
6.3 Templates
Learning Objectives
- Use existing Microsoft Excel templates to create new spreadsheets.
A template is a predefined pattern for a spreadsheet that has already been created for you. Hundreds of templates, already created by Microsoft, are available for you to use in Excel. These templates are very helpful if you have limited time to get a new task done in Excel, and you don’t know where to start. Templates do a lot of the work for you! Templates include all the formulas, formatting, etc. needed in a professional Excel spreadsheet. All that’s left to do is enter the data. Predefined Microsoft templates include everything from billing statements to blood pressure trackers to business cards. Depending on your version of Excel or Office 365, template categories may include: Business, Personal, Planners and Trackers, Lists, Budgets, Charts, and Calendars. In this chapter we will explore using existing Microsoft templates.
To access the templates in Excel, do the following:
- Click the File tab in the ribbon.
- Click New in Backstage View.
 Mac Users: Click the File menu option and choose New from Template
 - The top of your screen should look similar to Figure 6.9. If you have opened templates previously, these may show in this screen as well.
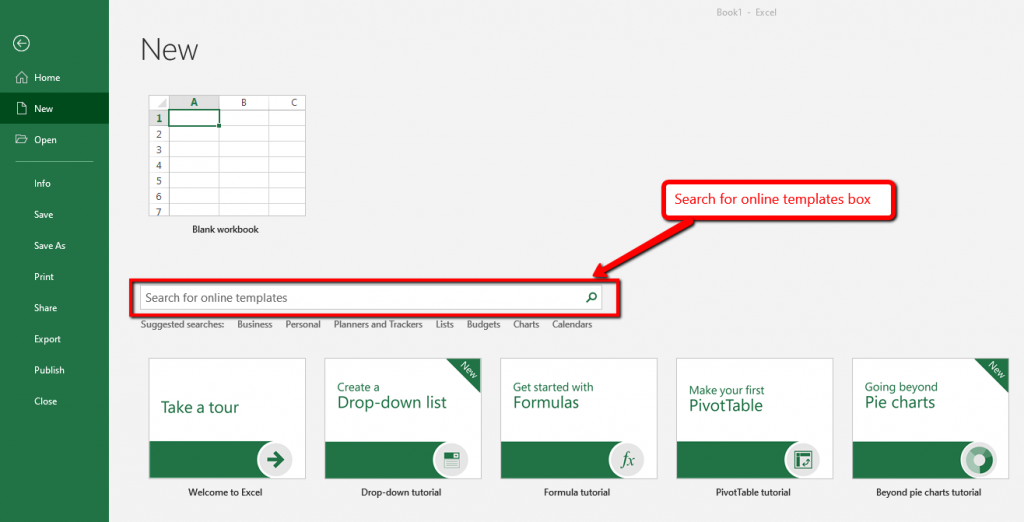
In the Search for online templates box shown above, you can type a description for the template you want to use. Let’s start by searching for a Construction related templates.
- Click in the Search for online templates box.
- Type Construction and press ENTER.
- Select one of the template options presented and click Create.
- Hold down CTRL and click ~ to see where the formulas are in the sheet. Working in formula view helps you see where the formulas are, so you won’t mistakenly delete them.
- Close the file without saving.
We will practice using one more Excel template to create a class schedule. If you already know your schedule for next term, you can use it to complete this template. Otherwise, use your current class schedule.
- Click the File tab in the ribbon.
- Click New in Backstage View. Mac Users: Click the File menu option and choose New from Template
- Click in the Search for online templates box.
- Type Class Schedule and press Enter.
- Click on the Student schedule that looks like Figure 6.11 below and click Create. NOTE: If this template is not available, select a similar one.
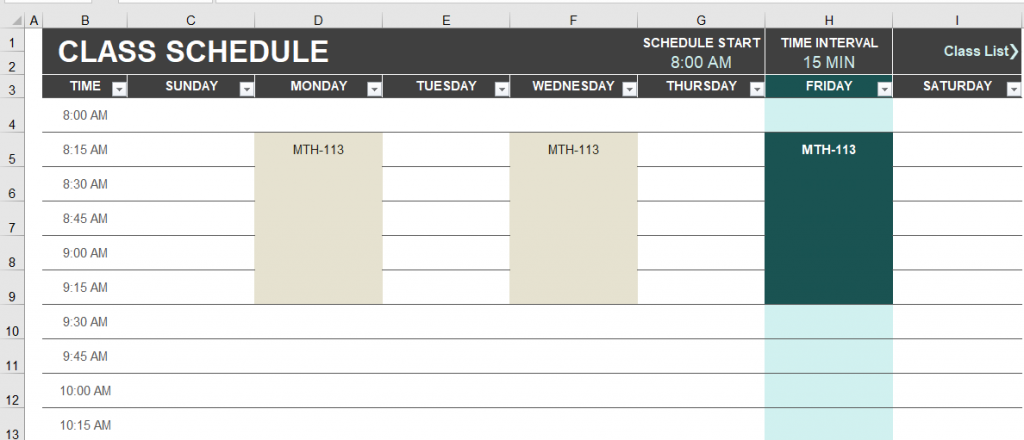
Figure 6.11 Class Schedule Template - Click on the Class List sheet. Replace the information in the Class, ID, Day, Location, Start Time and End Time columns with your own class schedule. In the Day column, use the dropdown arrow in the lower right corner of the cell to select the day of the week.
- Click back on the Class Schedule sheet to view your completed schedule. Click in cell H2, then click the dropdown arrow in the lower right corner and select 60 MIN for the Time Interval.
- Save the completed file as CH6 Class Schedule. Close the file.
Skills Refresher
To use a Microsoft predefined template:
- Click on the File tab in the ribbon.
- Click on New
Mac Users: Click the File option and choose New from Template - Type the desired template description in the Search box, and press ENTER.
Key Takeaway
- There are many pre-designed templates in Excel developed in Excel that you can use. This will save you the time and effort of designing and creating these files from scratch.
Attribution
“6.3 Templates” by Mary Schatz and Diane Shingledecker, Portland Community College is licensed under CC BY 4.0
