
1.5 Chapter Practice: PR1 Medical Office Budget
To assess your understanding of the material covered in the chapter, complete the following assignment.
Basic Monthly Budget for Medical Office
Creating and maintaining budgets are common practices in many careers. Budgets play a critical role in helping a business or household control expenditures. In this exercise you will create a budget for a hypothetical medical office while reviewing the skills covered in this chapter.
preparing the worksheet
- Open the file named PR1 Data, then Save As PR1 Medical Office Budget.
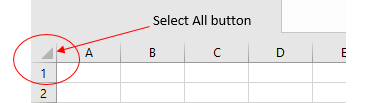
- Change the font of the entire worksheet (Sheet 1) to Calibri, size 12. (Hint: Select all cells in the worksheet by clicking the Select All button in the upper left corner of the worksheet.
- Increase the width of Column A so all the entries in the range A3:A8 are visible. (Hint: Place the mouse pointer between the letter A and letter B of Column A and Column B. When the mouse pointer changes to a double arrow, left click and drag it to the right OR double-click)
- Enter the label Quarter 1 in cell B2.
- Complete the headings in the range C2:E2 to contain the labels Quarter 2, Quarter 3, and Quarter 4. (Hint: Use AutoFill by placing the mouse pointer over the Fill Handle in cell B2 and then dragging through cell E2)
- Change the width of columns B through E to 12 characters. (Hint: Select the four columns. On the Home ribbon, in the Cells group, click Format – Column Width)
- Insert a blank column between Columns A and B. (Hint: Select any cell in Column B. Then, click the drop-down arrow of the Insert button in the Home tab of the Ribbon. Click the Insert Sheet Columns option)
- Enter the words Budget Cost in cell B2.
- Adjust the width of Column B to approximately 12.
- Enter the text Medical Office Budget in cell A1. (This will be the title for the worksheet)
- Merge and center the range A1:F1. (Hint: Select the range A1:F1 and click the Merge & Center button in the Home tab of the Ribbon to merge the cells in that range)
- Make the following formatting changes to the newly merged cell
- Bold and italics
- Font size:14
- Cell fill color: any dark color
- Font color: white
- Vertical alignment: middle
- Increase the height of Row 1 to approximately 25. (Hint: Select any cell in the row. On the Home ribbon, in the Cells group, click Format – Row Height)
- Make the following formatting changes to the cells containing the column headings (A2:F2)
- Bold
- Fill color: Tan
- Horizontal alignment: Center
- Wrap Text
- Copy the contents of cell C3 (Quarter 1 – Salaries) into the range D3:F3. (Hint: use Copy and Paste or AutoFill)
- Copy the contents of the range C6:C8 (Quarter 1 – Rent, Office Supplies, and Phone & Utilities) into the range D6:F8. (Hint: use Copy and Paste or AutoFill)
- Apply borders to all of the cells in the range A1:F8. (Hint: Select A1:F8 and click the down arrow next to the Borders button in the Home tab of the Ribbon. Select the All Borders option from the drop-down list)
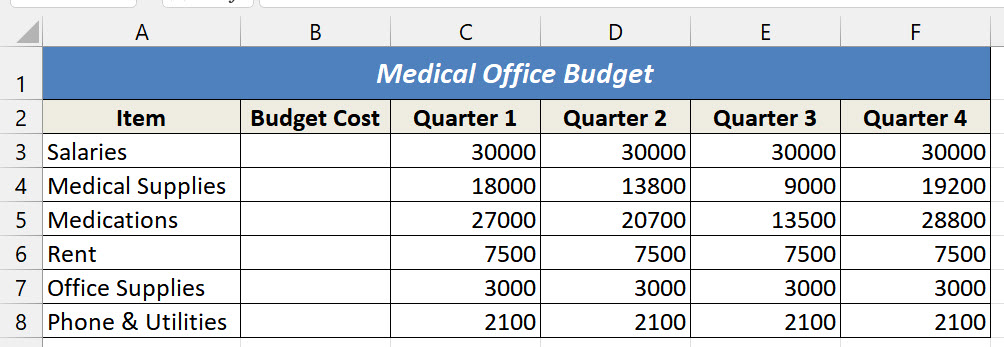
Before moving on, confirm that all of your numbers are correct by comparing them with the image below.
Calculating and Formatting Numbers
- In cell B3, calculate the total budget for all four quarters for the salaries using AutoSum. (Hint: Select cell B3 and click the down arrow on the AutoSum button in the Formulas tab of the Ribbon. Click the Sum option from the drop-down list. Then, highlight the range C3:F3 and press the ENTER key on your keyboard)
- Copy the SUM function in B3 into the Budget Cost cells for the other items (B4:B8). (Hint: Use either Copy and Paste or AutoFill)
- Format the first row of monetary values (B3:F3) as Accounting Style with zero decimal places. (Hint: If any of the cells display pound symbols (######), simply widen the column to display the values again)
- Format the remaining monetary values (B4:F8) as Comma Style with zero decimal places.
Finalizing the Worksheet
- Change the name of the worksheet to Budget. (Hint: Double-click the Sheet1 worksheet tab, type the word Budget, and press the ENTER key)
- Delete any extra worksheets. (Hint: Right-click the Sheet2 worksheet tab and select Delete. Repeat for Sheet3)
- Change the orientation of the Budget worksheet to Landscape. (Hint: Page Layout ribbon – Orientation)
- Add a header to the Budget worksheet that displays the following (Hint: Insert ribbon – Text – Header and Footer)
- Date in the left section (Hint: Insert the Current Date element from the Header & Footer ribbon so the date will update automatically)
- Your name in the center section
- Add a footer to the Budget worksheet that displays the page number in the right section of the footer (Hint: Insert the Page Number element from the Header & Footer ribbon so the page number will update automatically if additional pages are added)
- Review the Budget worksheet in the Backstage View – Print and confirm it is printing on one page. (Hint: File – Print)
- Check the spelling on the worksheet and make any necessary changes. Save PR1 Medical Office Budget workbook.
- Compare your work to the solution below and then submit the PR1 Medical Office Budget workbook as directed by your instructor.
Attribution
Adapted from Beginning Excel 2019, licensed under CC BY.
