
Step 5: Publishing the Book
How to Publish Your Book
Publishing on Pressbooks is called “exporting.” As shown below, you will find the Export page in the sidebar menu. Click export to be taken to the page.
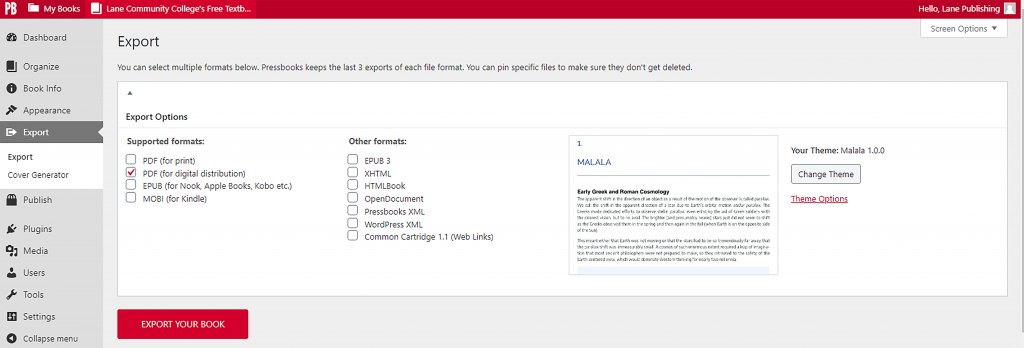
Once you’re on the Export page, there are five primary formats to publish your textbook in:
- Pressbooks Webbook
- Print PDF
- Digital PDF
- EPUB
- MOBI
Pressbooks also supports other experimental formats, but they do not currently offer technical support for them. Lane OER recommends using the five supported formats.
Simply choose which formats you would like to publish in, and then click the red button that says “Export Your Book.” Below this button, you will find the area called Latest Exports where they will be generated and saved for download.
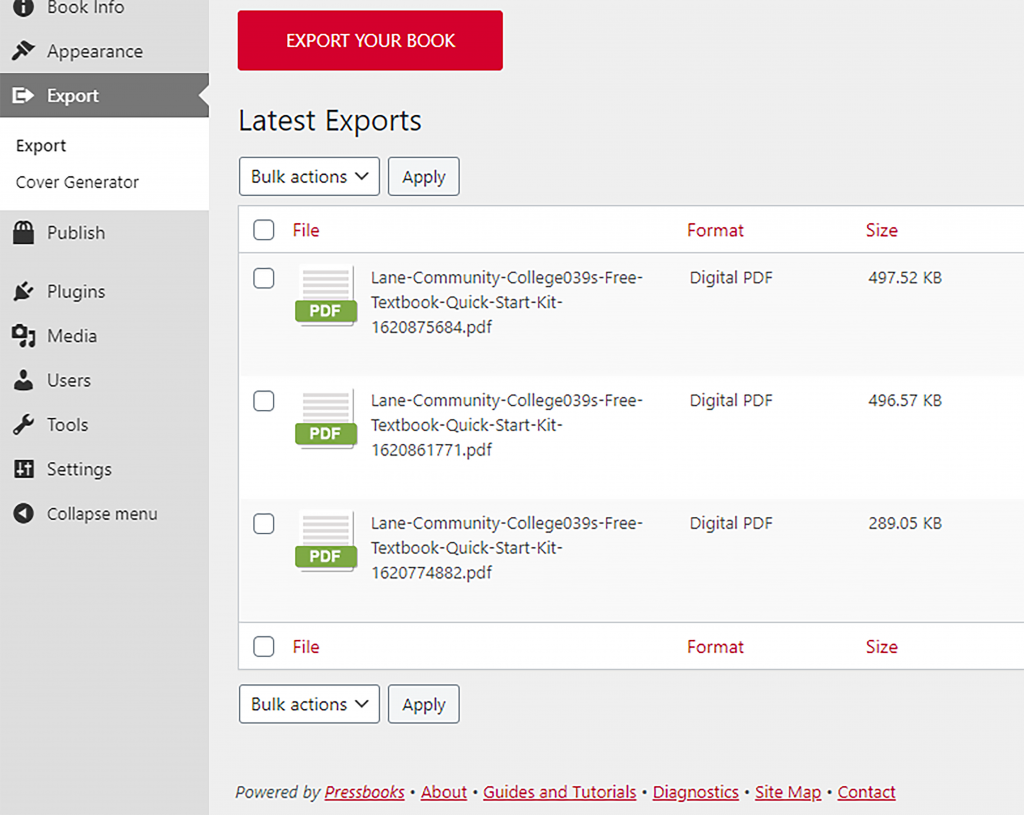
Simply hover your arrow over the export you wish to publish, and the download option will appear. Click that to save it onto your device.
About the Webbook
The webbook offers optimal reading accessibility for students because it is designed to be responsive for all screen sizes: mobile, desktop, or tablet.
You will not export your textbook to publish it in the webbook format. Instead, it will be automatically generated by the Pressbooks software as you create your book. The content is updated whenever you choose to save your work.
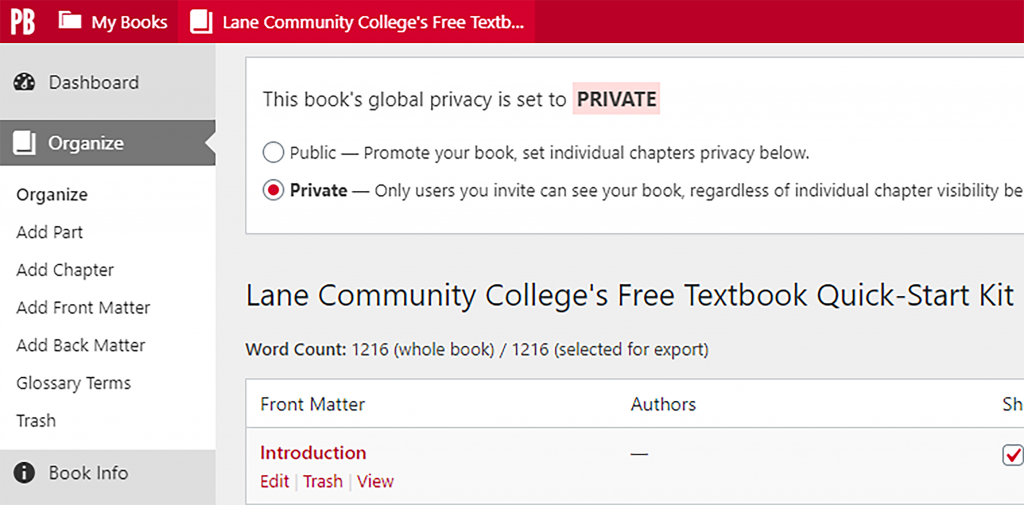
Instead of exporting, the primary way to publish your webbook is to make it visible to the public. The setting for this can be found at the top of the Organize page (seen below). There you can choose to make the book visible to the public, or you can set it to private, which will allow you to invite users of your choice to view or collaborate on the book.
Integrating the Webbook with LMS/Moodle
One of the great capacities of the Webbook is the ability to integrate it with LMS Moodle. This allows you to do the following:
- Use your webbook/textbook to structure and arrange your Moodle course shell. I.e., your webbook chapters will automatically create the weekly sections/modules for your course. You can edit/revise these as you like after integrating the webbook.
- Easily add course content into LMS, including content not available for traditional textbooks: e.g., videos and interactive H5P activities.
- Grade “passback” will enable students to be graded automatically on quizzes and other activities.
- Have students participate more actively with your course by empowering them to create and edit content (see “Adding Student Collaborators” below).
How to Integrate Your Webbook and Add H5P Content
Although Lane does not currently offer an LTI connection for optimal webbook integration, you will still be able to successfully integrate your webbook with LMS by exporting your webbook as a common cartridge file. Here is a list of the essential steps to follow:
1. Before exporting your webbook, make sure that it is set to “Public” on the Organize page. Go to the Export page next. Under the “other formats” section, choose Common Cartridge with Weblinks. Click “Export Your Book” and a copy of your webbook will be generated as a “common cartridge” file for download in the Latest Exports area.

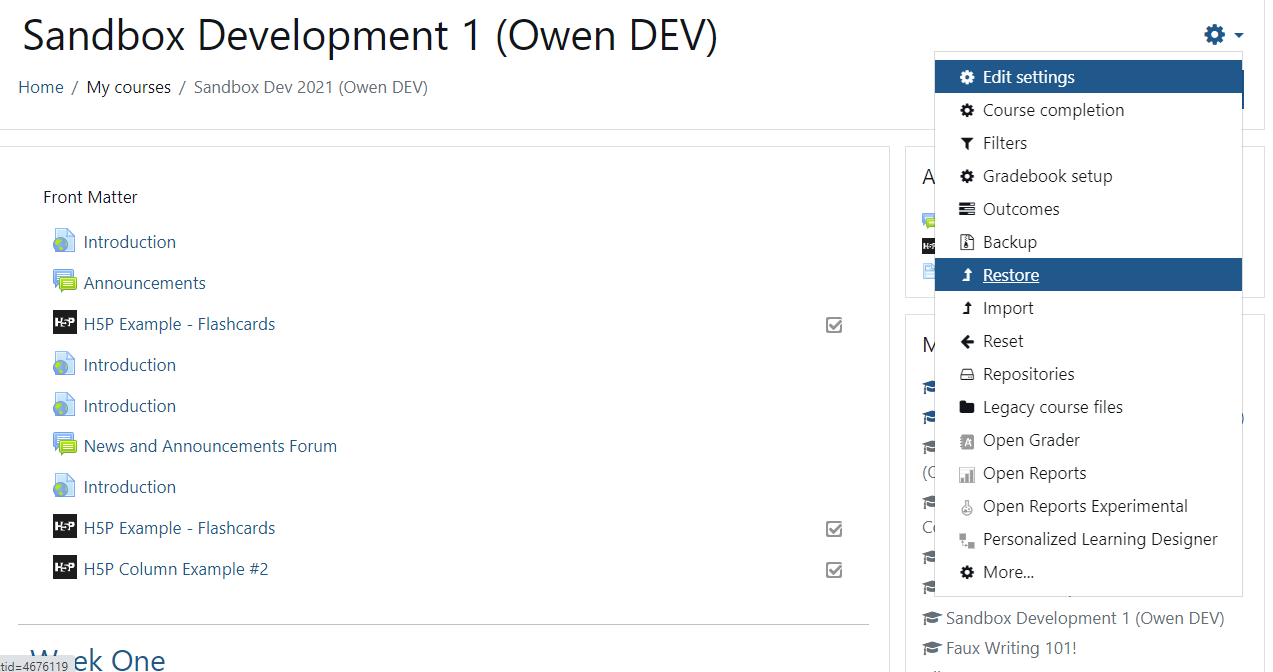
2. After downloading your webbook as a common cartridge file, you can upload it to Moodle. Beginning on your Moodle course page, choose the gear icon that leads to the admin menu, then choose Restore. On the Restore page, click “Choose a File” and upload your common cartridge webbook file. Next, click “Restore” and Moodle will run you through a series of prompts until the process is complete. During this process, only select activities, blocks, and filters that are necessary for your current course.
3. The structure of your Moodle course will be based on the chapter/part arrangement of your webbook. You can make changes to the structure and section titles by enabling your Moodle editing function.
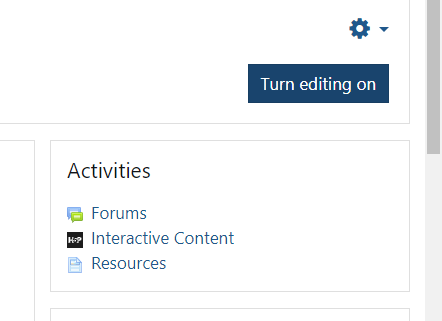
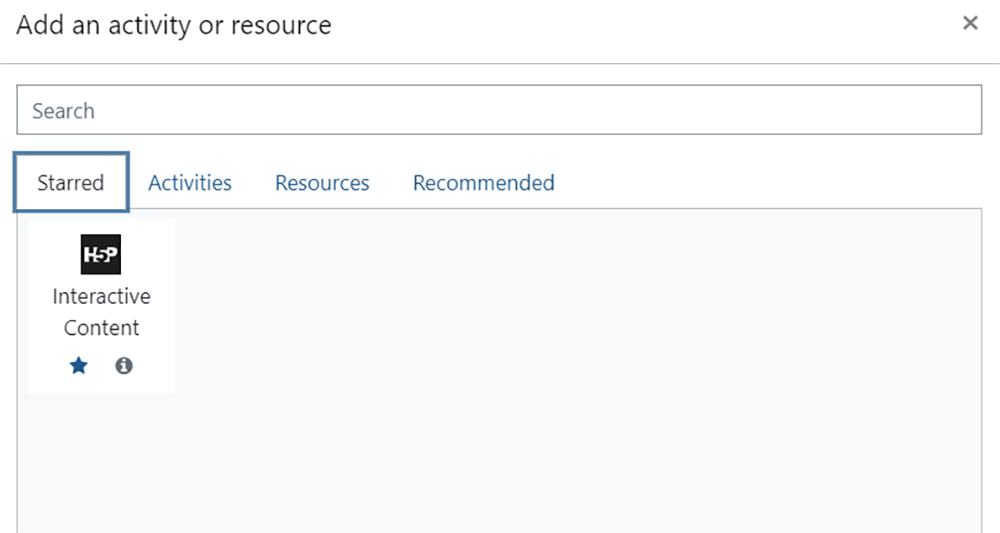
4. After integrating your webbook with Moodle, you can begin to add interactive H5P content by manually placing it where you like between the weekly Moodle course sections, modules, and assignments. This must be done manually because Lane currently does not provide an LTI connection for integration, which would automatically include any interactive content that you created for your webbook. To add content manually, just enable the editing function in Moodle, select “add an activity or resource,” then choose an activity such as “H5P Interactive Content.”
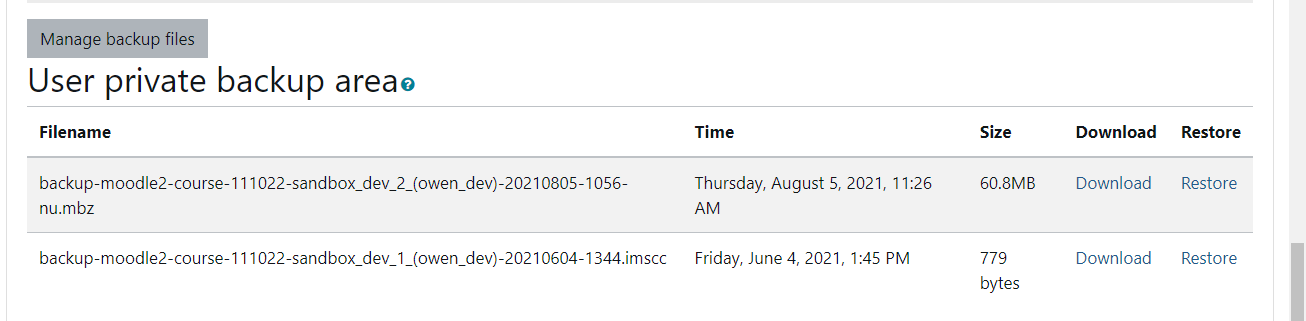
5. Once you have added interactive content to your Moodle course, the course can be downloaded as an integrated file that includes any H5P content you added and can be imported to your future courses, including courses on different LMS systems (however, integration will likely be more optimal when you exchange files between similar LMS systems). To do this, you will want to create a backup file of the integrated course that can be downloaded for future use via the restore process described above in Step #2.
To create a backup file of the course, click the gear icon for the admin menu and choose “Backup.” Moodle will run you through prompts until the process is complete, and you will be asked to select appropriate activities, blocks, and filters. When your backup file is ready for download, you will find it under the Restore page in the “User private backup area” section.
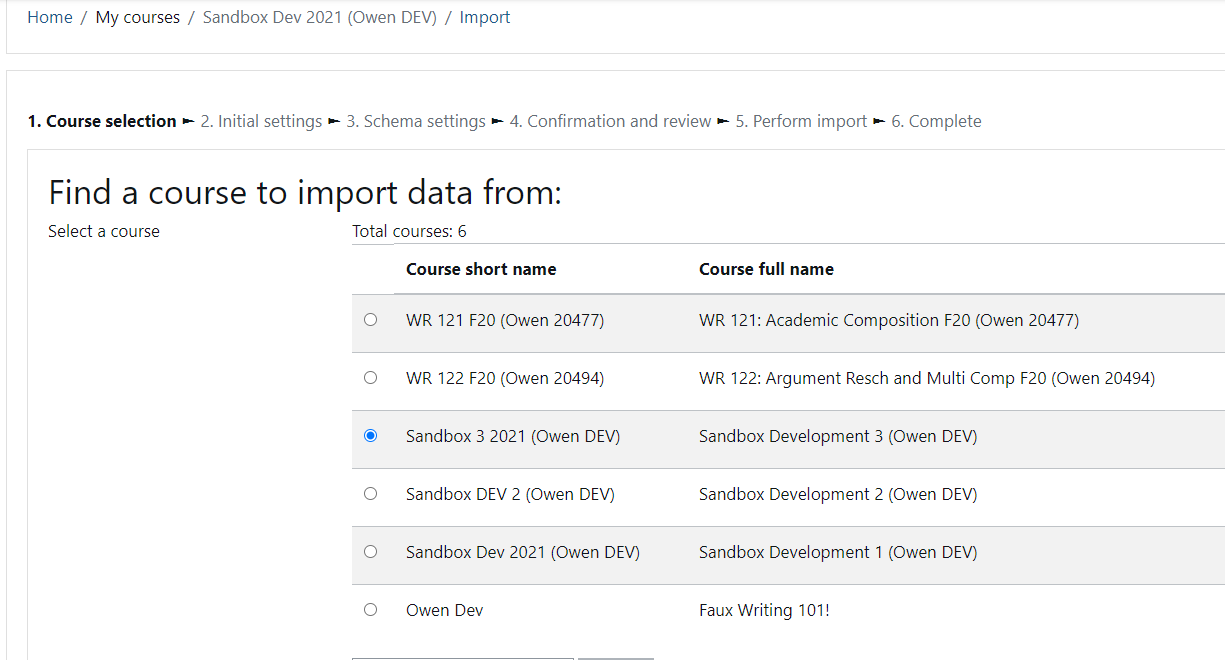
6. You can also add integrated content and course files via the import function which enables you to transfer previous courses to future ones. Click the admin gear icon to choose the import option, and then choose the course you would like to use from the list of options on the Import page.
If you have questions or problems with webbook integration, contact Josh Manders from Lane’s Academic Technology team: mandersj@lanecc.edu
Adding Student Collaborators
One of the most important capacities of the Webbook is its ability to involve student collaborators. This allows faculty to create a more active, meaningful experience for students by empowering them to participate in the creation of course content. Here is a brief list of some of the ways students can collaborate with your webbook. They can:
- Create annotations via Hypothesis to share their thoughts with the class, creating a vital learning community and course scaffolding.
- Create course scaffolding by providing definitions of key terms in your webbook’s glossary.
- Create legacy content from past assignments that provide clear examples to future students of how to succeed at course learning outcomes.
- Create legacy chapters that provide students a chance to begin participating in their chosen discipline.
Read More
Read more about ways to involve students with your webbook or other OER projects here.
Read more about webbooks here.
