9 45 lateral branch
45 degree lateral
We will begin by drawing a side and end view of what we want the fitting to look like. Depending the size of pipe you use, your drawing may differ. Refer to pipe chart to find the correct size OD piping material. This example is for 45 degree fit, you can draw this to any angle you may need and use the same steps.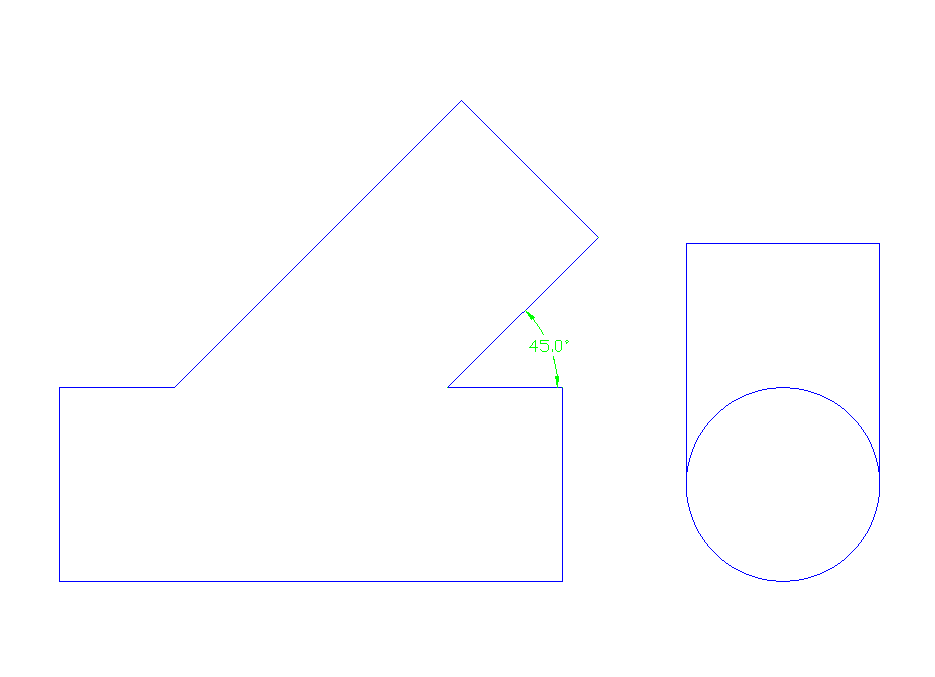
Now as before, we will draw half circle on the ends of pipe and divide them up into equal parts to help develop our element lines. Remember to number the lines as well so when we draw out the stretch-out.
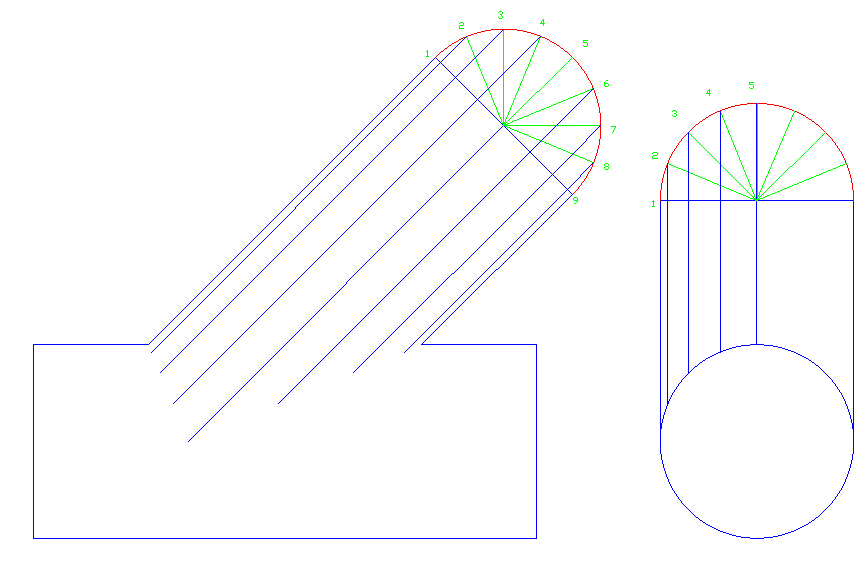
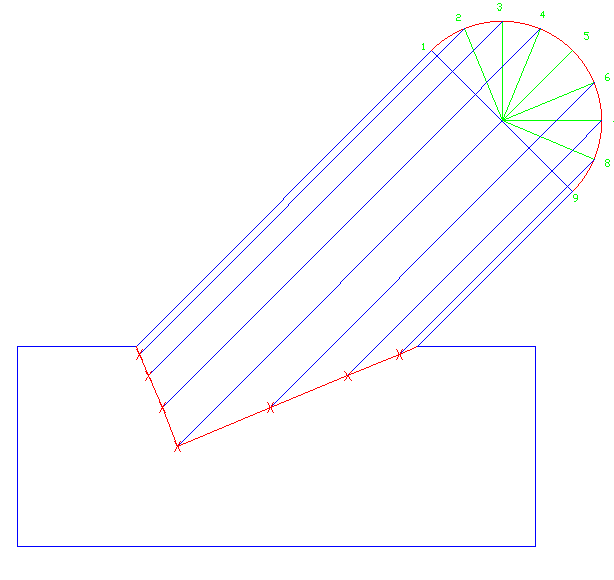
Now we can draw lines horizontally between the two views to help develop the first set of lines we will need. Line up and draw from point 1 to point 1 and so on through point 5. You will notice how the lines will go straight through line 6, 7, 8 & 9. Since this is a concentric reducer from end view, the points will be the same on both side of the pipe. Place a tick mark and each point of intersection.
When you draw a curved line from tick mark to tick mark it will look like this.
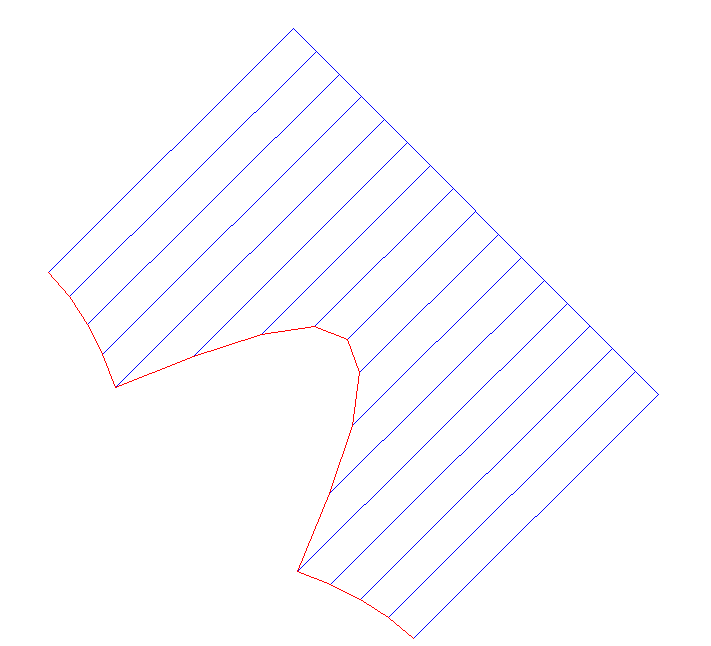
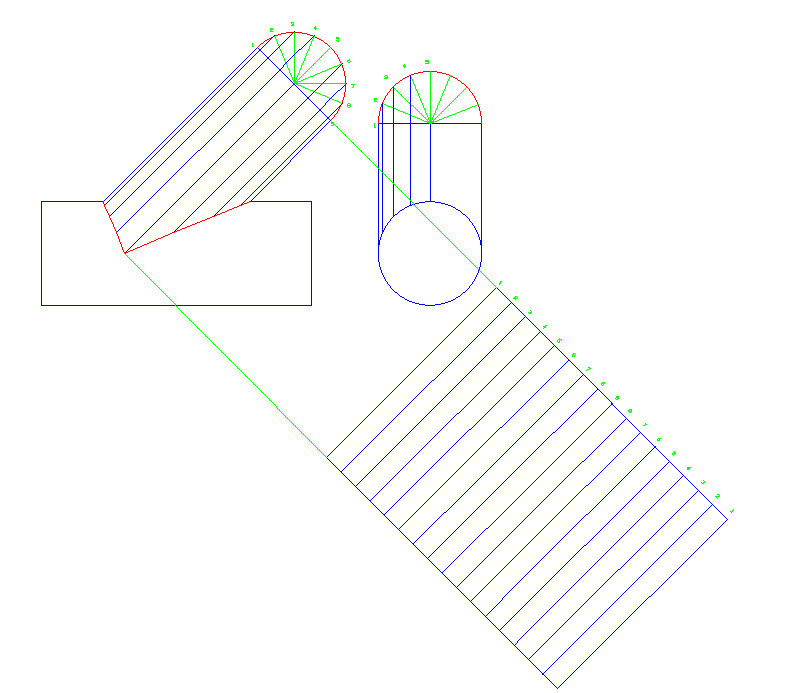
Now we can make our stretch-out from the 45 lateral and divide up as we have on past templates. Divide the stretch-out up into 160 equal spaces.
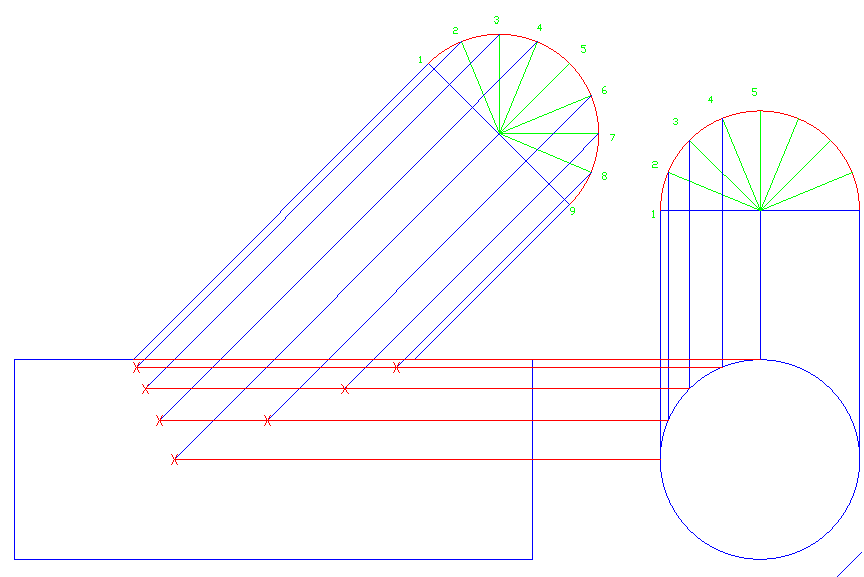
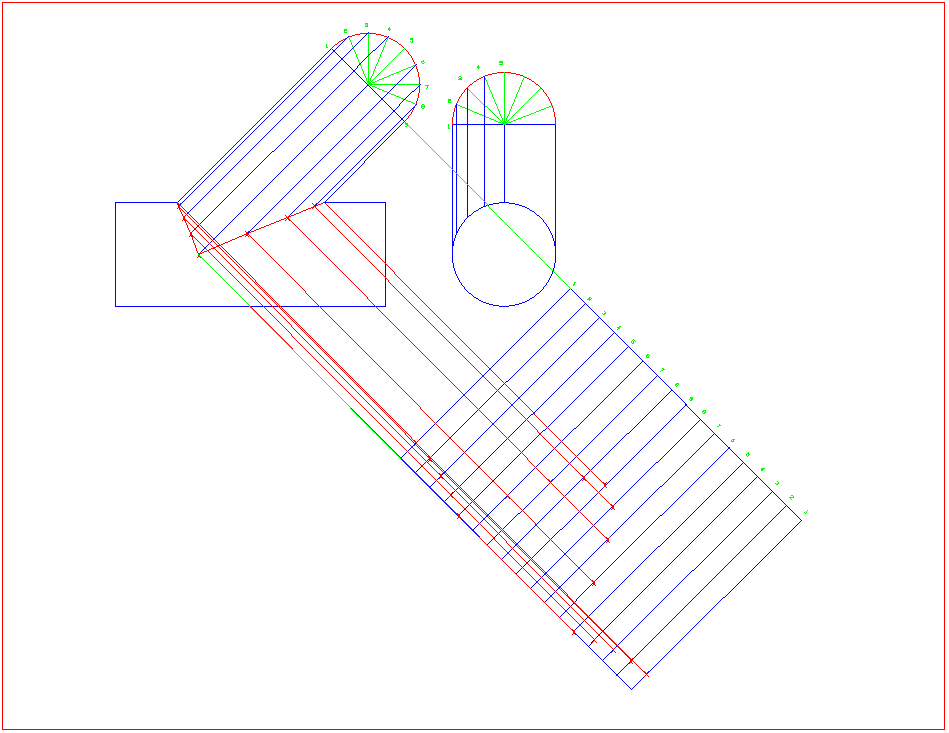
Now we can transfer lines at a 45° angle down from the side view and connect them to same number lines on the stretch-out. Place a tick mark on each point that intersect with the same number as that of where the line originated from.
Now we can connect between tick marks and draw in our curved line.
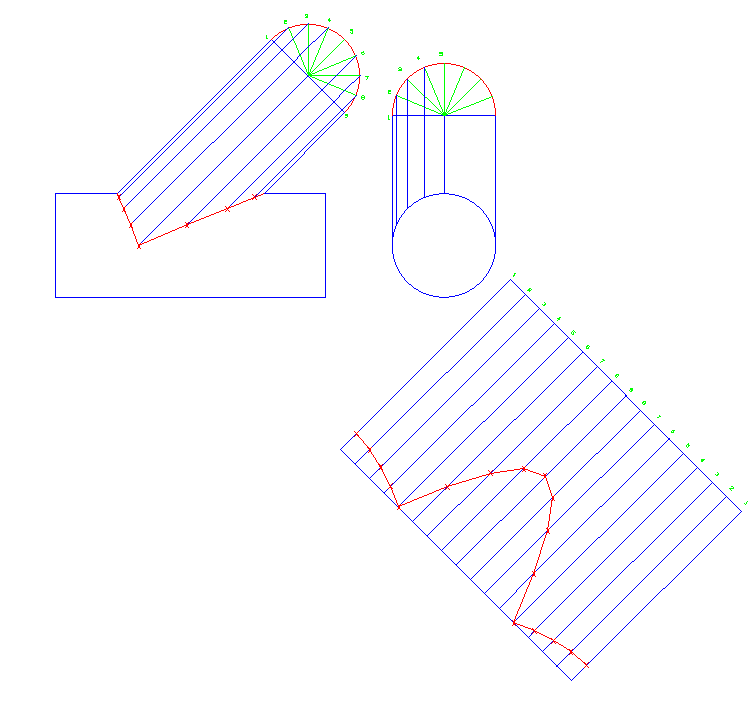
Getting rid of all the nonessential lines our template is ready for use.