
5.3 Preparing to Print
Learning Objectives
- Review options for professional page setup for printing.
- Understand how to insert a picture to enhance the visual appearance of a worksheet.
- In this section, we will preview the worksheets containing tables to ensure they will print in a professional manner. We will make any formatting and page setup changes that are needed, as well as add a picture to one of the worksheets to enhance its appearance.
Previewing a Worksheet
Data file: Continue with CH5 National Weather
Now that the weather data has been sorted, filtered, and subtotaled as needed, it is time to print the worksheets. You are going to start with the Portland ME worksheet.
- Click on the Portland ME worksheet. If needed, use Ctrl-Home to move to cell A1.
Notice that cells A1, A2, and A3 are not merged and centered over the entire table of data. To fix this, you need to unmerge each of the merged cells, and then merge them again, making sure to include E1, E2, and E3 in the selection.
- Select cell A1 and click the Merge & Center button. This should split A1 into four cells (A1:D1).
- Select the range A1:E1 and click the Merge & Center button. Cell A1 should now be merged across A1:E1.
- Repeat steps 1 and 2 for A2 and A3.
Next you need to preview the worksheet in Print Preview and determine what page setup options need to be set.
- Go to Backstage view and select Print from the menu.
Notice that the table is to the far left of the page, with quite a bit of white space on the left. You decide that it would look better centered on the page.
- In the Settings section, click the link for Page Setup. This opens the Page Setup dialog box. See Figure 5.26.
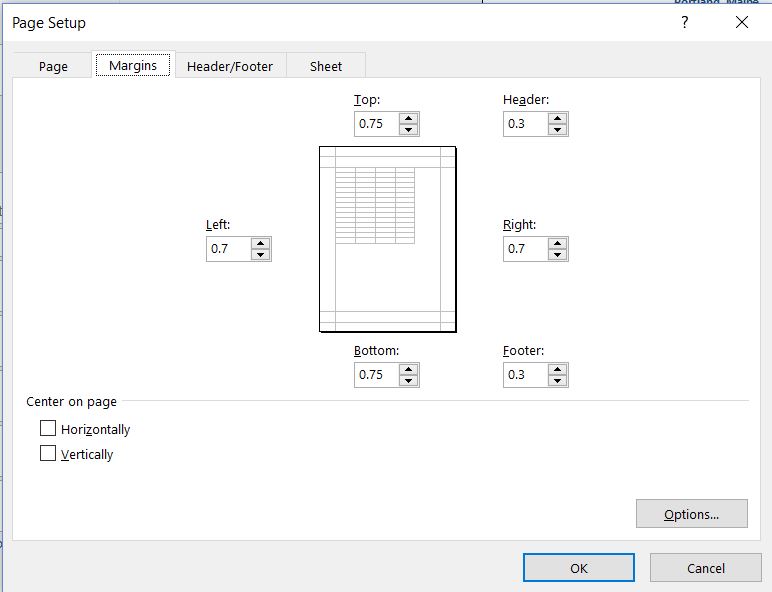
Figure 5.26 Page Setup - Click on the Margins tab.
- In the Center on page section, check the box for Horizontally.
- Click OK. The table should now be centered horizontally on the page.
- Next you need to add a footer with the workbook filename as well as the worksheet name.
- Open the Page Setup dialog box again (see Step 1 above).
- Click the Header/Footer tab then click the Custom Footer button.
- In the Left section: box type File:.
- Making sure to leave a space after the colon, click the Insert File Name button.
- In the Right section: box type Worksheet:.
- Making sure to leave a space after the colon, click the Insert Sheet Name button.
- The Footer dialog box should look like Figure 5.27. Click the OK button twice to return to Print Preview. Confirm that the footer appears correctly, then exit Backstage View.
![Custom Footer dialog box shows sections for Left, Center, and Right. "File: &[File]" entered for Left Section. and "Worksheet: &[Tab]" for Right section. Center section empty.](https://openoregon.pressbooks.pub/app/uploads/sites/7/2016/09/image28-3.jpg)
Inserting an Image to Enhance a Worksheet
Next you are going to add a small weather related graphic to the worksheet to enhance its appearance. In Excel you can either insert an image file that you have saved or you can search for one online within Excel. In this example, there is a graphic saved in the data files for this chapter that you will use.
- Click the Insert tab on the ribbon.
- Click the Pictures button from the Illustrations group. (This allows you to insert an image you have saved. If you wanted to search for an image online, you would click the Online Pictures button.) (See Figure 5.28.)
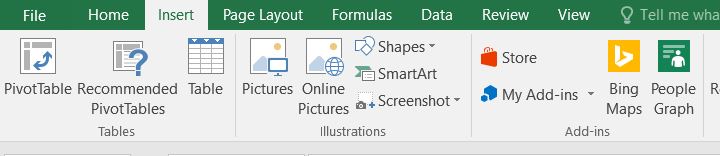
Figure 5.28 Insert Pictures - Navigate to the location where your data files for Chapter 5 are located and double-click on the Weather image file.
The image now appears on your worksheet, but not in the location you want. It is also slightly larger than you would like. (See Figure 5.29.) You are going to move the image to cell E1, then resize it so it does not cover up part of the table.
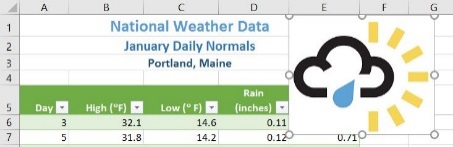
- Place your pointer in the image so that the
 appears. Drag the image so that the top left corner is in cell E1.
 - Using the resizing handle in the bottom right corner of the image, resize the image so that it does not cover any of the table. Hint: drag diagonally to the left and up.
- Check Print Preview again to make sure the worksheet with the image added looks good.
- Exit Backstage View and save the Excel file.
Previewing the Remaining Worksheets
Before considering this workbook complete finished, you need to confirm that the remaining worksheets are all printing appropriately.
- Click the Portland OR worksheet and go to Print Preview. No changes need to be made to this worksheet. Exit Backstage View.
- Click the Weekly OR worksheet and go to Print Preview. Notice that the Slicer is printing on a second page. To fix this, set the Page Scaling to Fit All Columns on One Page.
Notice that the last Slicer button (Saturday) is being cut off. This is because the Slicer height needs to be adjusted.
- Exit Backstage View.
- Resize the Slicer so that all of the buttons display.
- Return to Print Preview and confirm the worksheet, including the slicer, is printing appropriately. Exit Backstage View.
- Click the Subtotal OR worksheet and go to Print Preview.
- Using the Page Setup dialog box, center this worksheet horizontally on the page.
- Exit Backstage View.
- Save the CH5 National Weather workbook.
- Compare your work with the self-check answer key (found in the Course Files link) and then submit the CH5 National Weather workbook as directed by your instructor.
Key Takeaways
- When working with Excel workbooks, the final step should always be to review the worksheets in Print Preview to make sure they are printing appropriately.
- You can add images you have saved, or images you find online, to a worksheet to enhance its appearance. Be sure to resize and move them appropriately so they do not detract from the data.
Attribution
“5.3 Preparing to Print” by Julie Romey, Portland Community College is licensed under CC BY 4.0
