Exercise 5.4 Line Drawing of Shoes
You will draw a basic line drawing of the image of the shoes. The drawing process should use a slow and methodical approach with an emphasis on accuracy, it is not a quick sketch.
Materials needed:
- Pencils – both 4H and HB
- One quarter of your drawing pad
- Viewfinder and erasable marker
Time to complete: 40 minutes
Instructions:
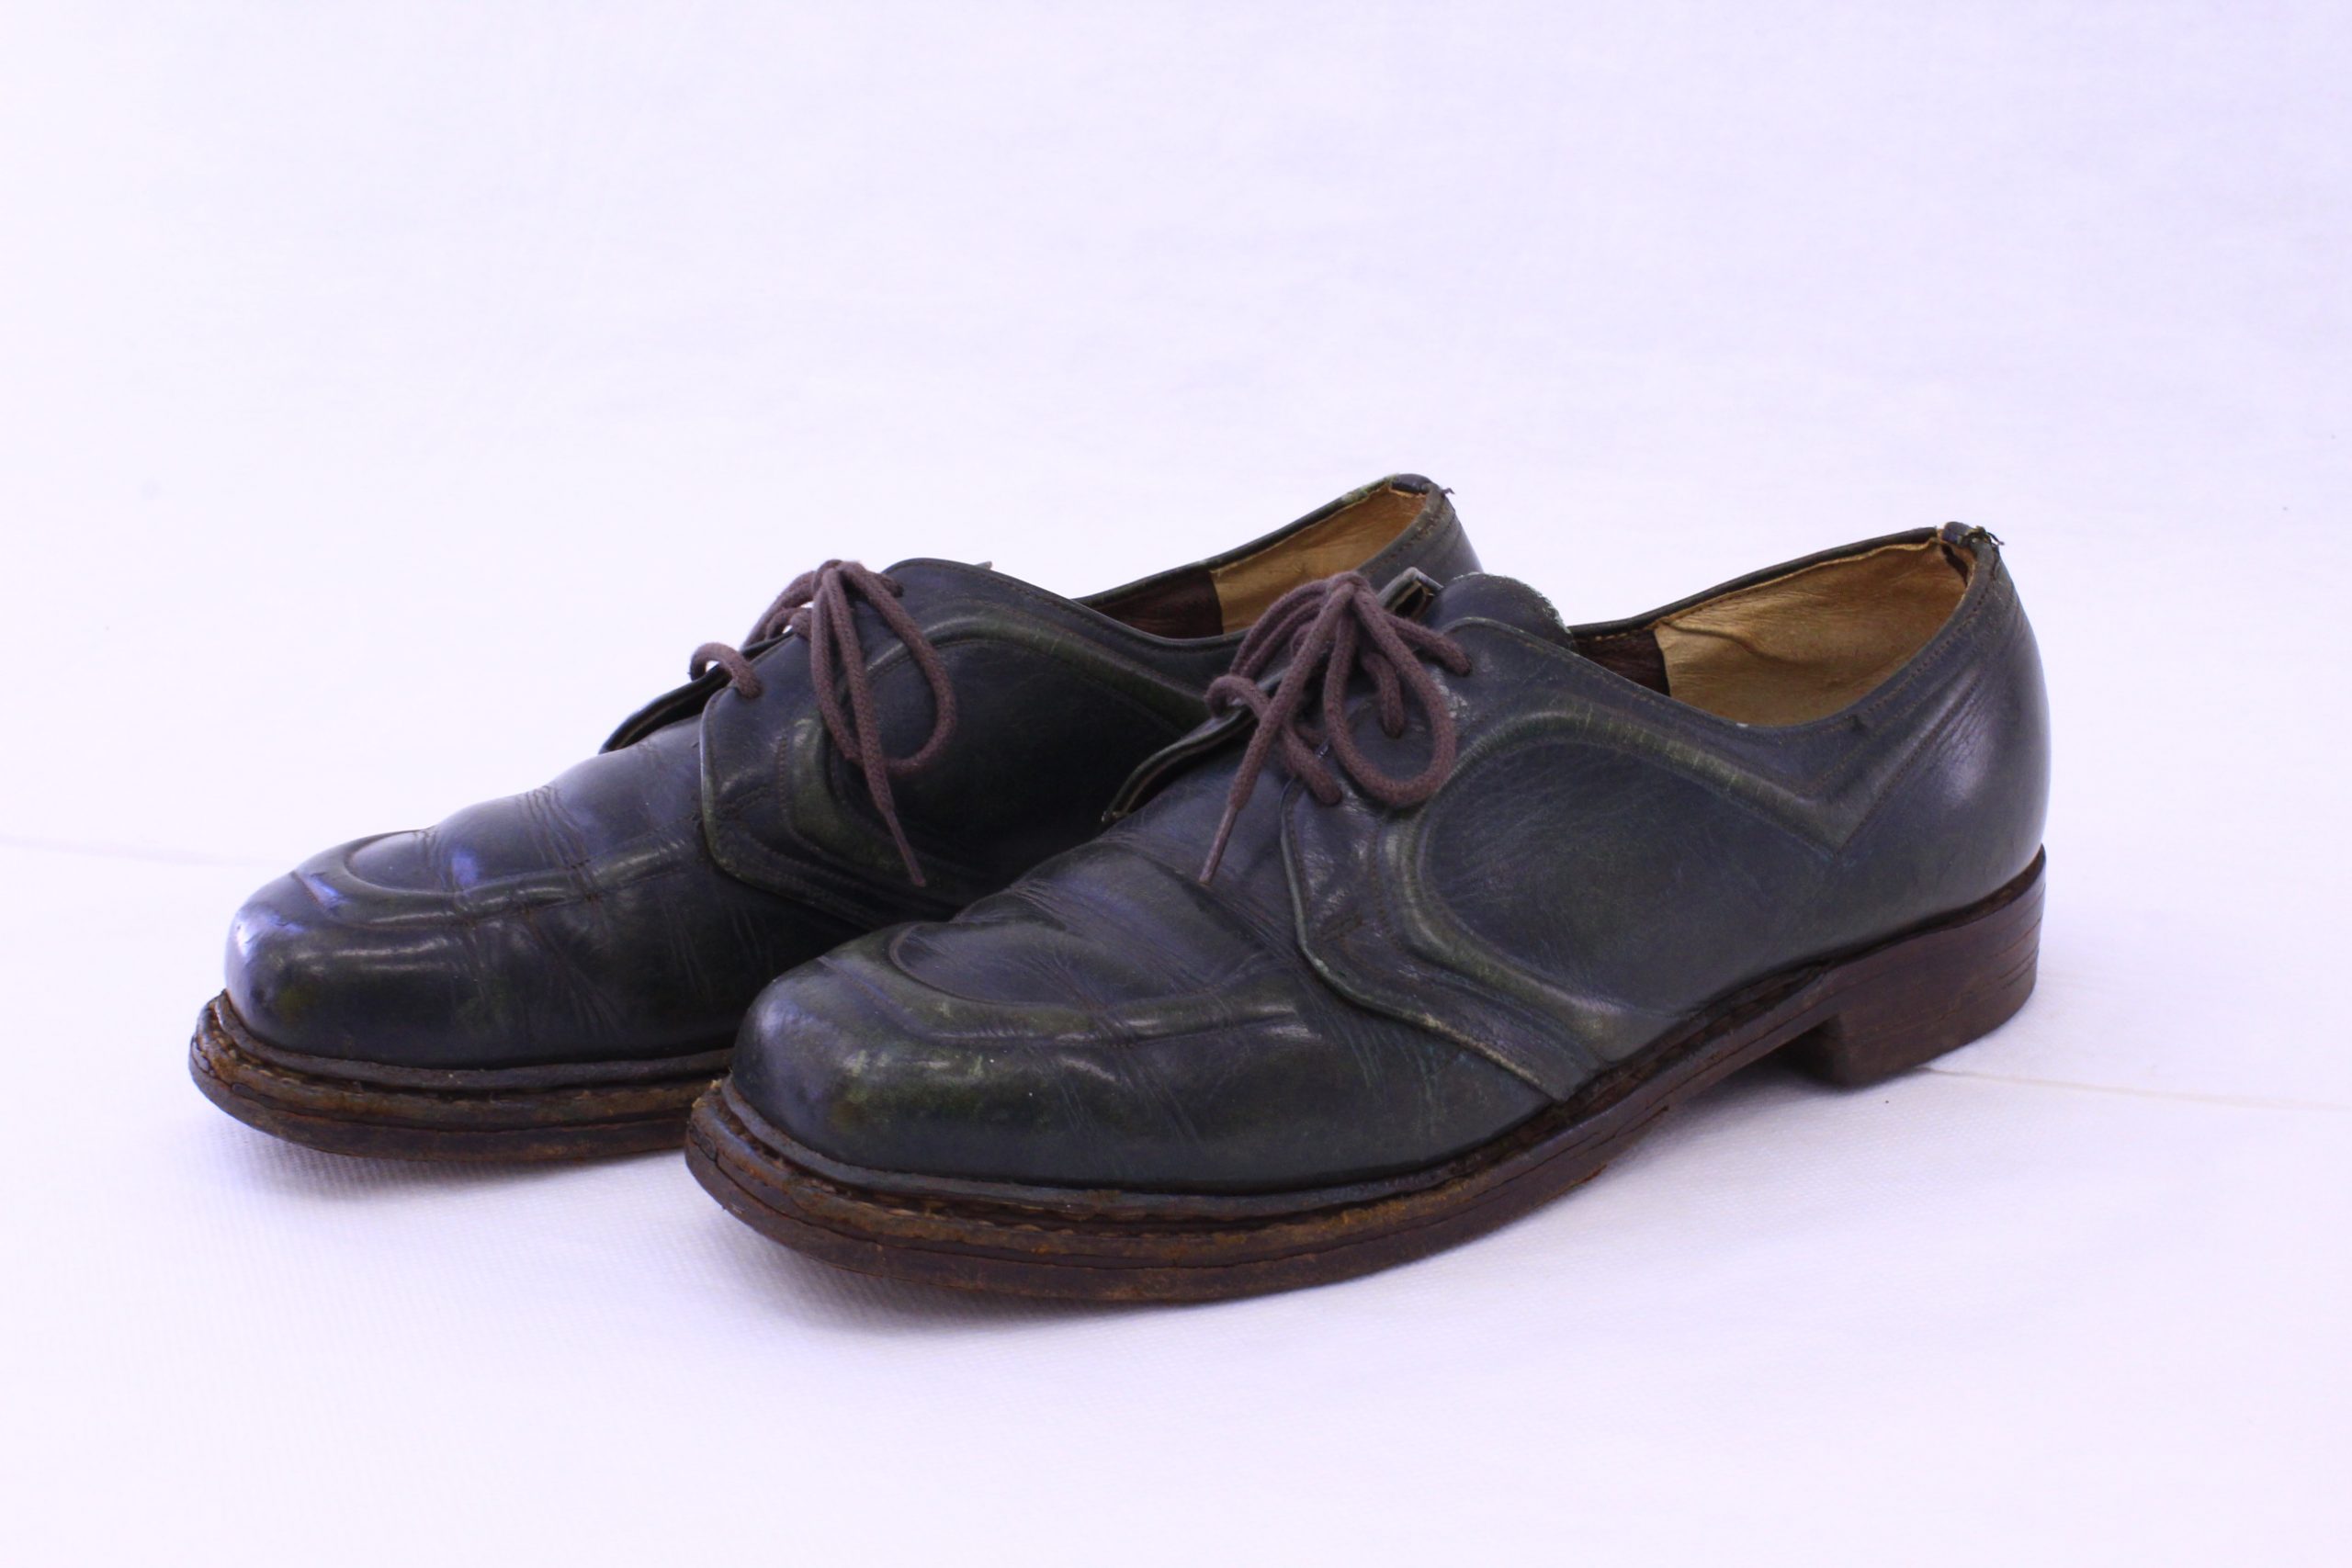
You will draw the shoes in the image below and make sure the measurements are correct. The drawing will only need to be a line drawing, No shading is necessary.
If you wish, you can develop the drawing as much as you like, however, the focus of this drawing is the main form. The laces are optional.
- Start with a hard 4H pencil.
- The object should fill your drawing area as much as possible.
- Keep all setup lines and tick marks. Don’t erase any extra lines that were used. Try your best not to erase. The setup lines should be lightly done with your hard pencil. Do not push hard.
- After the lightly drawn object looks correct, go in and darken the main features with your HB pencil to darken the lines. Don’t trace around the entire object in one pass. Draw each section at a time and try not to push too hard on the pencil.
- Take a photo of the drawing with the rest of the exercises for chapter five once you complete all of them. Exercises 5.1, 5.2, 5.3, and 5.4 should all be in the same photo file.
Image to draw:

Helpful notes on how to draw shoes:
- It may help to combine both shoes into one basic shape, which is made up of straight lines around the perimeter. Draw this basic shape to see how it fits in your drawing area. This should be much lighter than the final line drawing.
- Even though there are a lot of curves, trying to find the general angle of the curves may help.
- Don’t forget about negative space, such as the openings at the top of the shoes.
- There are a few vertical and horizontal points that intersect with other points. Finding and using these may help.
- The viewfinder will help greatly if you are having problems with this one.
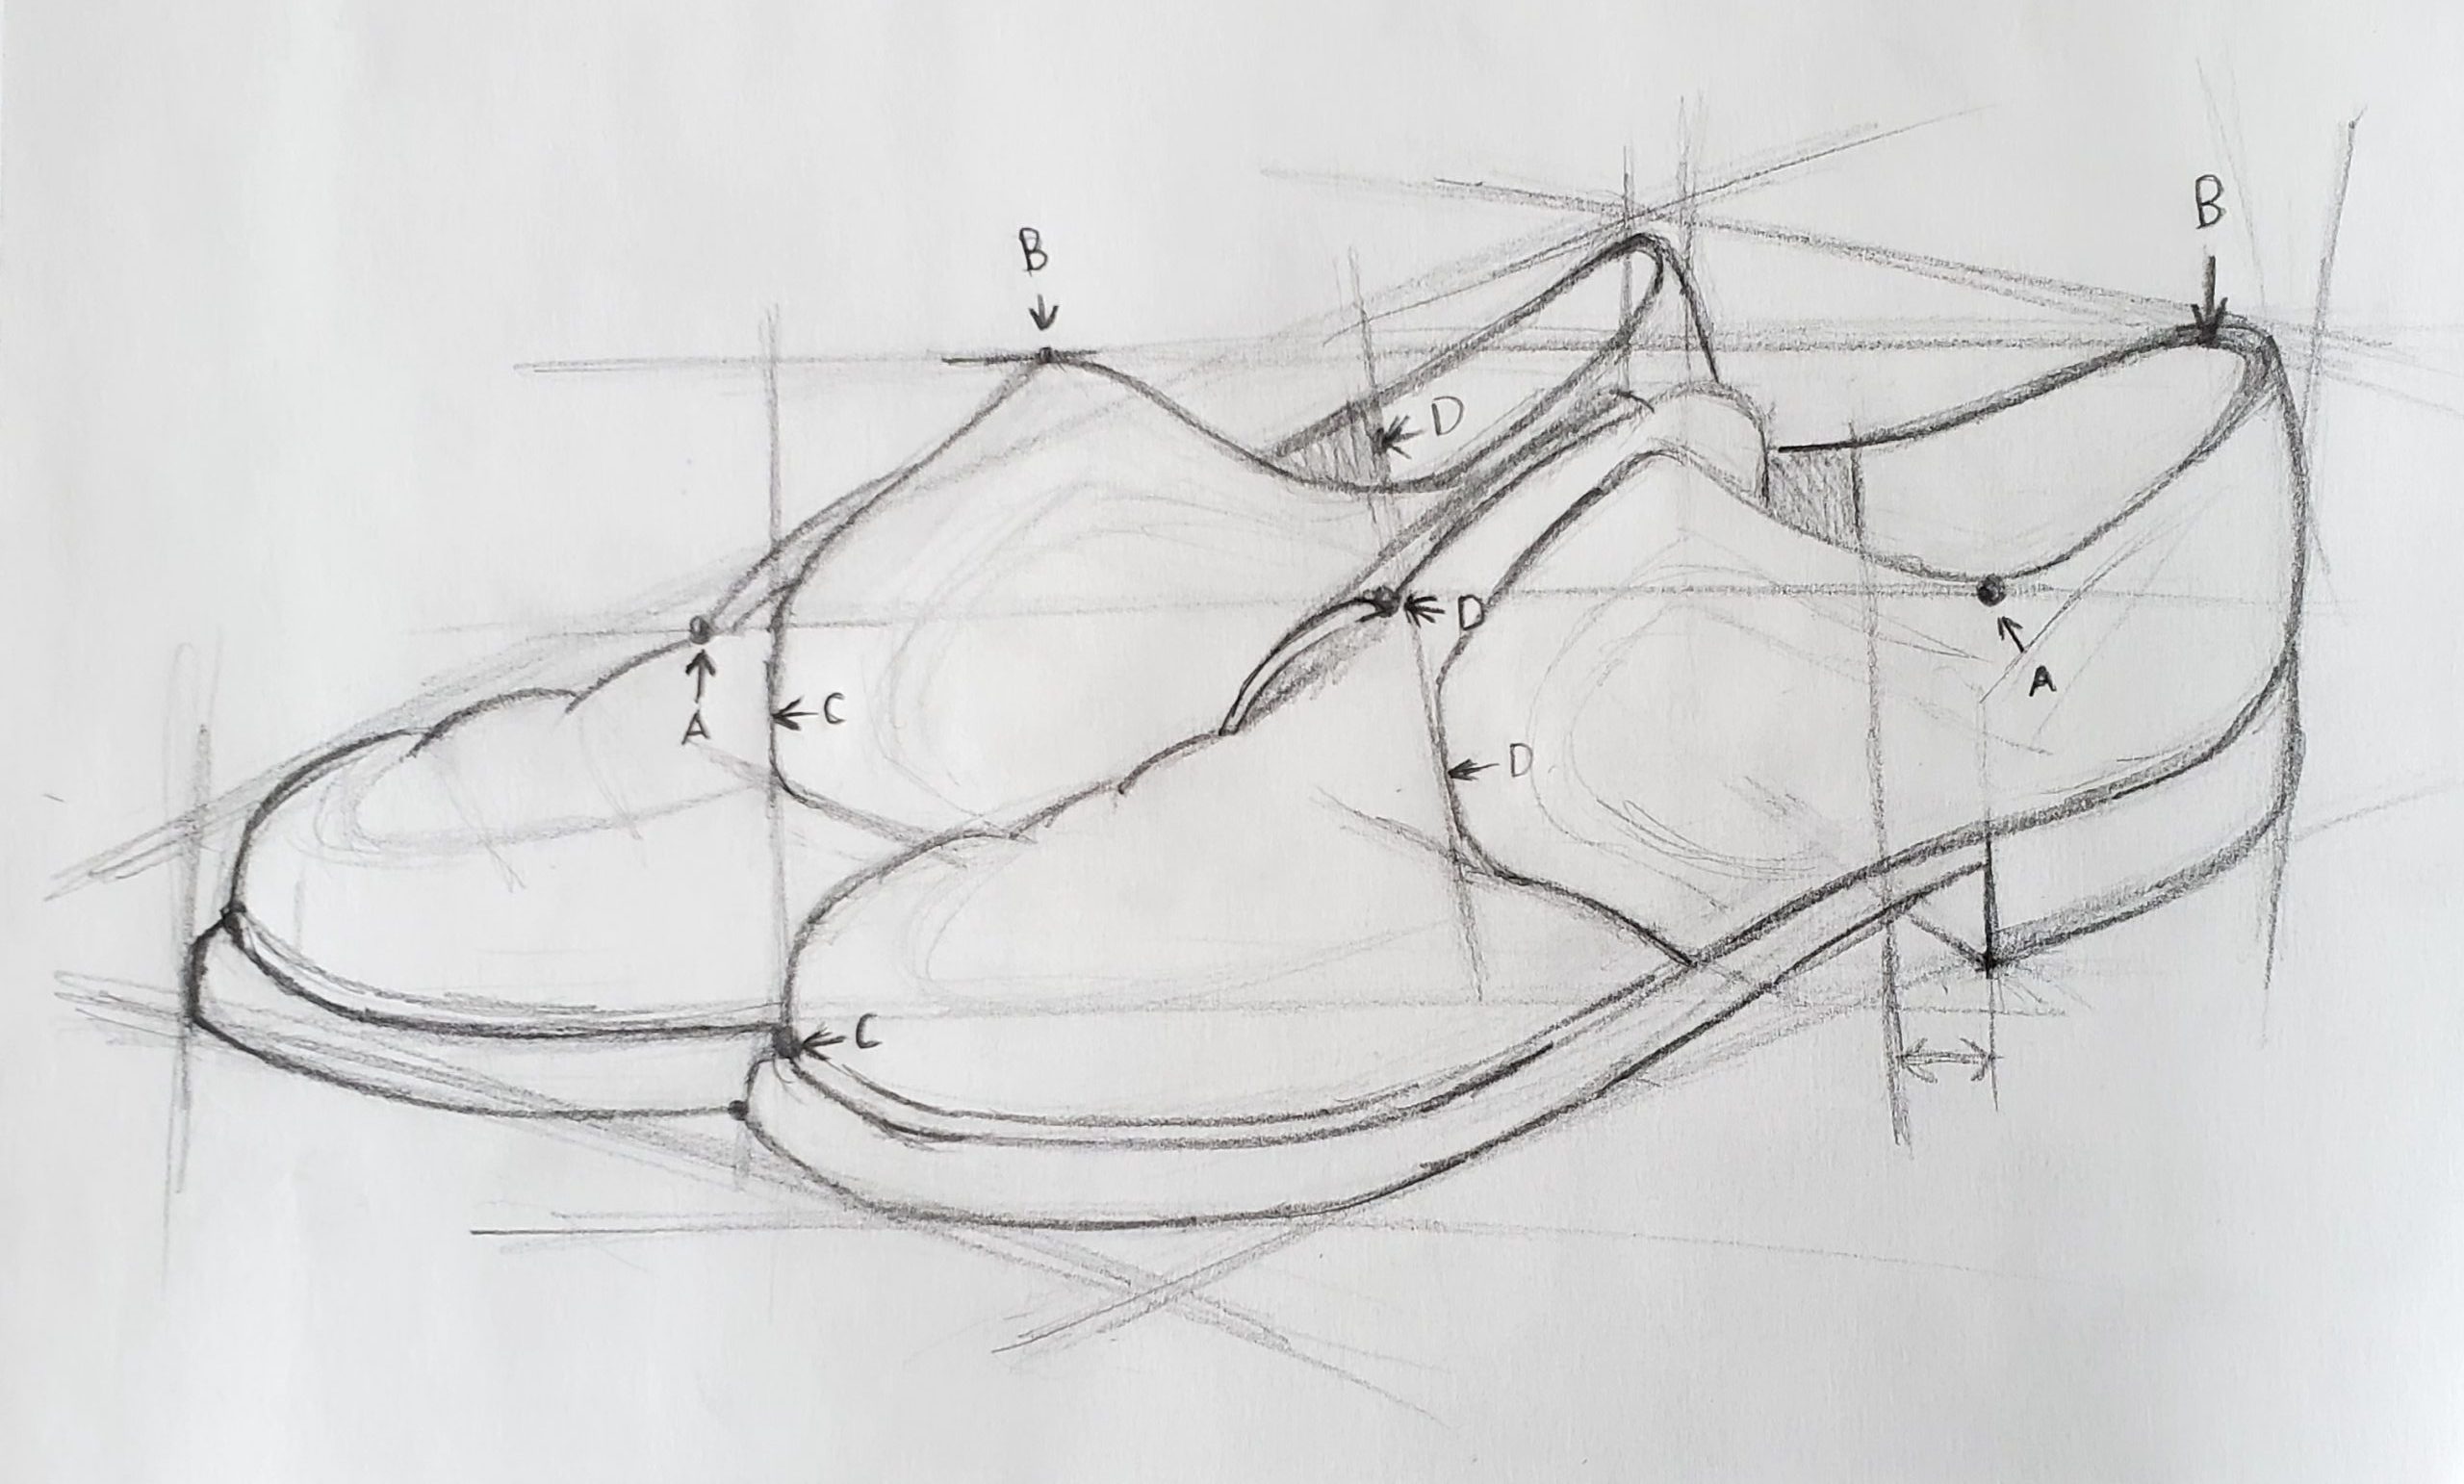
Example: Drawing of a pair of shoes with guide lines. Do not use this image for your drawing.
The example below shows how one lettered point will line up with another point with the same letter. The alignment lines for points A and B are horizontal and the alignment line for C is vertical. The alignment line for the three D points is at a slight angle. There are many others that you could use if needed. Note how the objects are broken up into straight lines at the start of the drawing, and the curves are added later.