Chapter 6 Shading
Visualizing Shading
Learning Objectives
By the end of this chapter, you should be able to:
Define different shading techniques including hatching, cross-hatching, scribbling, blending, and stippling.
Explain how lighting effects how you see tonal values and how this relates to shading.
Implement shading into a drawing to create depth and texture.
Now that you know how to create accurate line drawings, you may want to add some tonal value, or shading, to the space between the lines. Shading has the potential to be confusing because usually you are taking a colored subject and converting it into a black and white drawing. Not only do you have to deal with a certain color and how it relates to other colors, but you also have to deal with that color and how it changes due to lighting. You will have to differentiate between light and dark colors. For instance, blue would be shaded in a darker tone of gray than yellow. Also, you must take into account how light can affect shading of just one color, where maybe one area of the color blue is in shadow and another area of blue is in bright light.

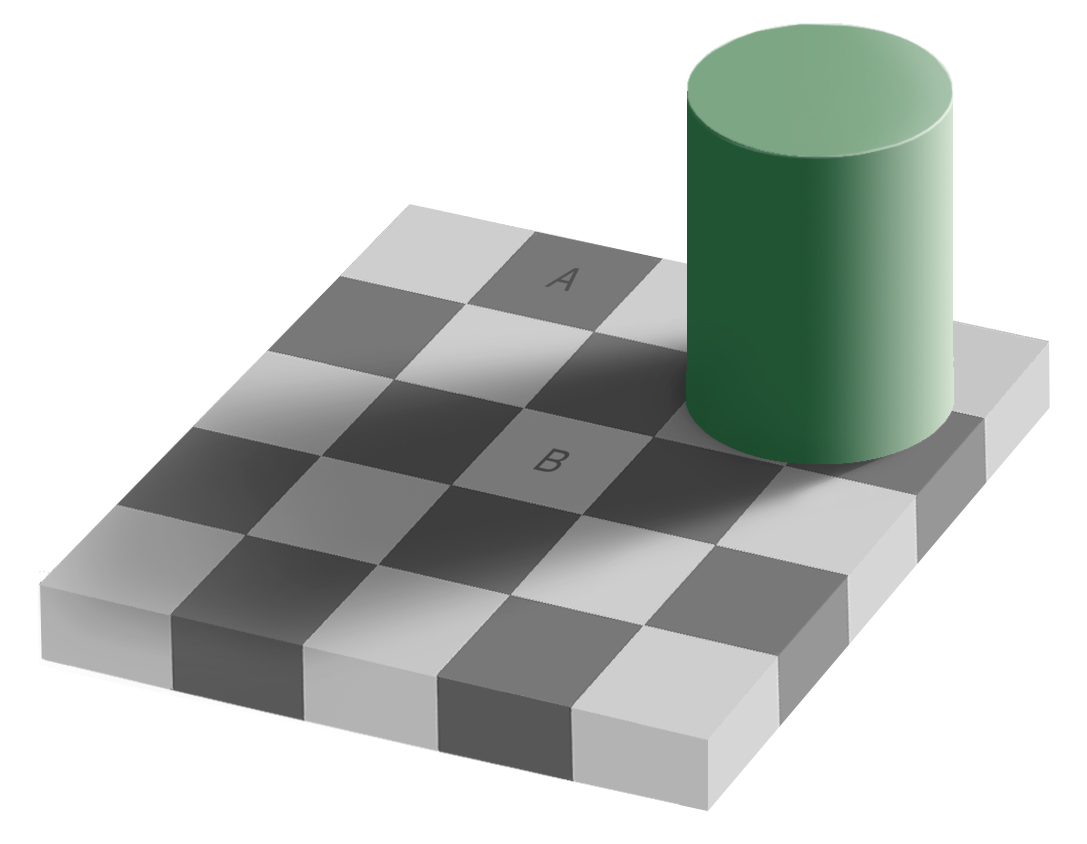
The example on the left shows two cubes, where each face has a different tone of shading. Note how each side of the cube is the same tone in both images. These three distinct shades help you understand the object is three dimensional. You are also clued as to the direction of the light source, since you know light makes nearer areas lighter than further areas. Light and shadow help you navigate the area.
Do squares A and B have the same shade of gray in the image below?
When looking at shading, be careful how you interpret various shades. Sometimes your eyes can play tricks on you.
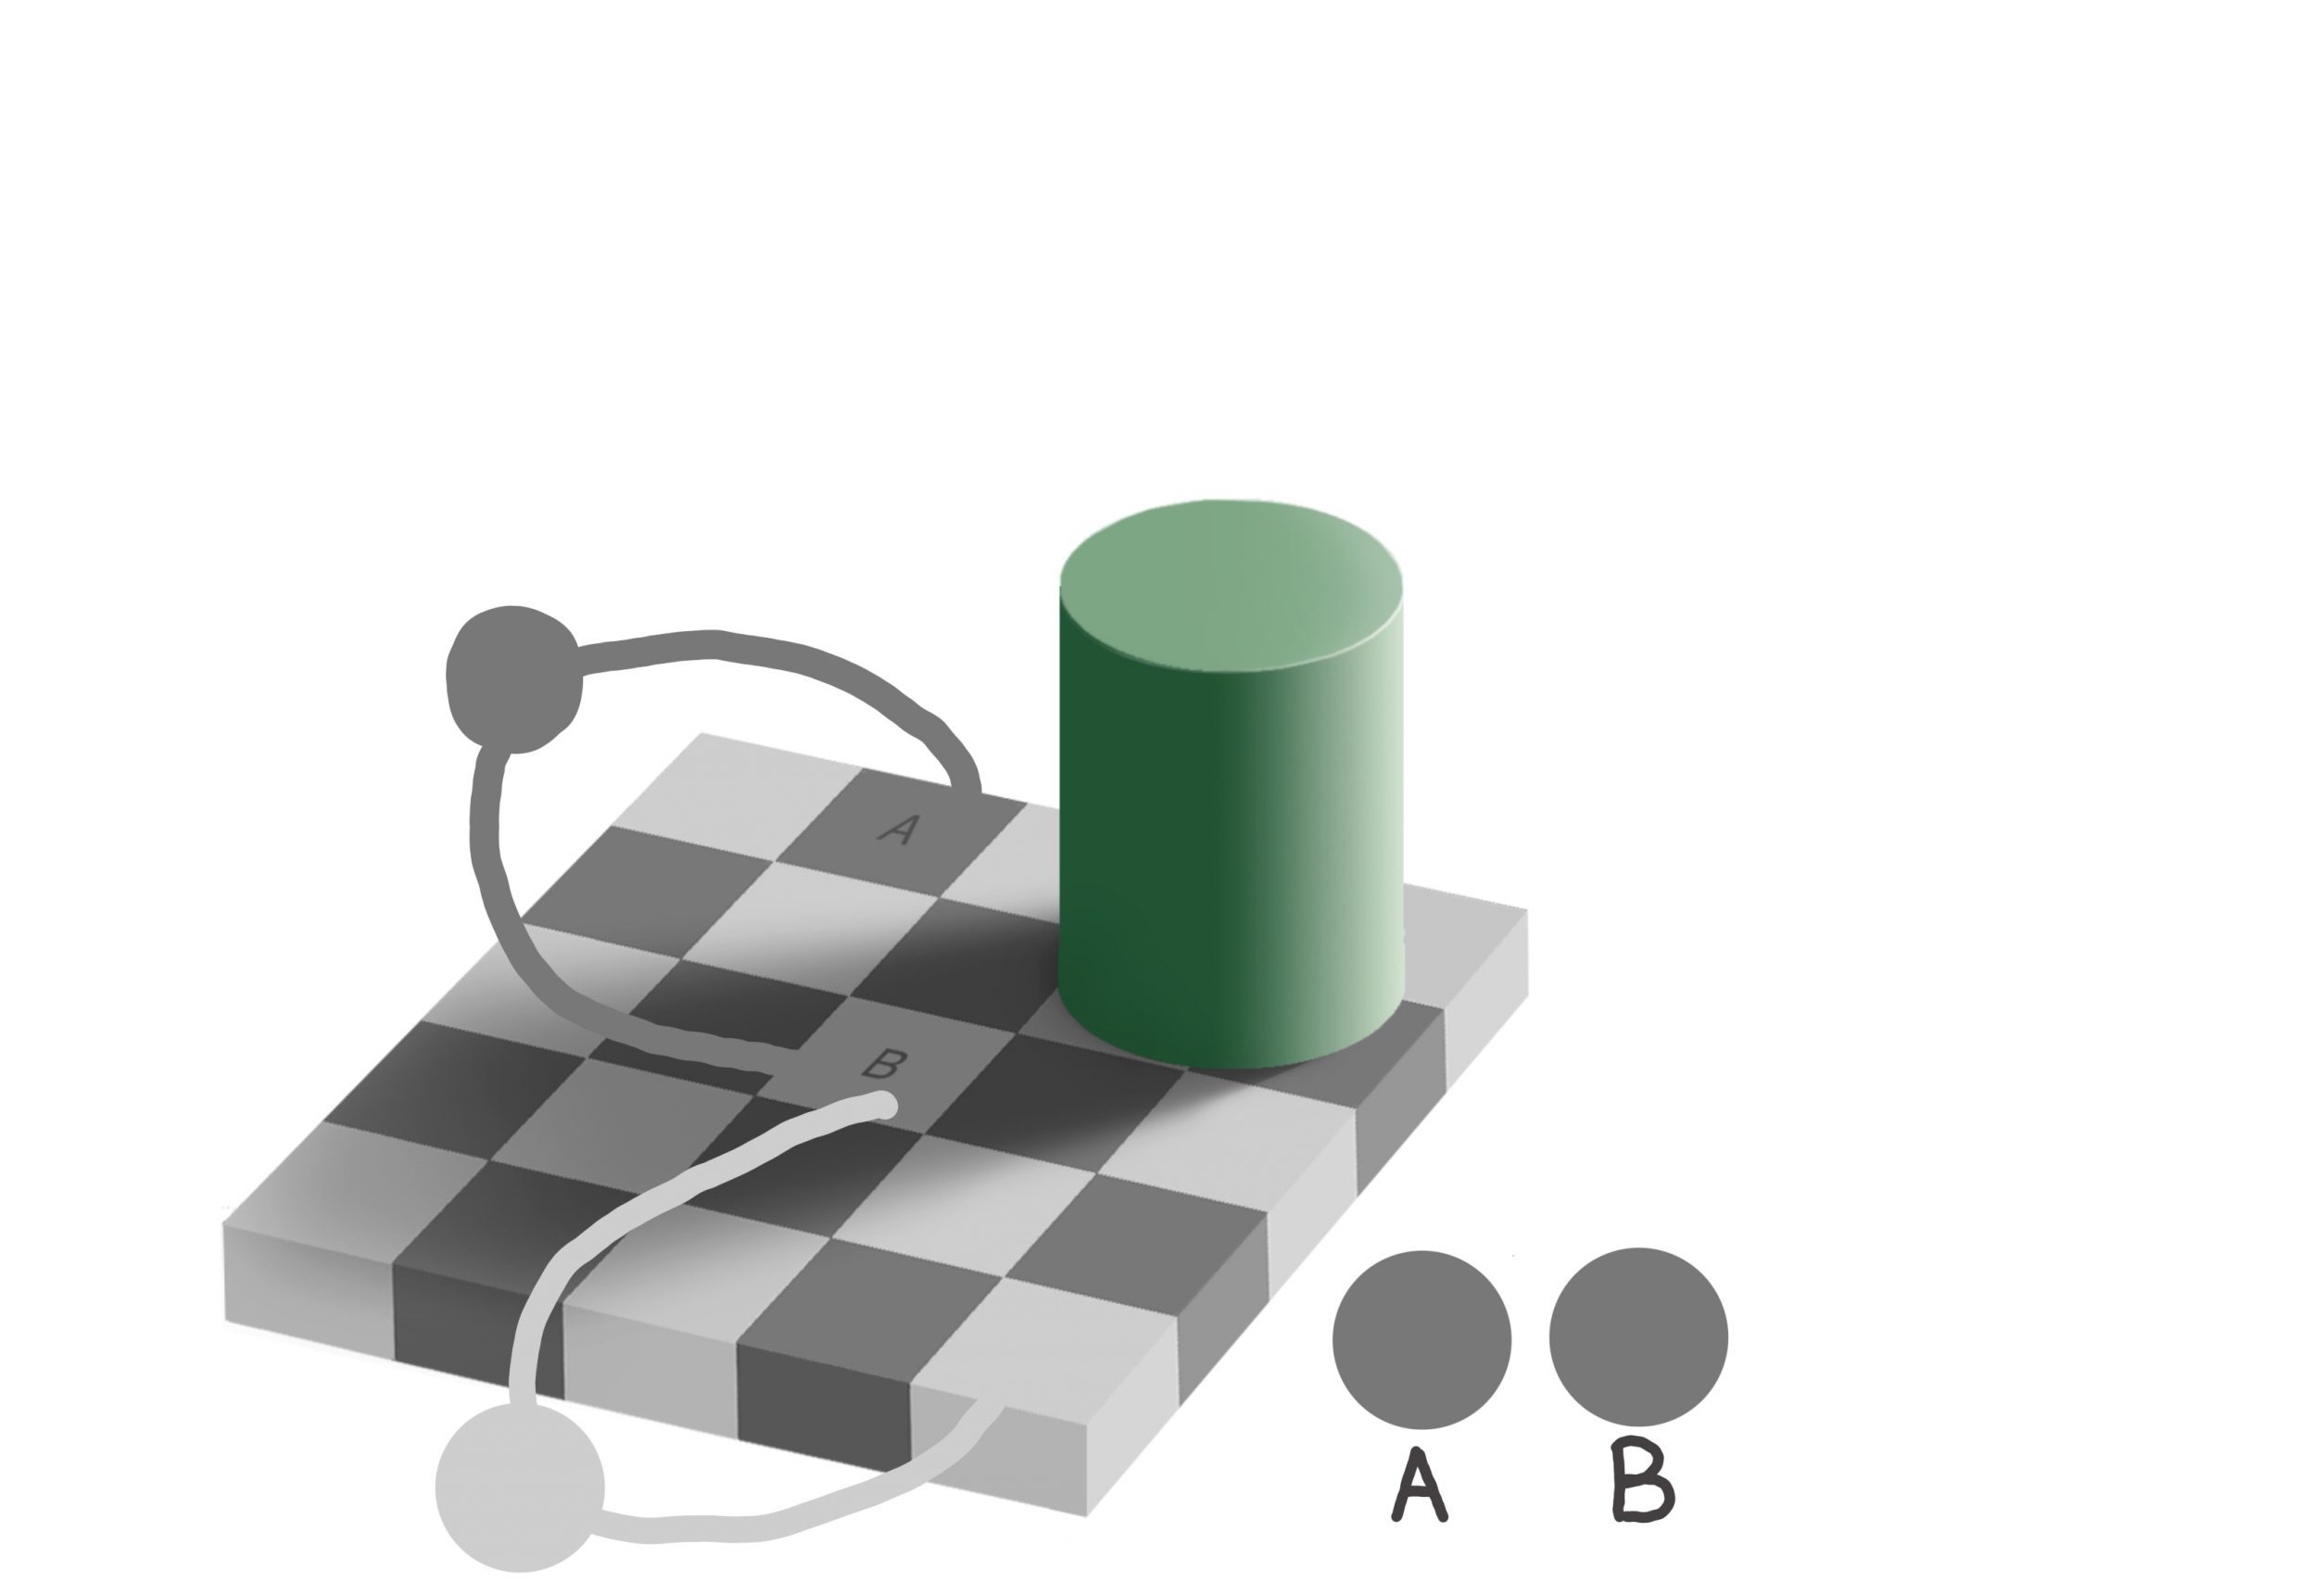
It may be hard to believe that A and and B are indeed the same tone of gray. On the right, a color sample was taken from both squares and placed here to show they are the same. Also, two thick colored lines are drawn between two square locations. Notice how the line going from A to B seems to fade as it gets to the B square, but in reality it does not. There is also a line that goes from the front corner square to the B square to show that it is much lighter. The reason squares A and B are the same shade is due to the shadow being cast by the cylinder. The shadow is making all of the squares in the shadow darker, which tricks us into thinking square B is lighter than it really is.
The below example shows various black and white interpretations of a colored image. The image on the top right is a drawing of the top left image, interpreted by the artist. The two lower images are of the original image converted to black and white. The image on the lower left is a direct conversion to black and white. The bottom right image is a brightened version, which shows a better contrast between light and dark. Note how the bottom two versions have a greater variation in tone, which give off a more distinct sense of shape and intensity.


Adding Shading
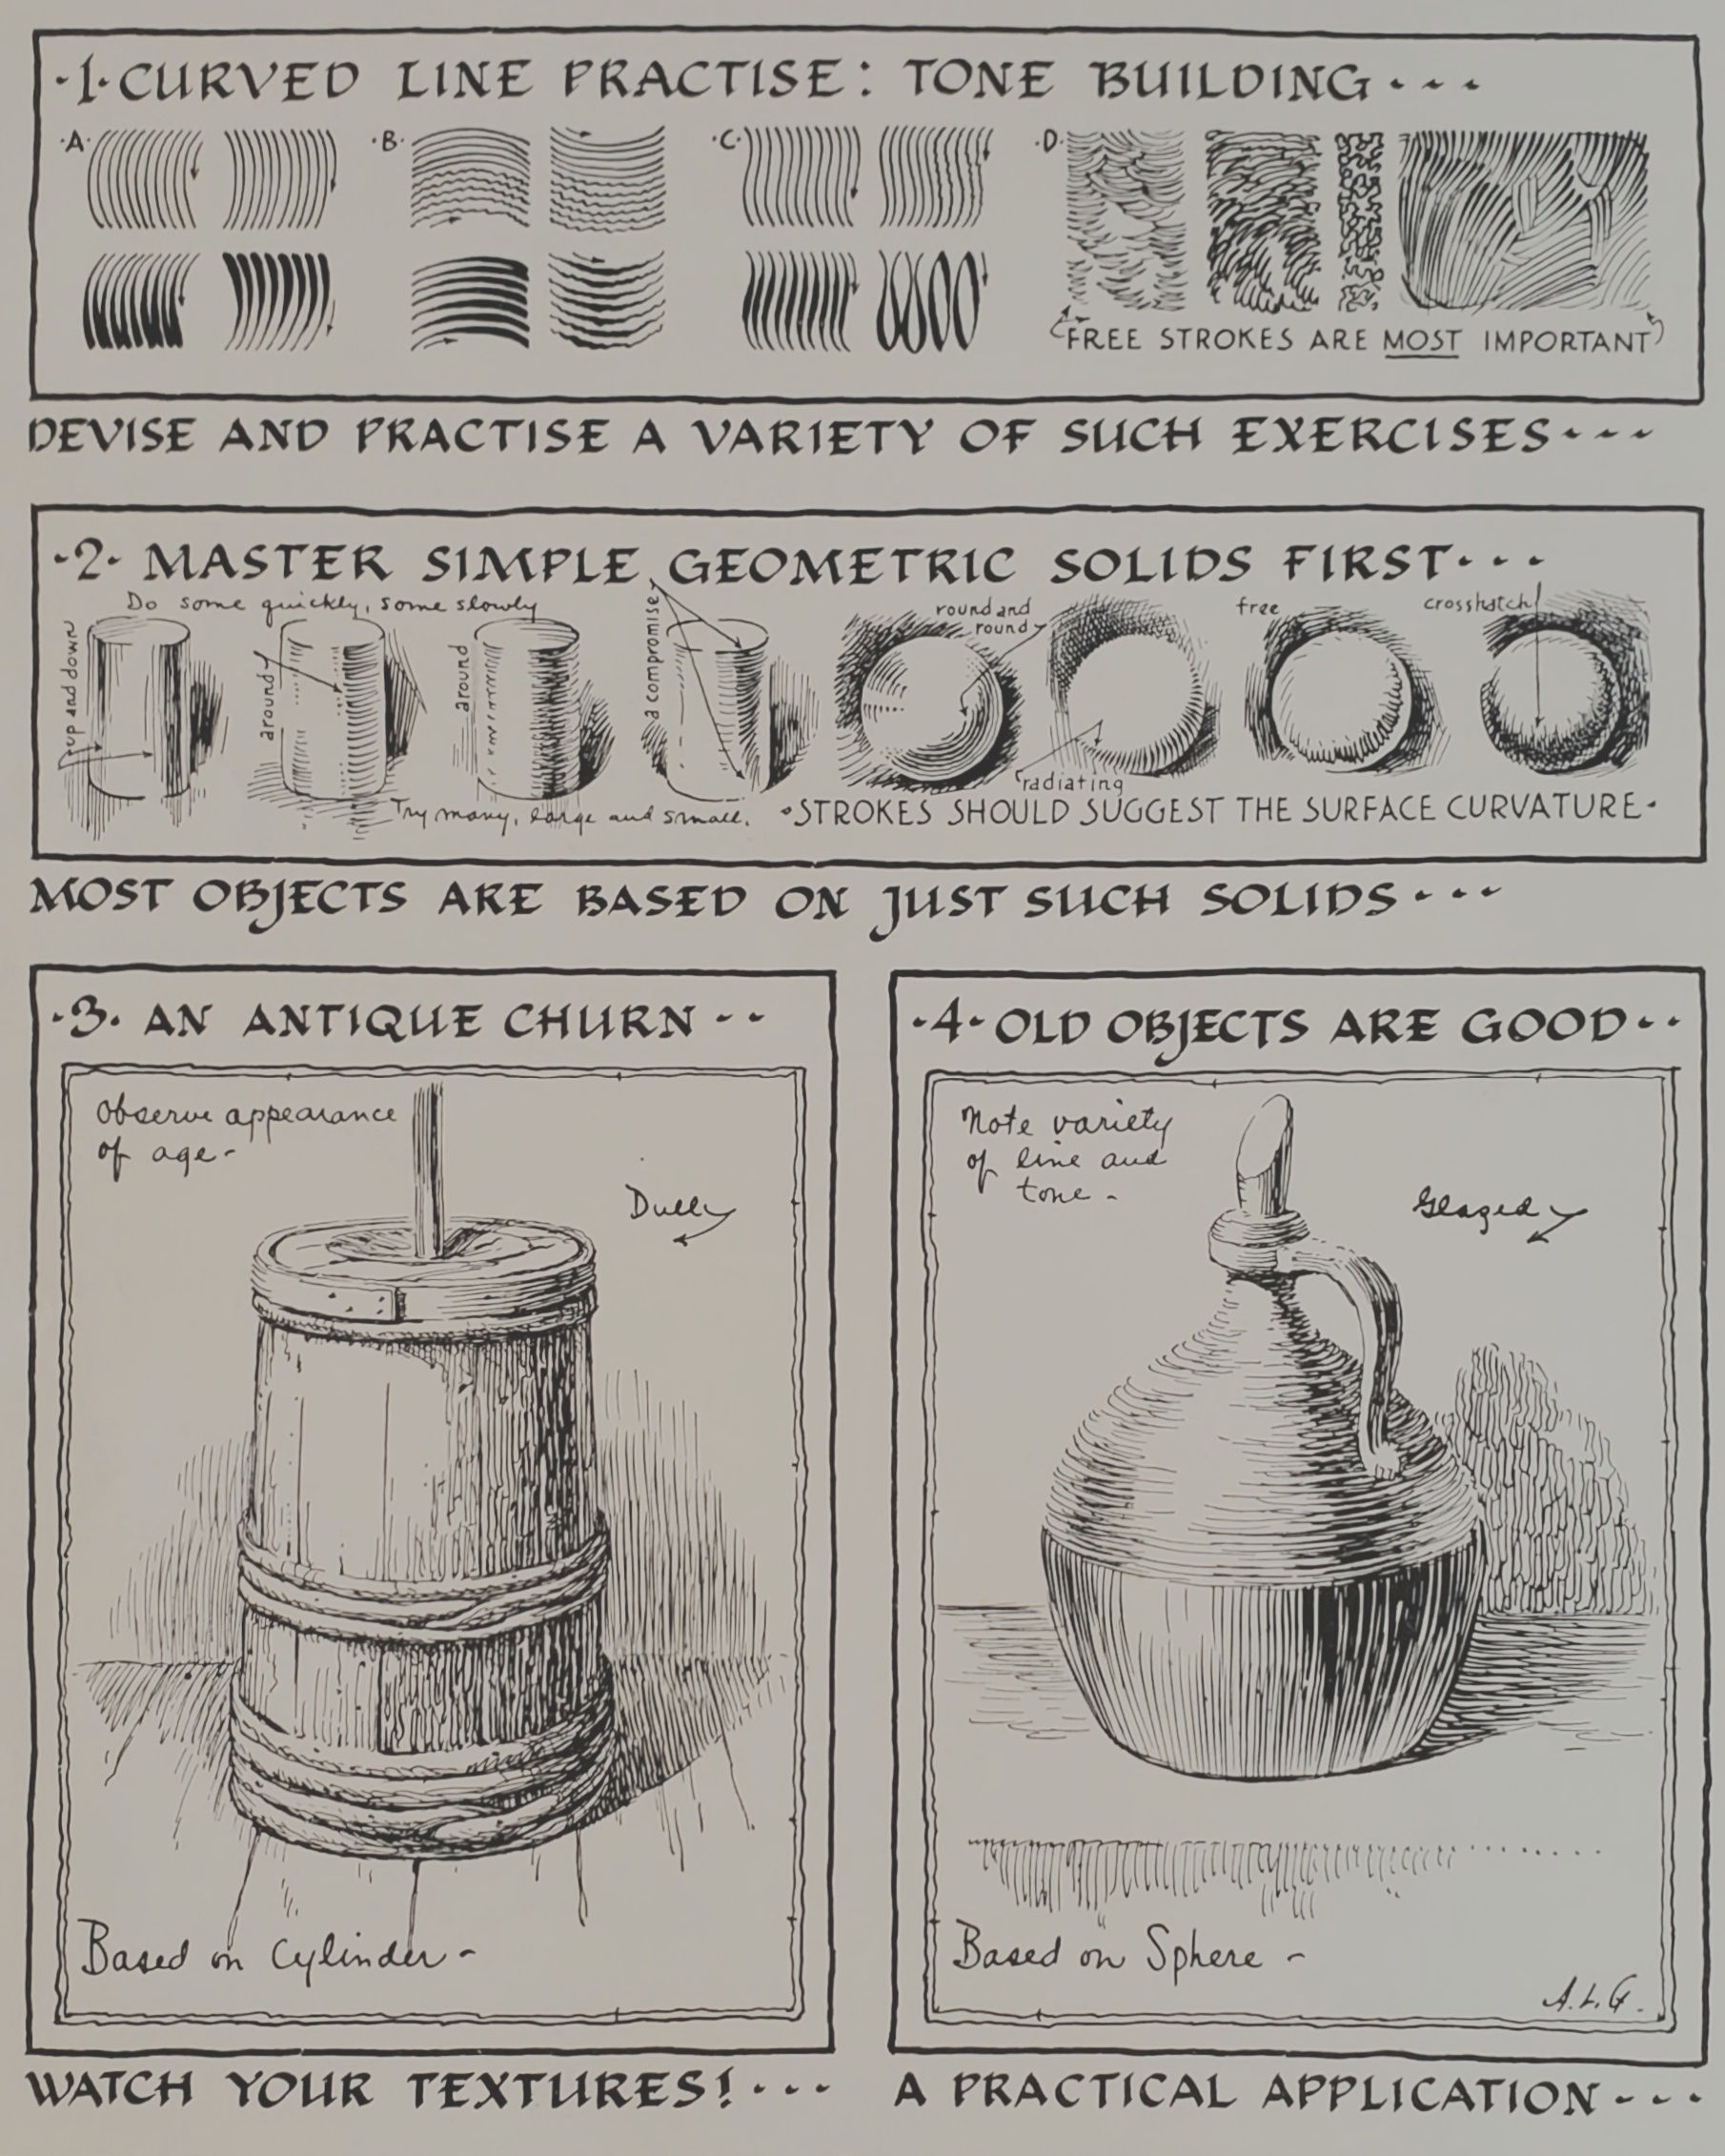
Now that you have some line drawings under your belt, it is time to add some shading to further develop your drawings. There are several shading techniques that fit into five main categories. Shading can also show the object’s texture, depending on how it is applied. Some forms of shading work better than others. It can vary depending if you want a precise drawing or one that looks a little rough, or quickly done. When applying shading, there are many techniques to choose from.
Hatching and Cross Hatching
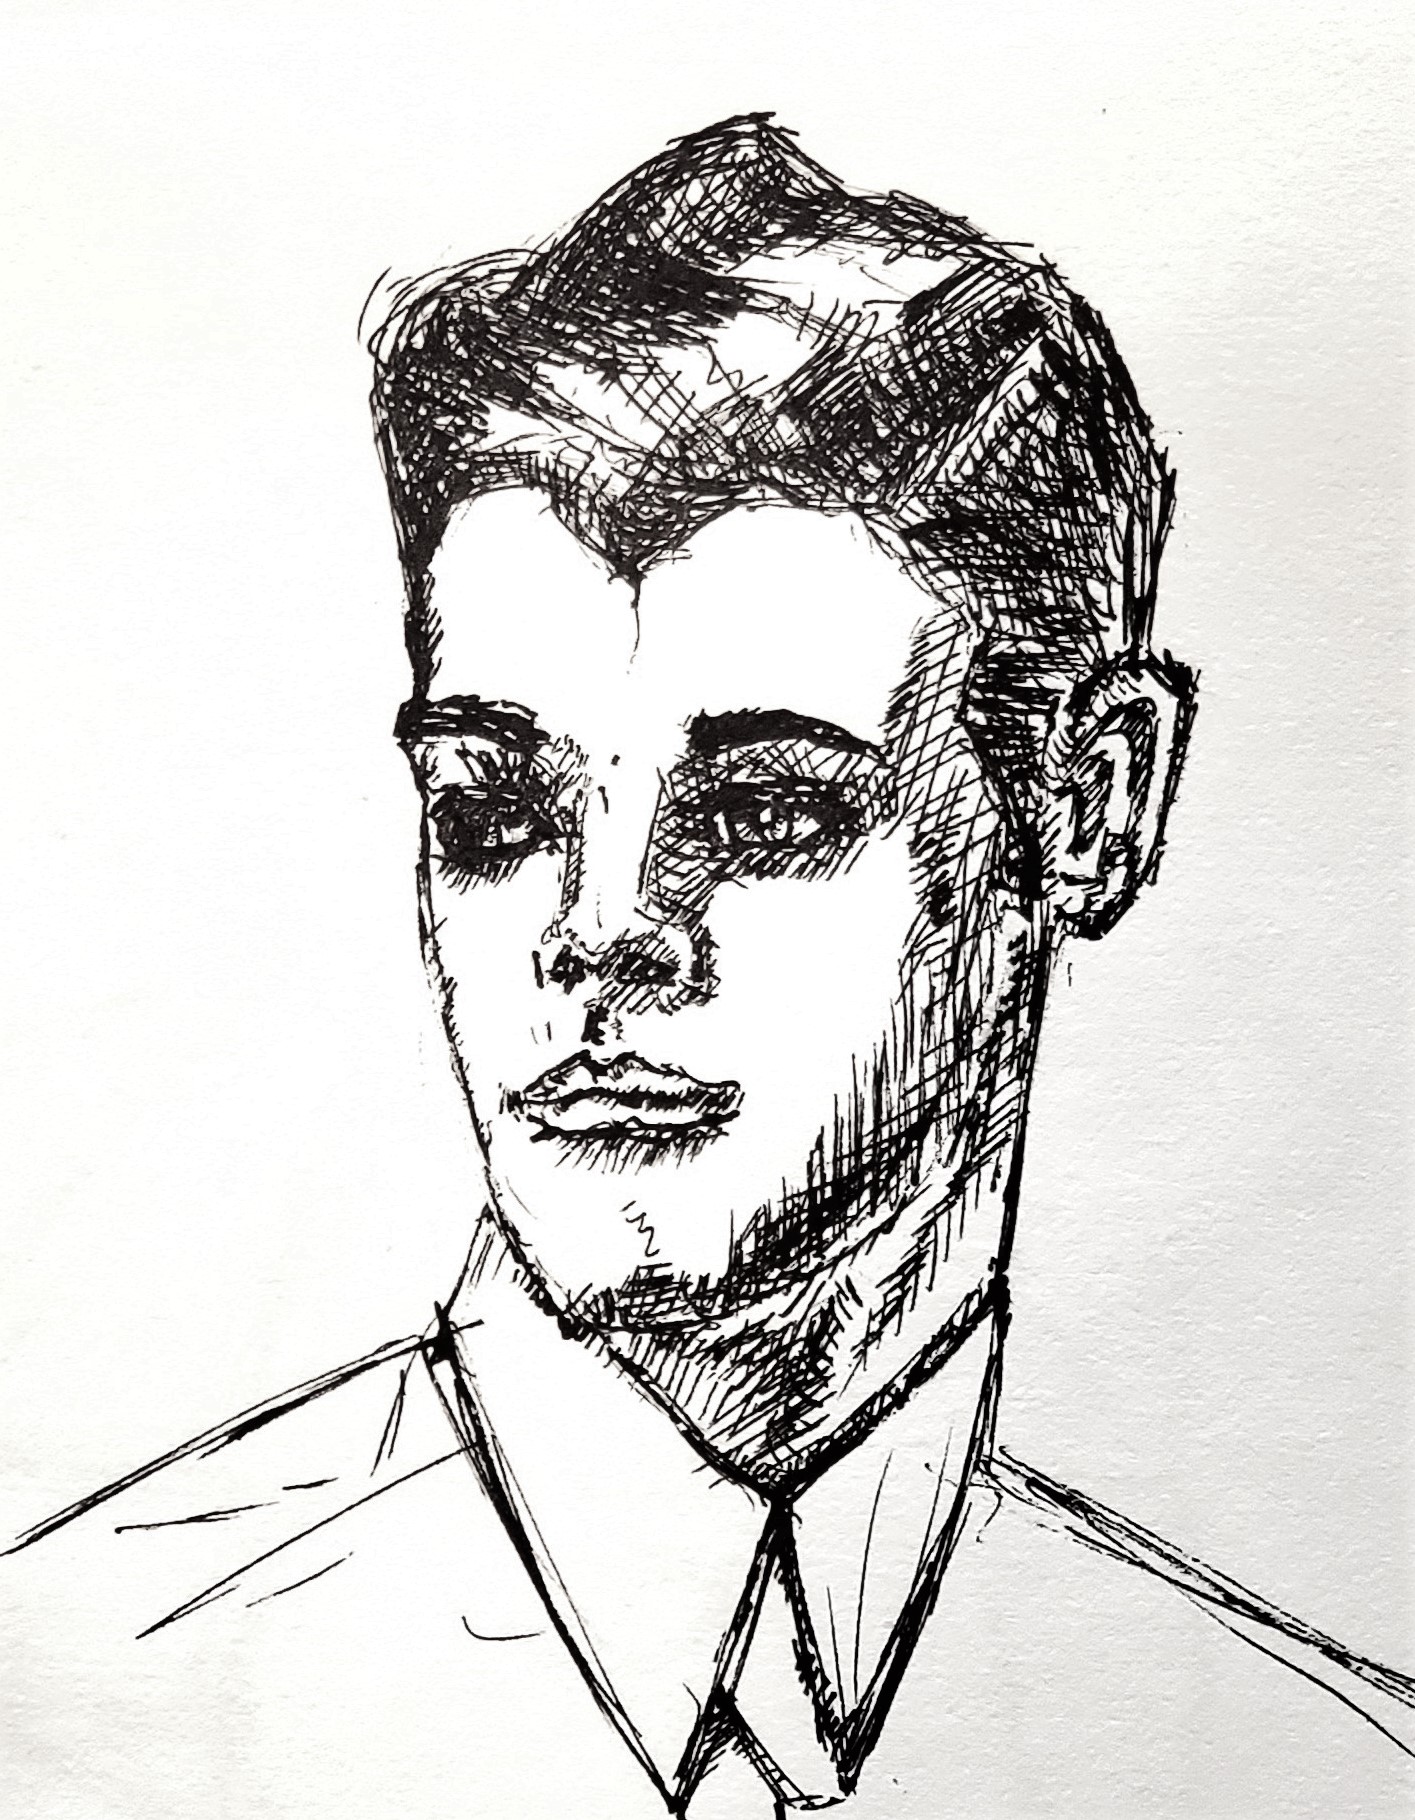
Hatching is simply applying parallel lines over your drawing to darken an area. Cross hatching is similar, however, the lines are applied in various overlapping directions to create the desired shading. In both forms, a hatching line can be straight, curved, or vary in thickness to give the drawing the desired shading or texture. Below are some examples of hatching and crosshatching.
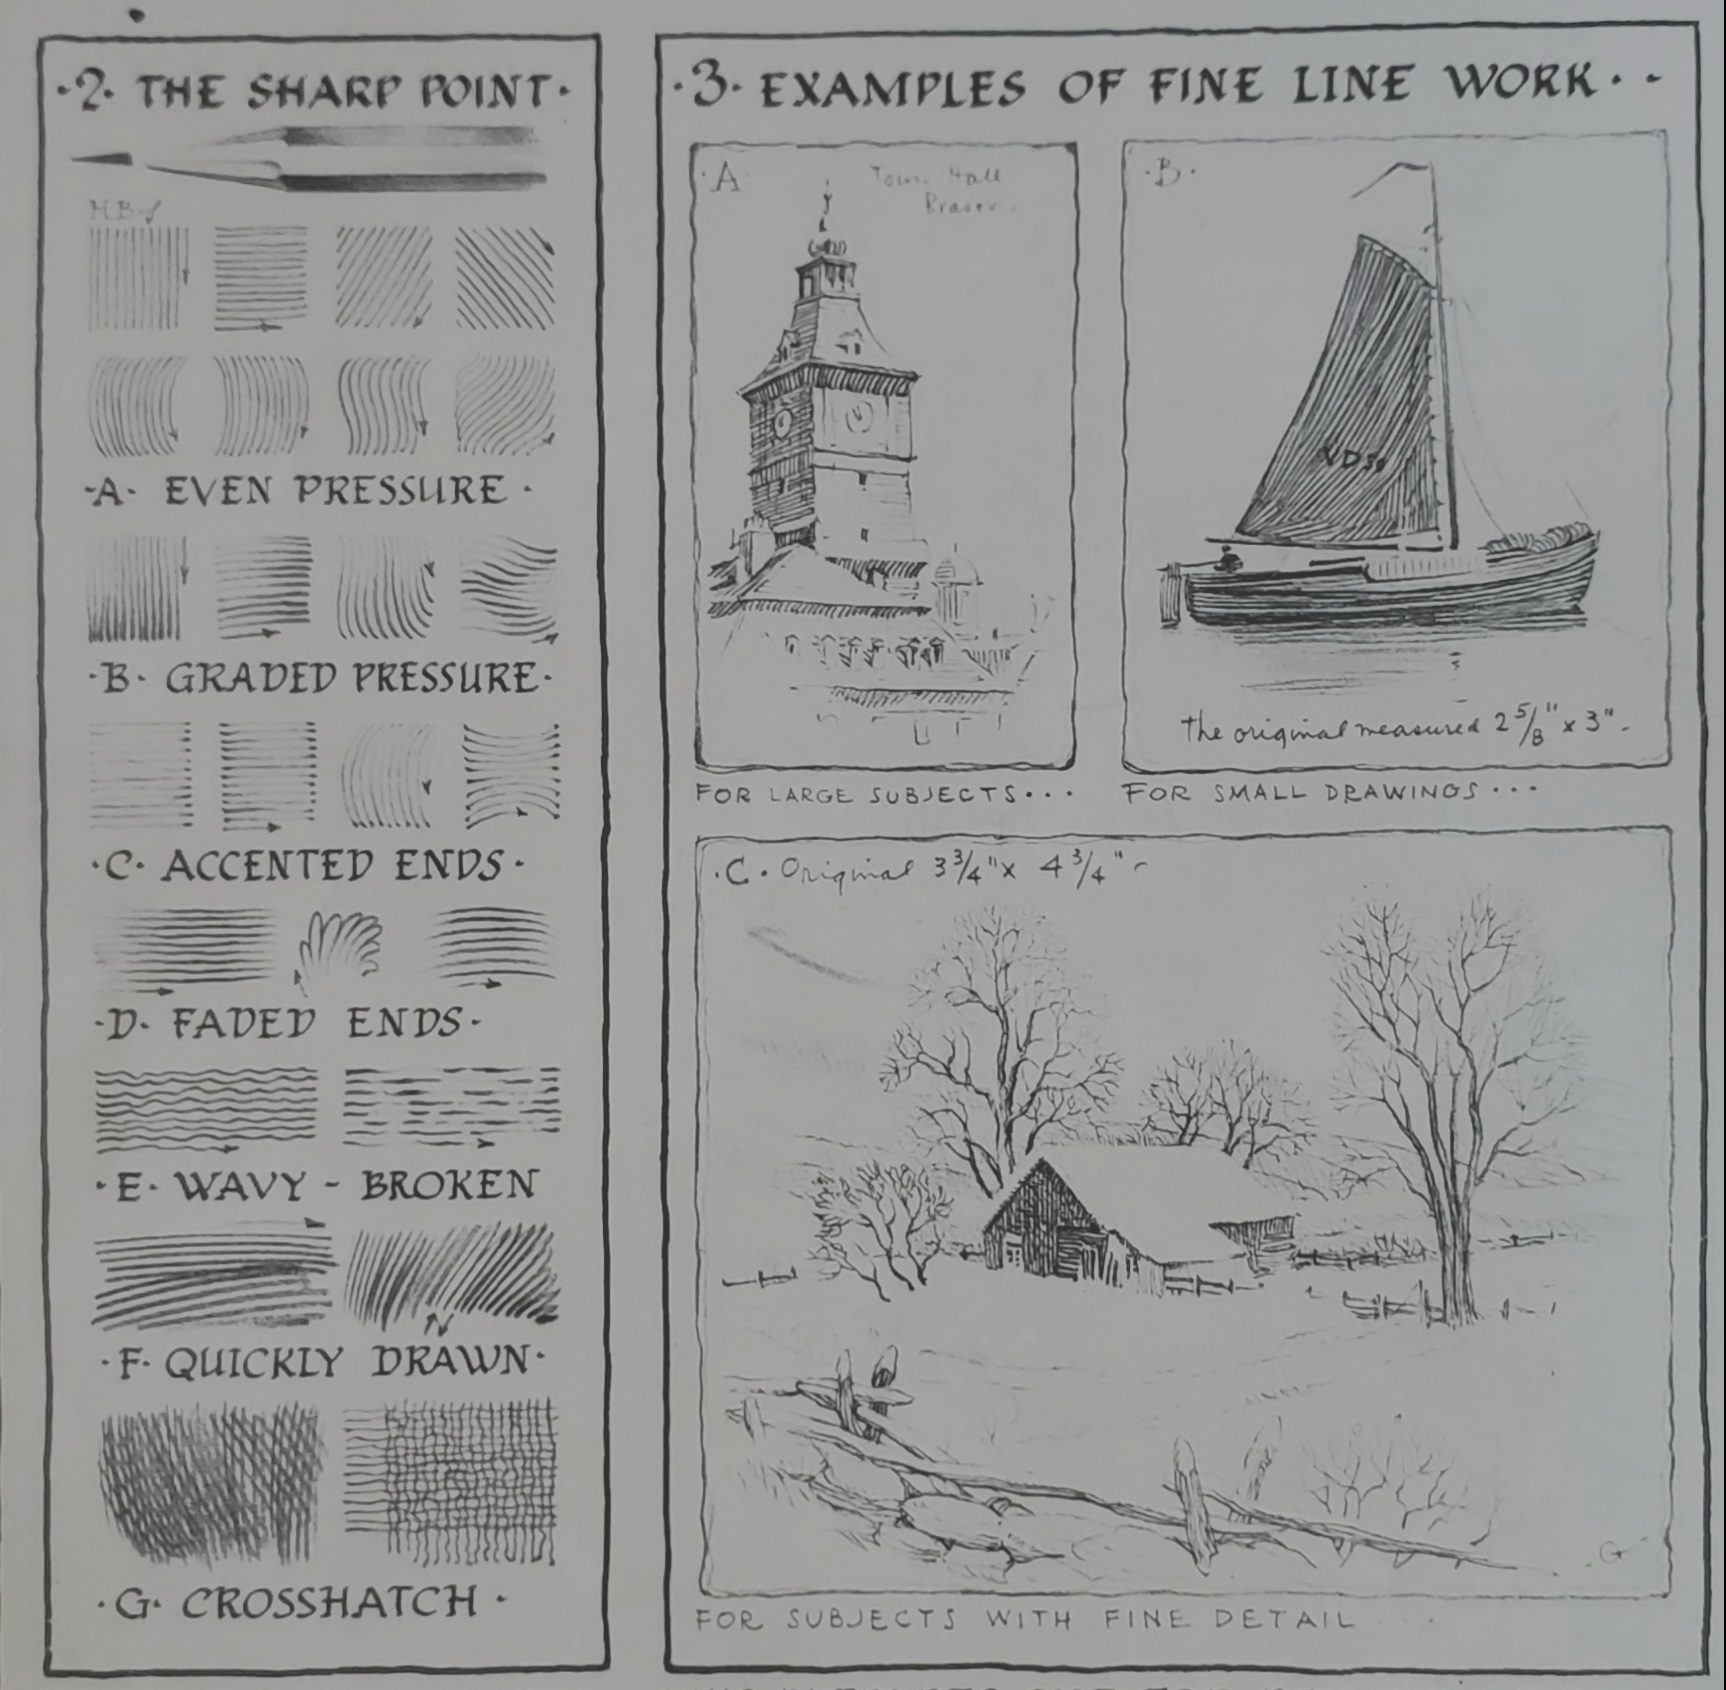
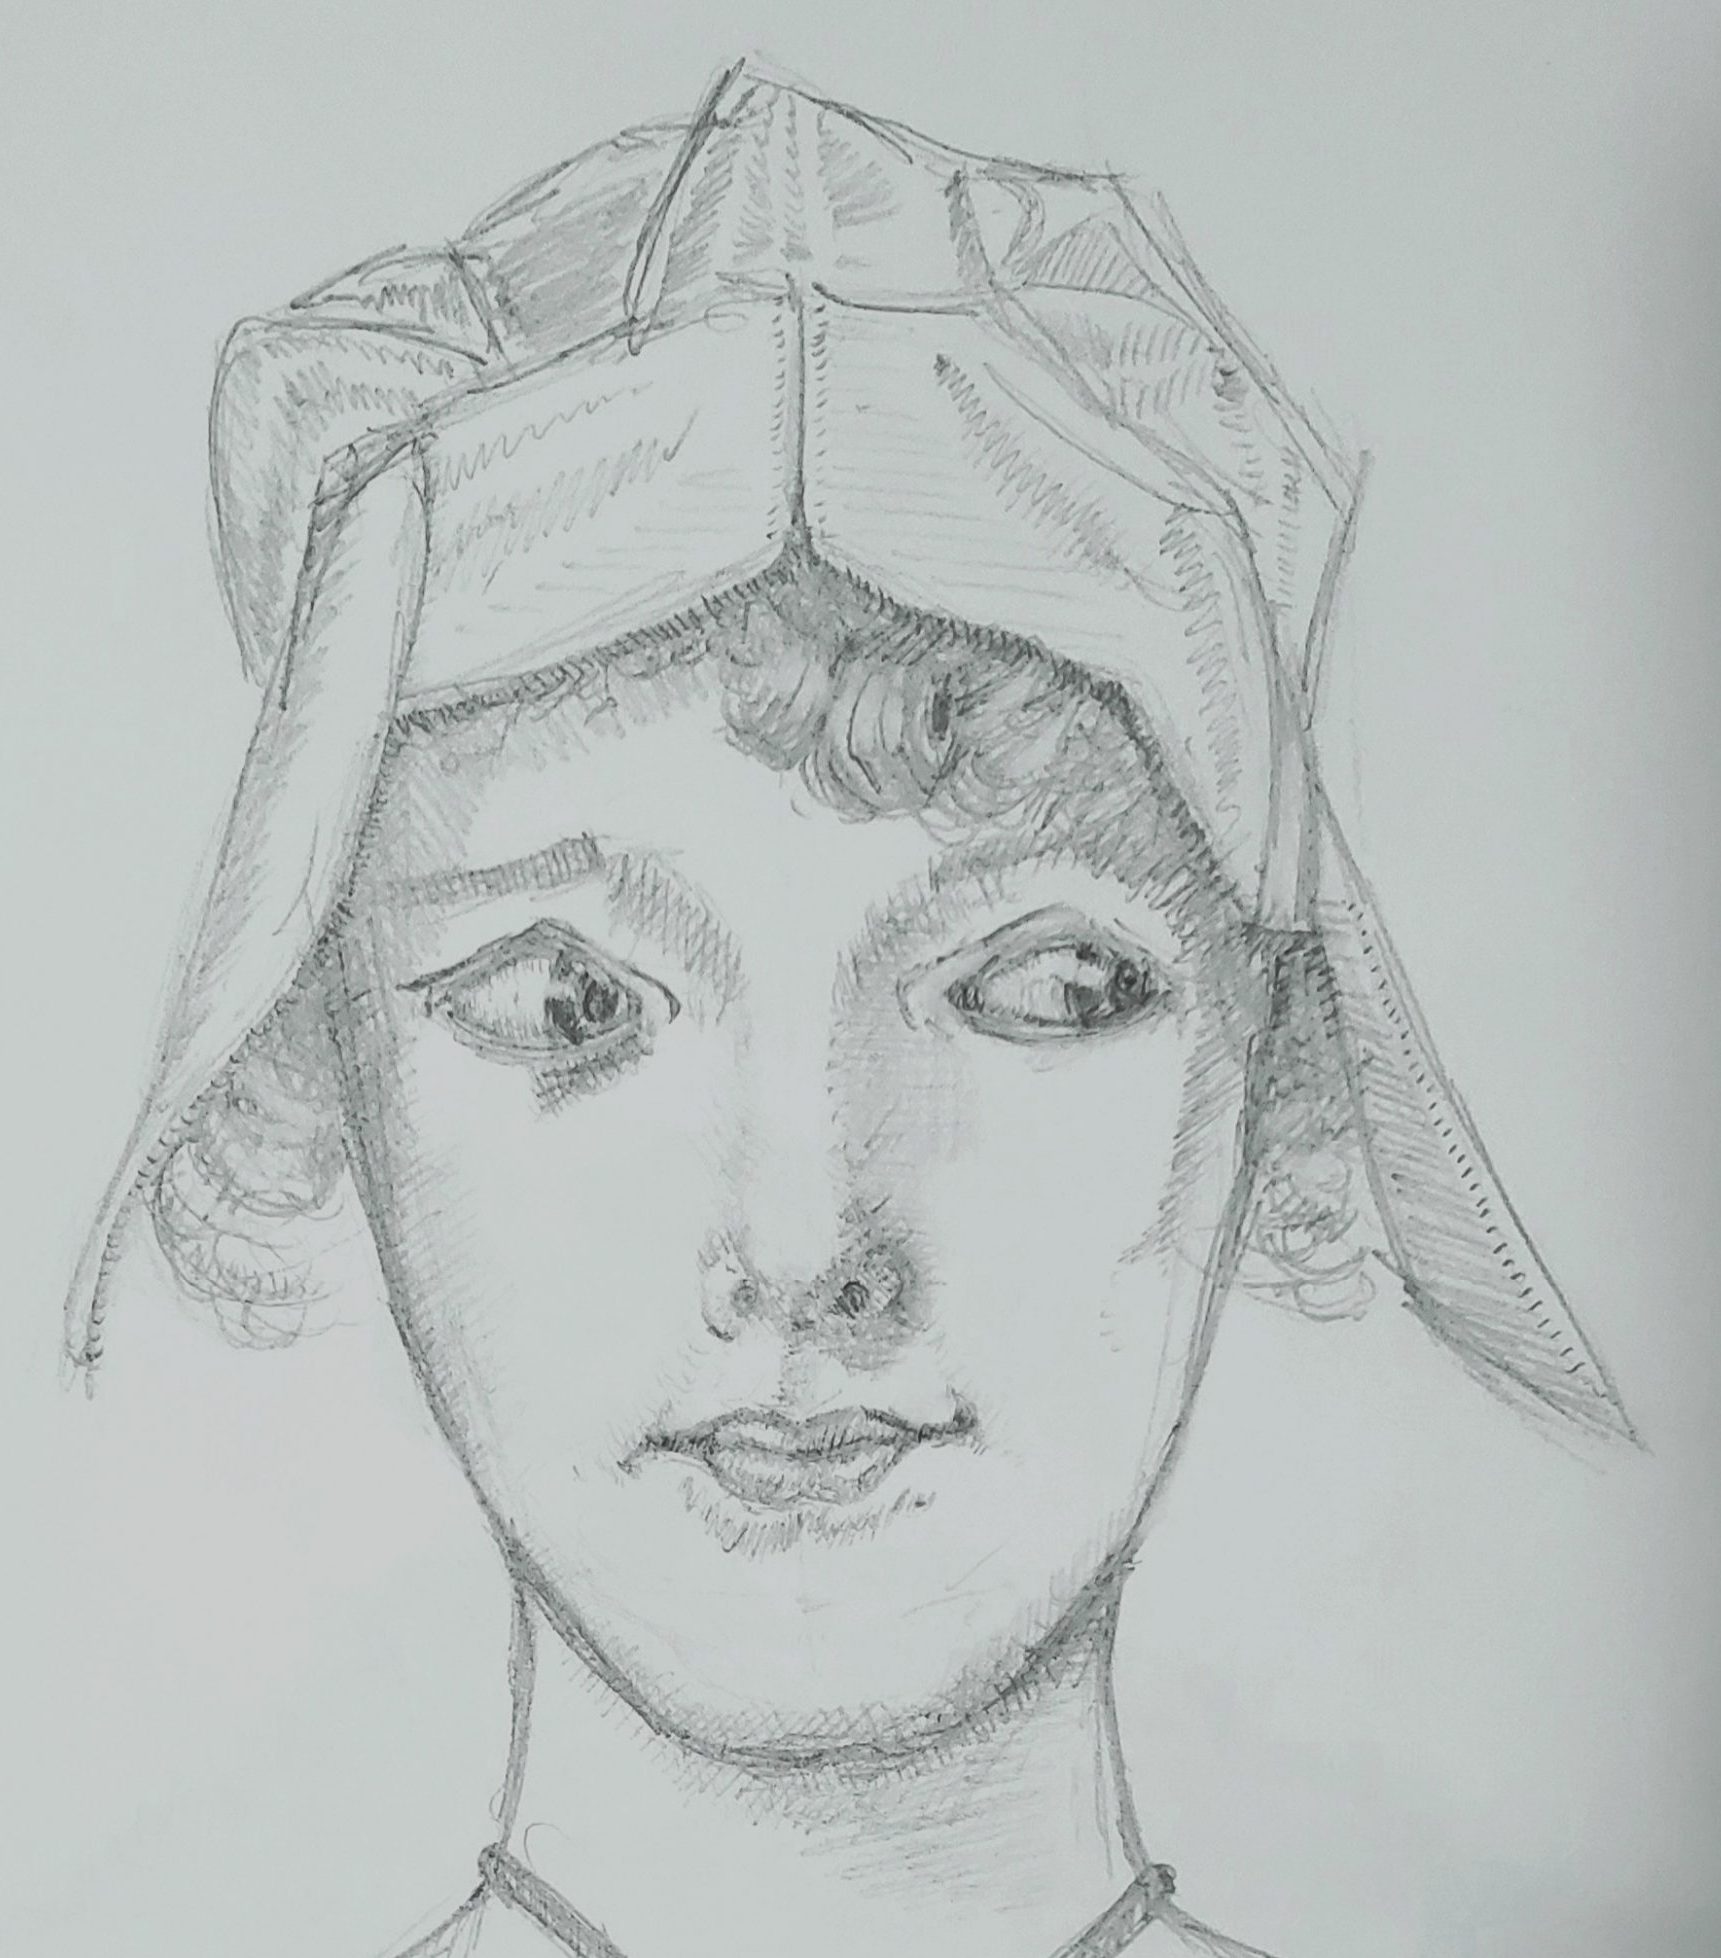
The example below shows hatching and cross hatching, which help define shape, especially in the hat.
Scribbling
The easiest way to create shading is to just build up darker tones with random motions until you get the desired look. This can also be the quickest way to get shading done, due to its loose and quick motion. Be careful with losing too much control. Be purposeful when building up your scribbles or the drawing can turn into a mess. Below, the left image shows a more refined example of scribbling with same crosshatching mixed in. The drawing on the right shows a looser representation of the same subject.
Blending
Blending is spreading or rubbing the drawing medium that has already been applied to your paper. Any of the other shading methods can be used first to apply medium on your drawing that can then be blended. Blending has a tendency to create a softer feel to the drawing compared to the other methods.
Blending can be done with the techniques listed below:
- Finger – this is the easiest and simplest way, however, your fingers may have oils or dirt that can be deposited on the paper and affect the look.
- Paper towel or rag – this is the second easiest way to blend.
- Stump – the best way to blend your shading in tight spaces.
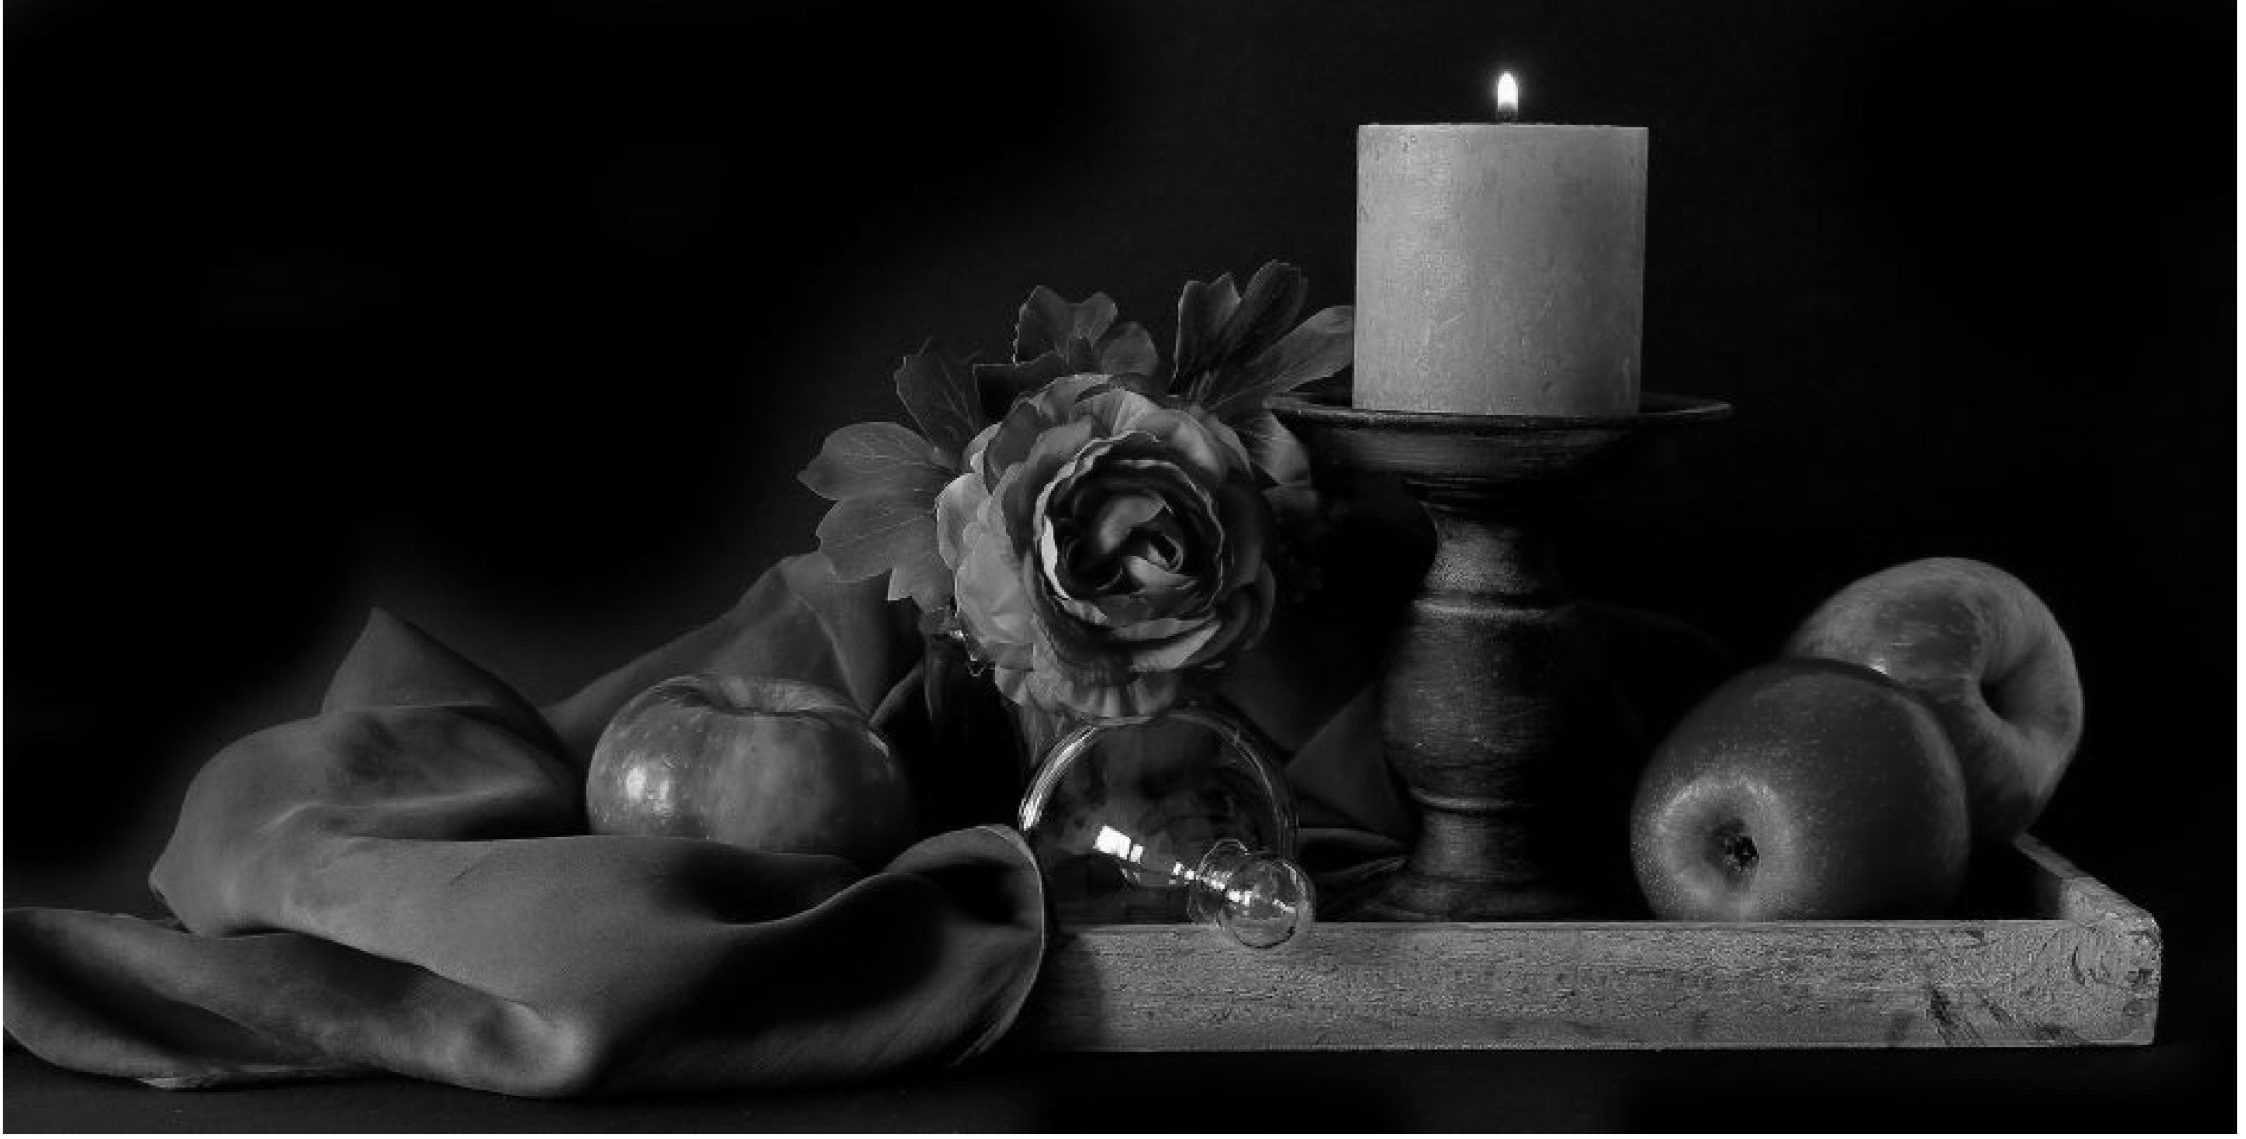
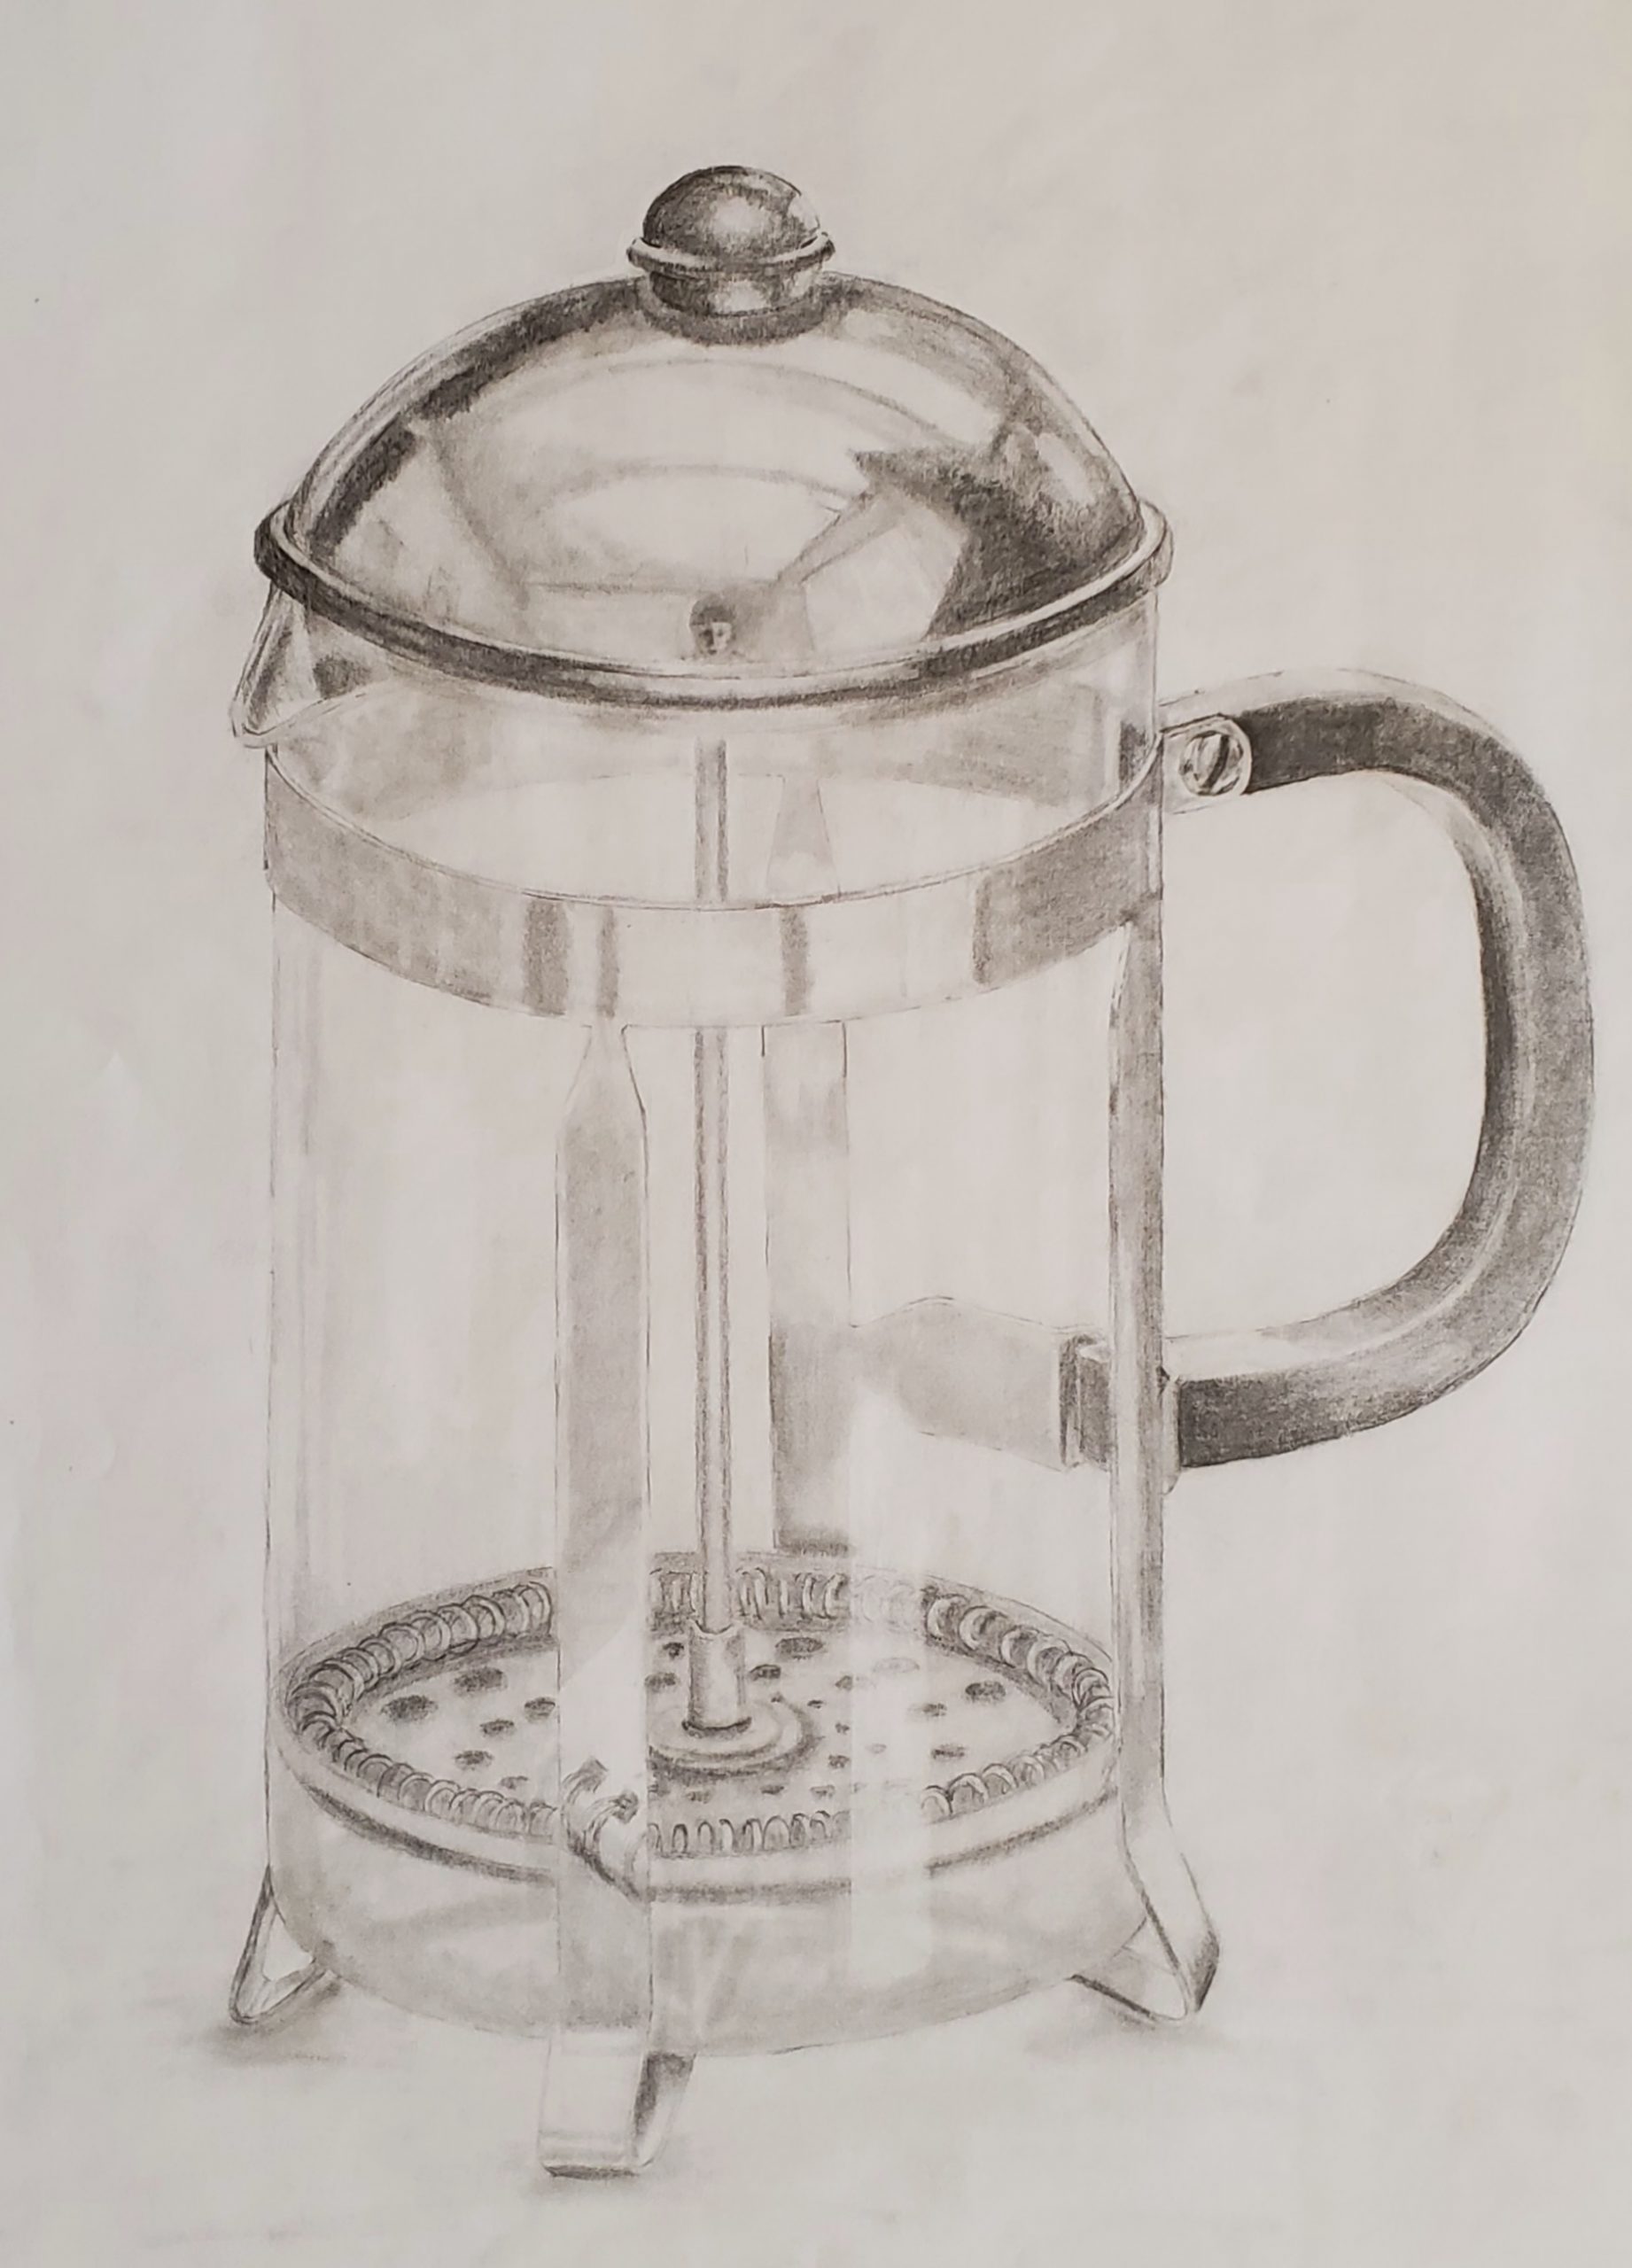
Note how the earlier example of the blended sphere and the image of the French press below have no line. A drawing can be well defined with shading alone and no line. When you look at a black and white photo, do you see any line defining all the objects?
Stippling
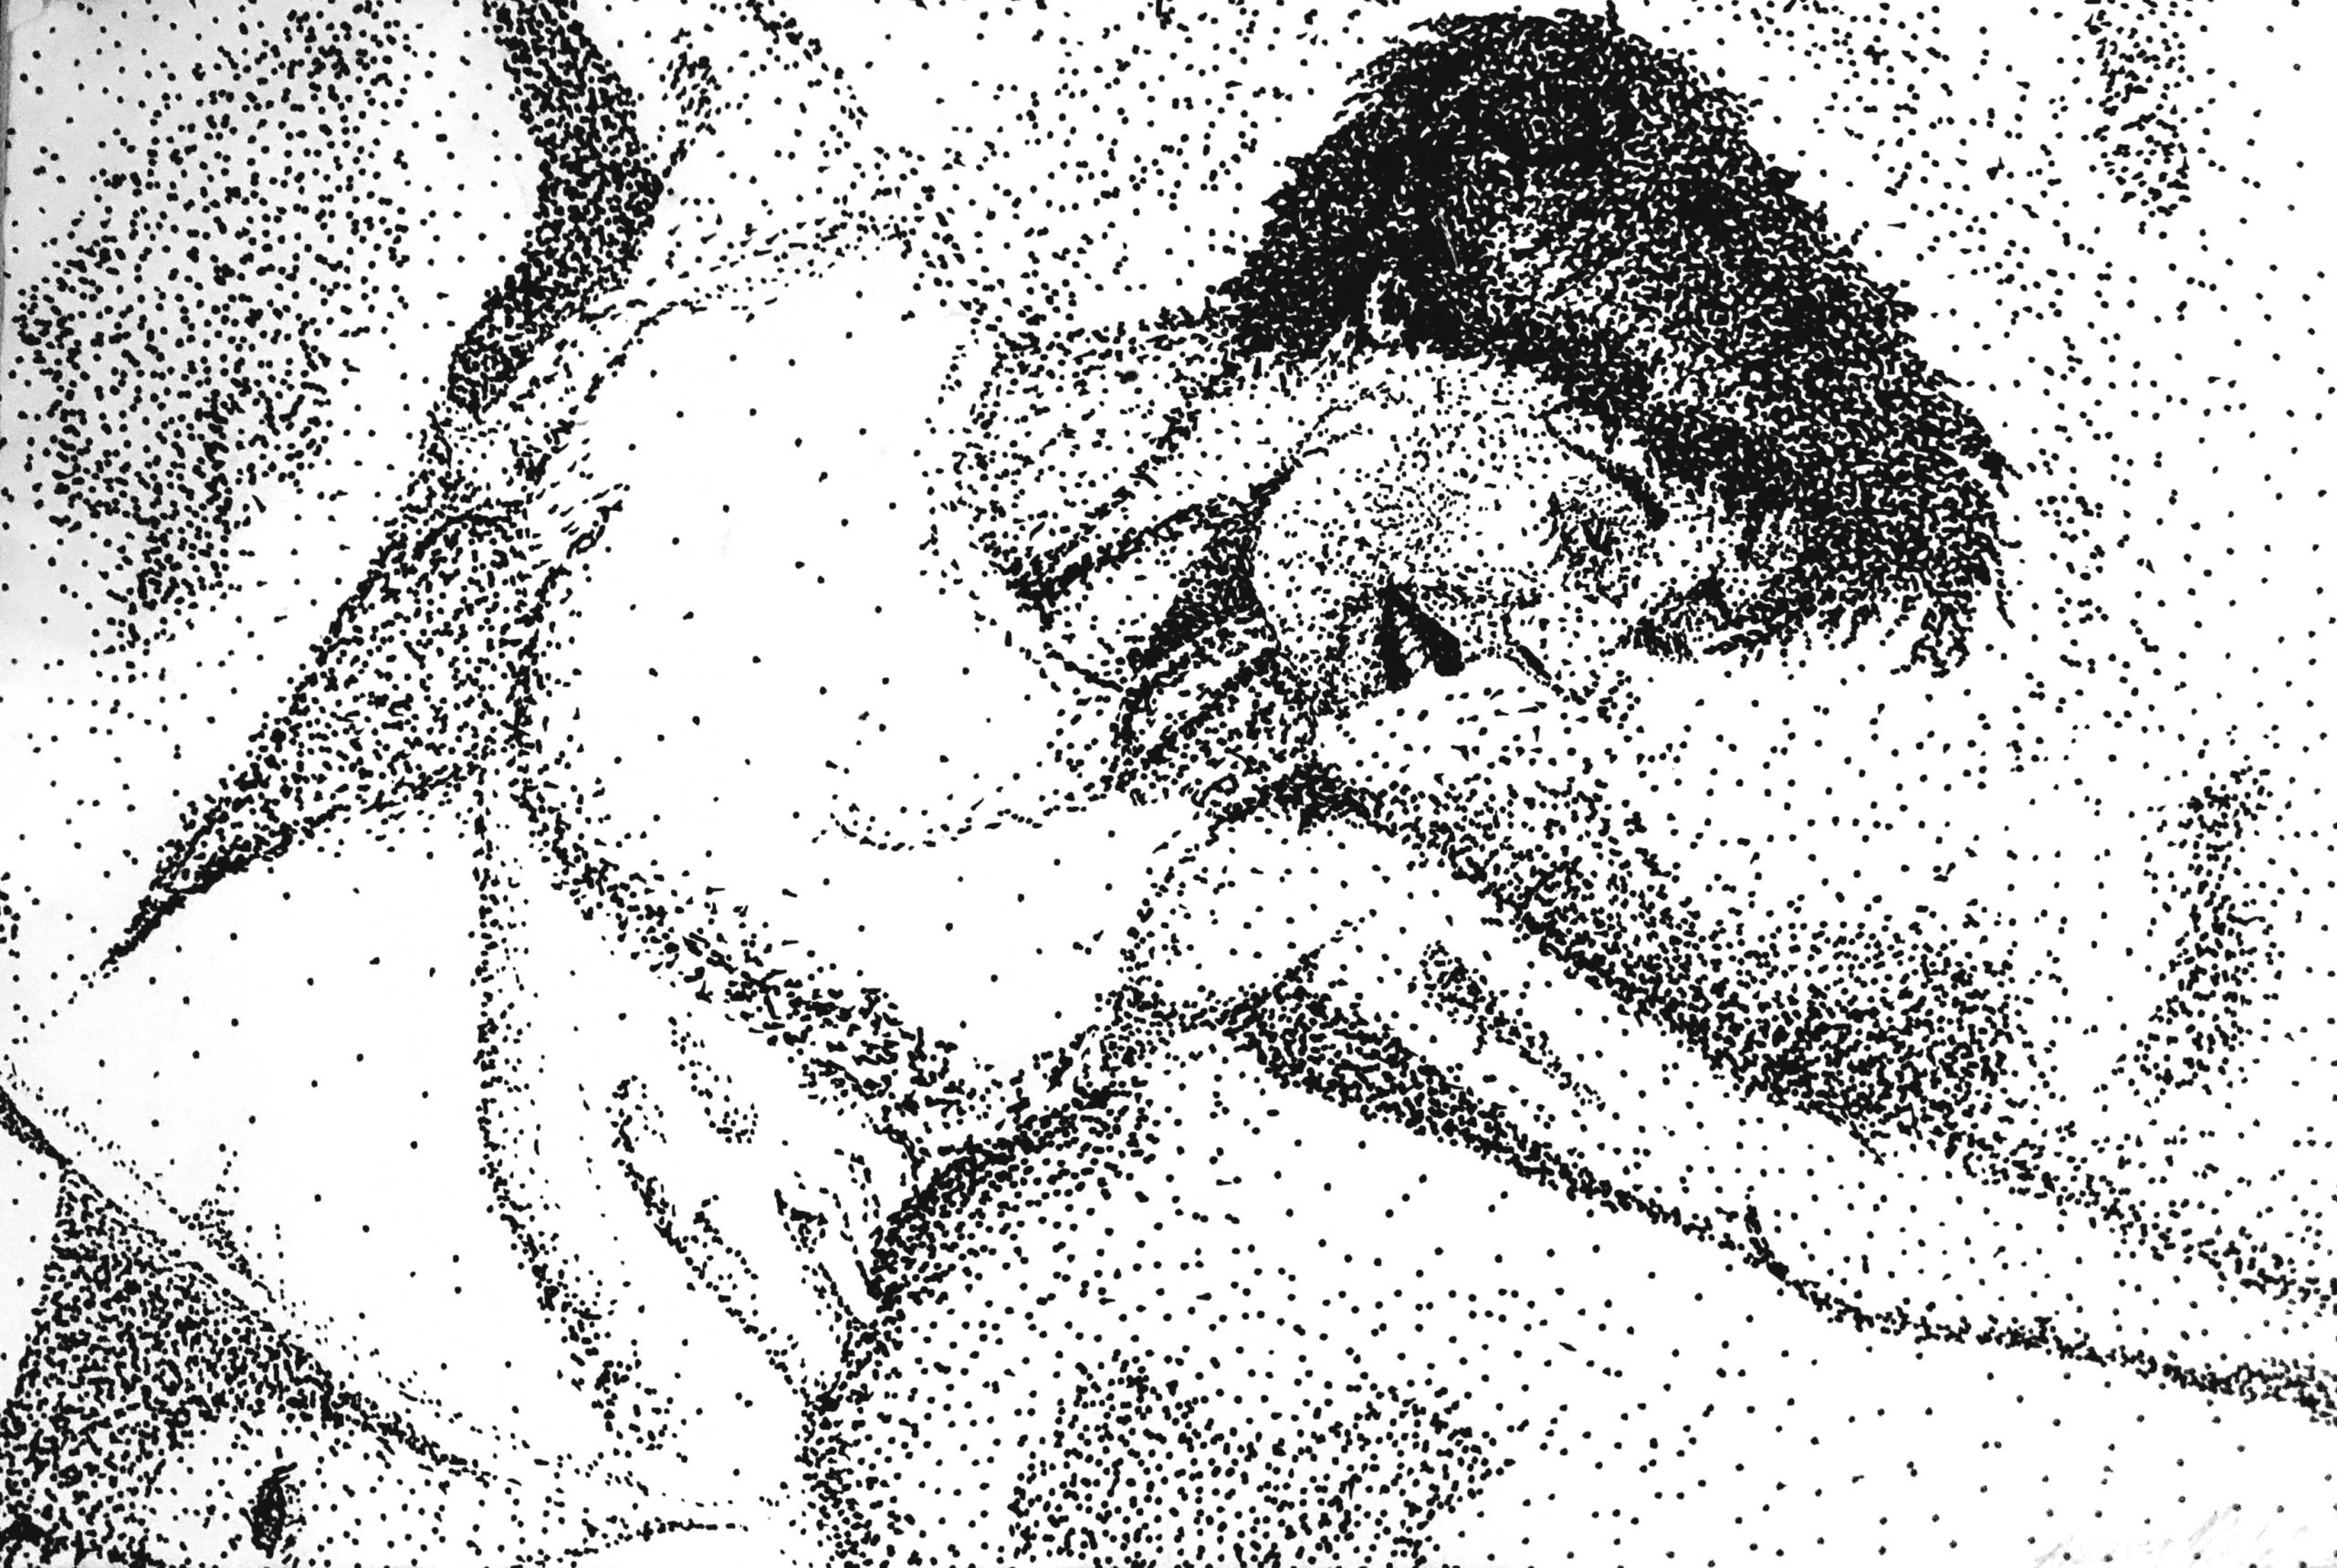
This method can take a bit more time to complete, as it requires building up many small dots to create the appropriate amount of shading. This method works more quickly if you use something that can create a bigger dot than a pencil can, such as a marker. Consider how the image below gives a great example of a drawing without line. Even with the absence of line, the image shows both shape and dimension.
More examples
Below are some additional examples that depict various styles of shading.
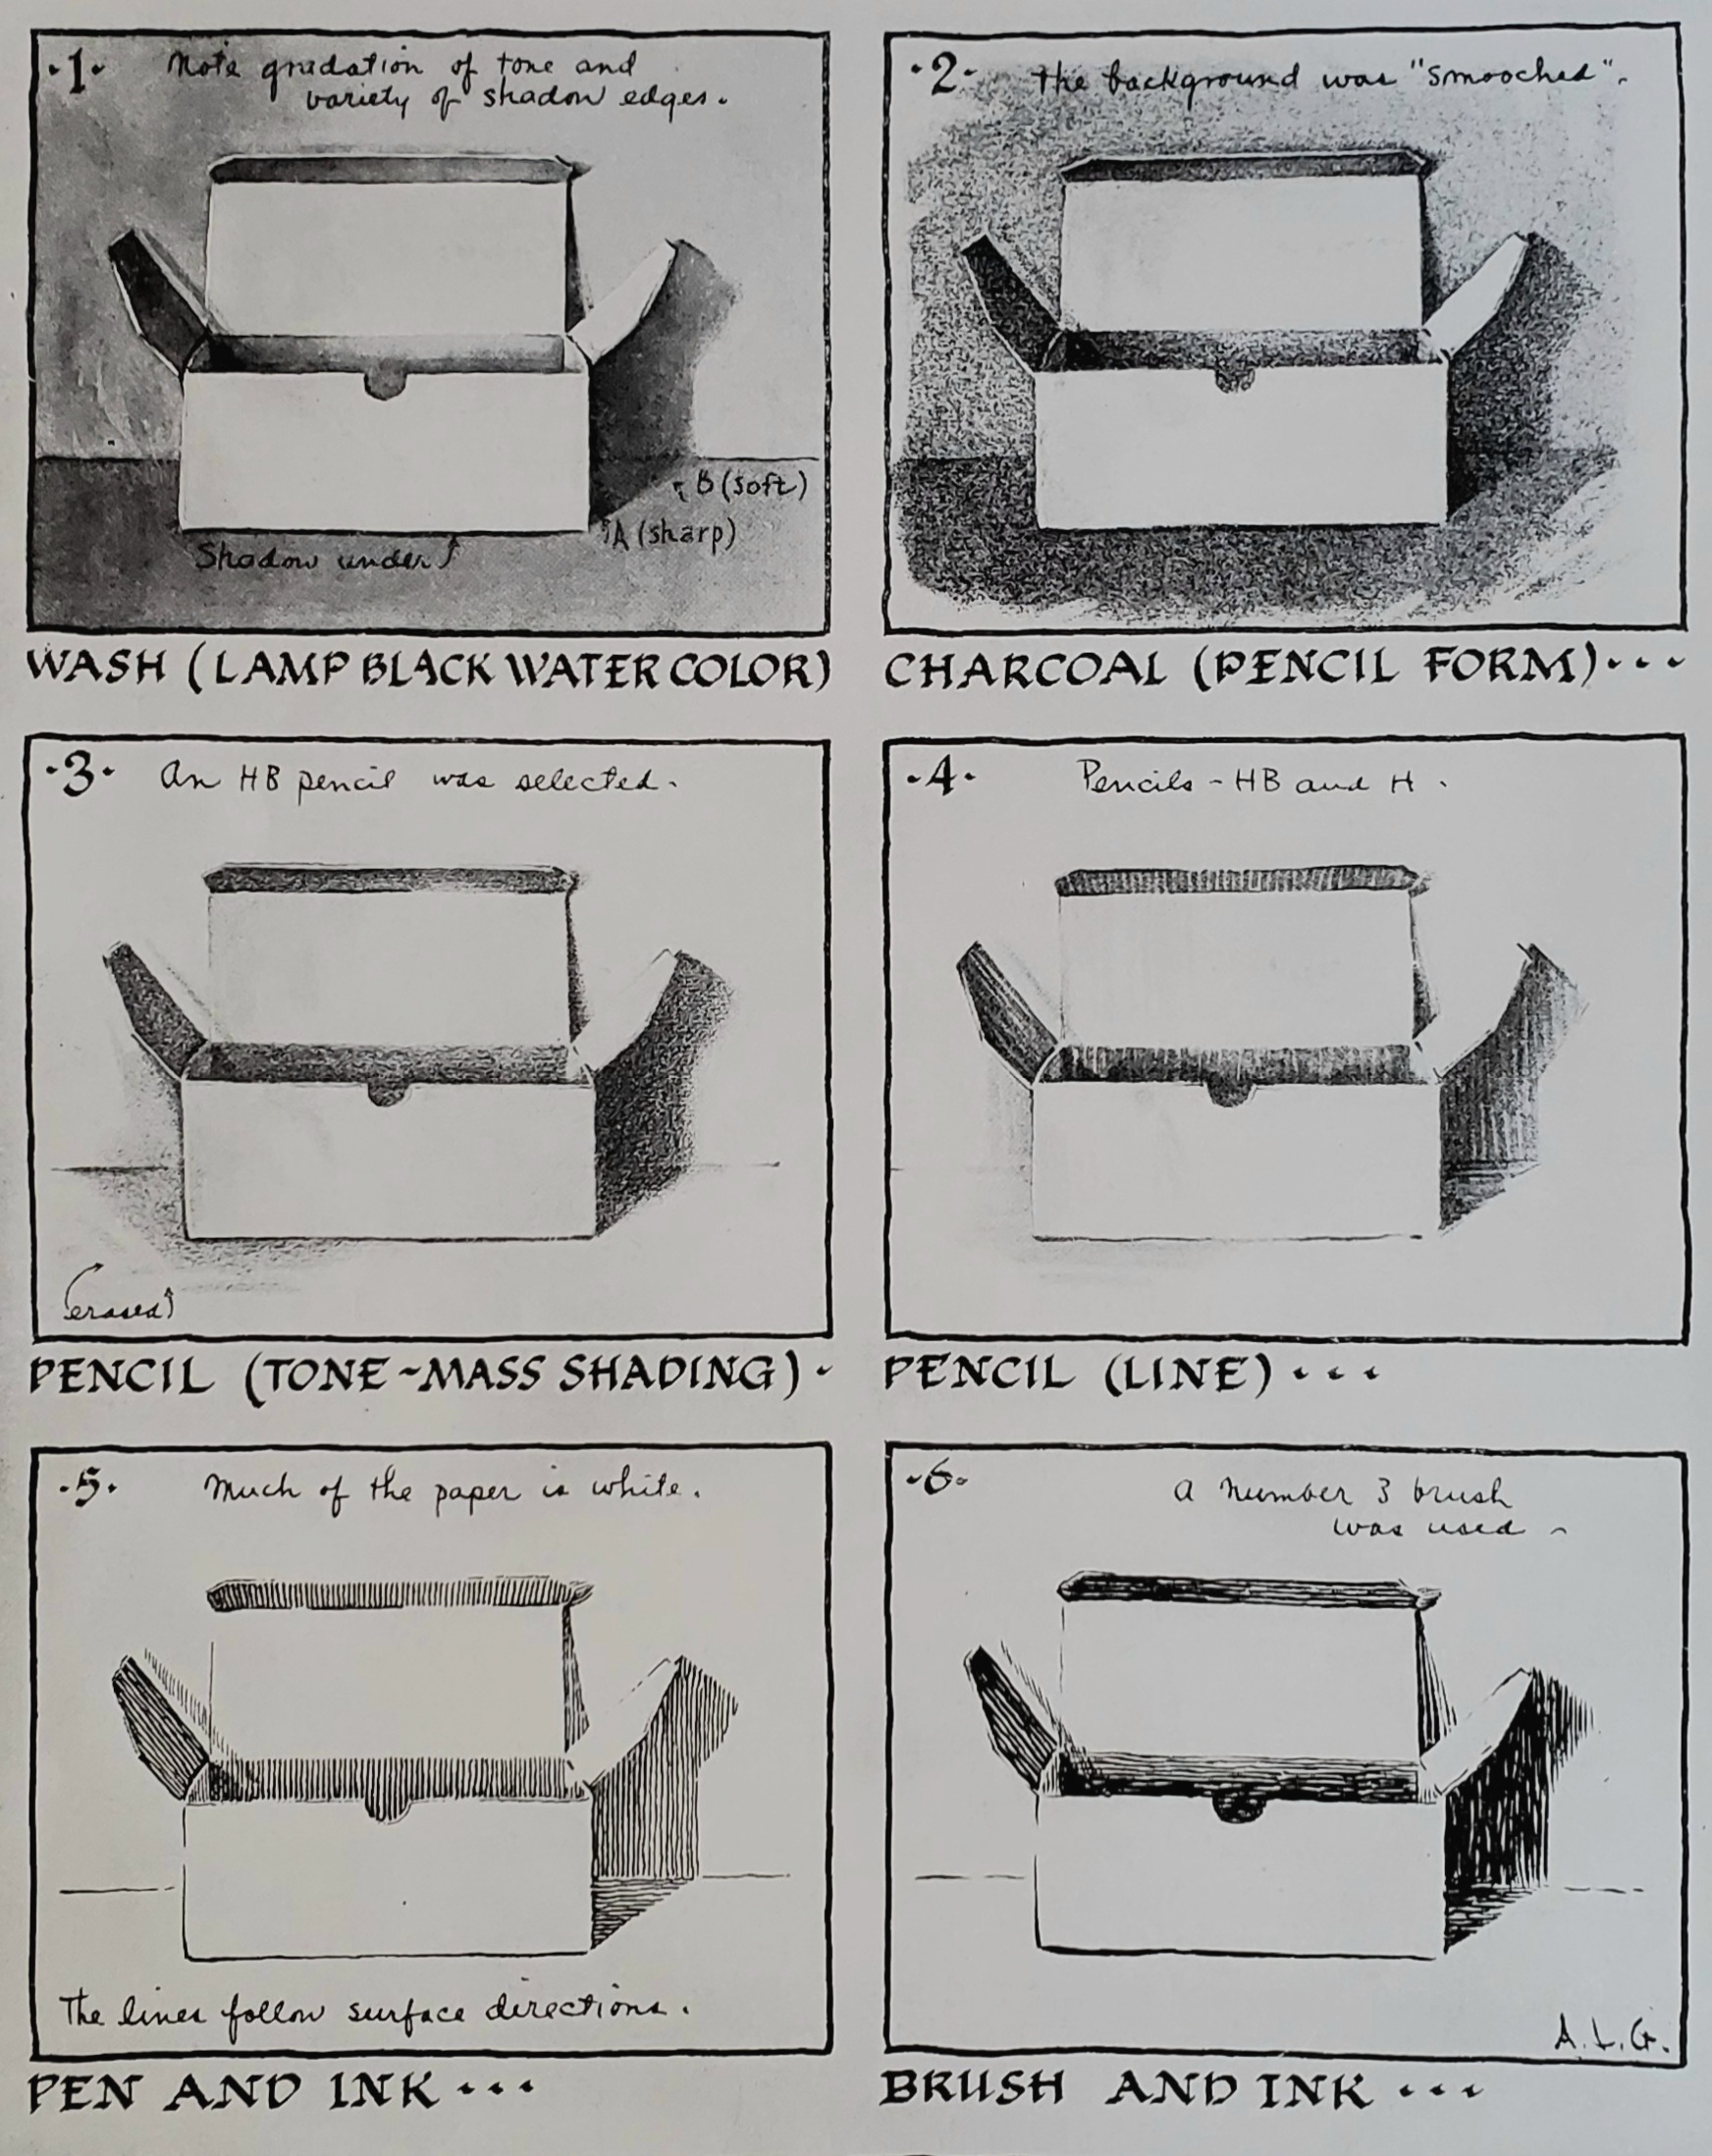
Note in the examples of open boxes how different shading can be applied to the same object. Notice how shading is the main way the object is defined.
Below are some good examples of how to use varying line direction and line weight to create shape, texture, highlights, and shadow.
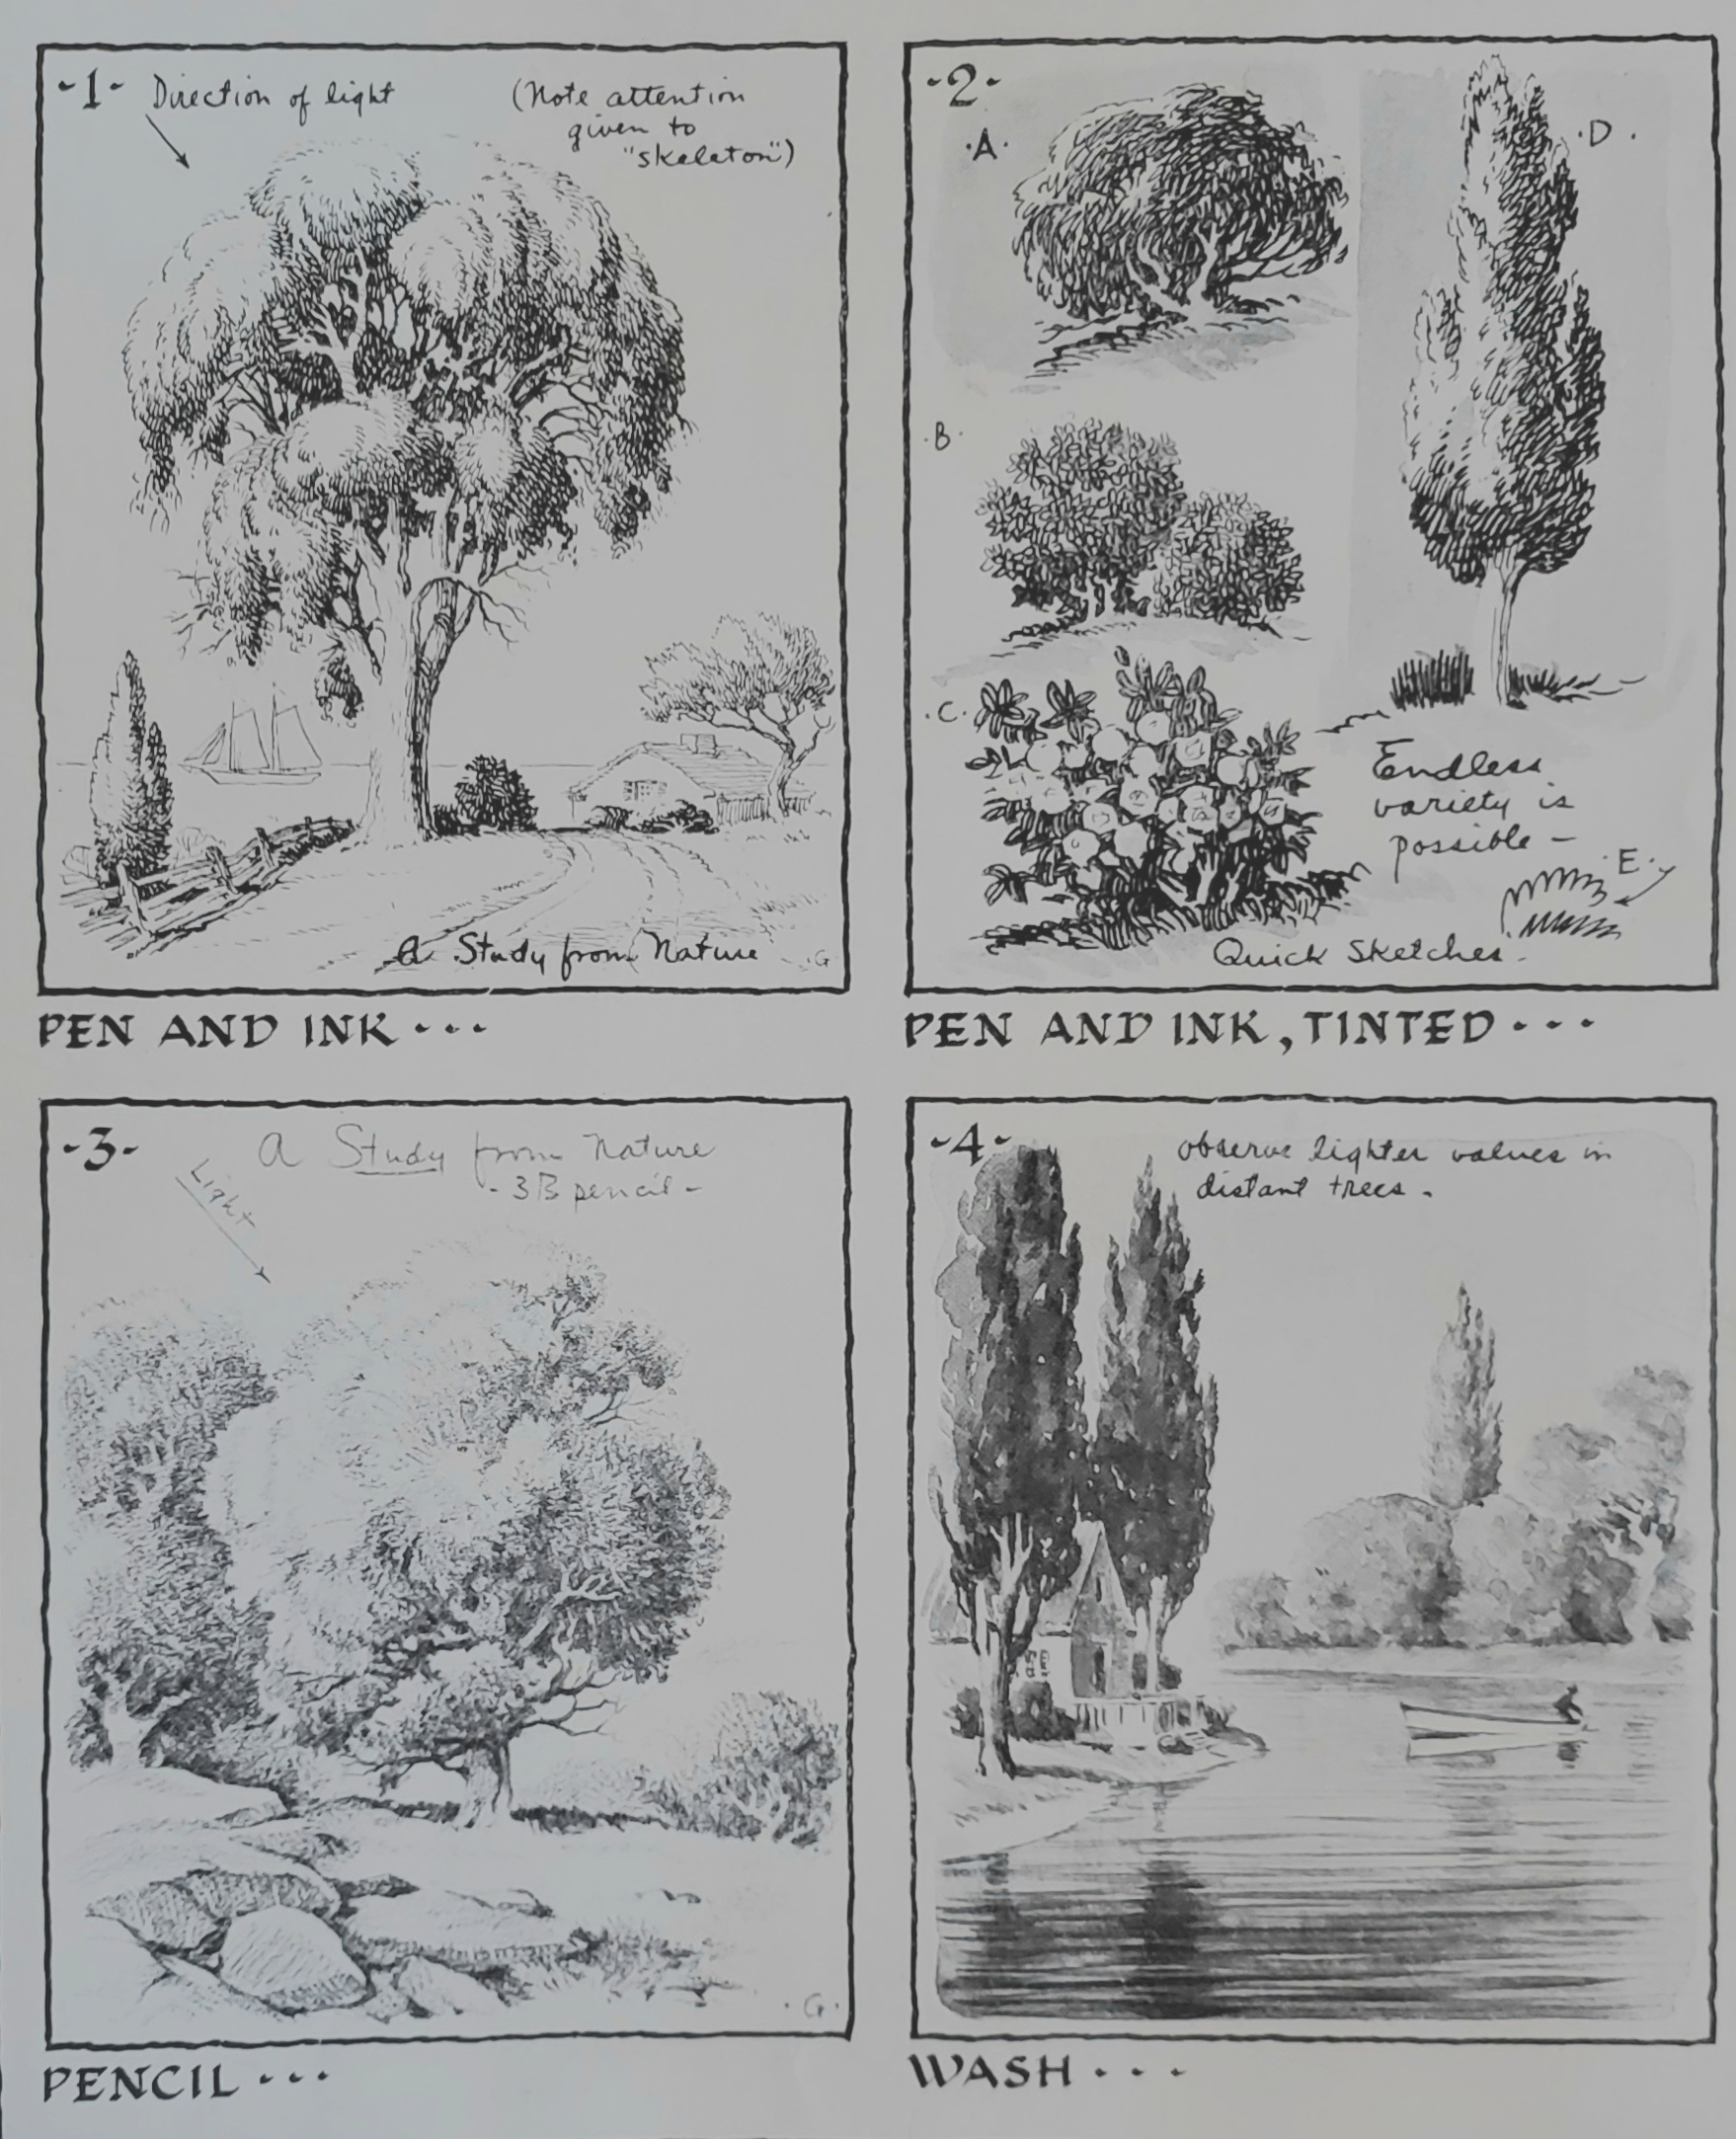
The examples below show how to create shading in conjunction with a tree’s various textures. How do you draw a tree with thousands of leaves when you cannot draw each leaf or minute detail? Generalizing or minimizing details that have a lot of clutter can sometimes be difficult. The type of shading used can help to both give shape and texture of these areas without getting carried away with every minute detail.
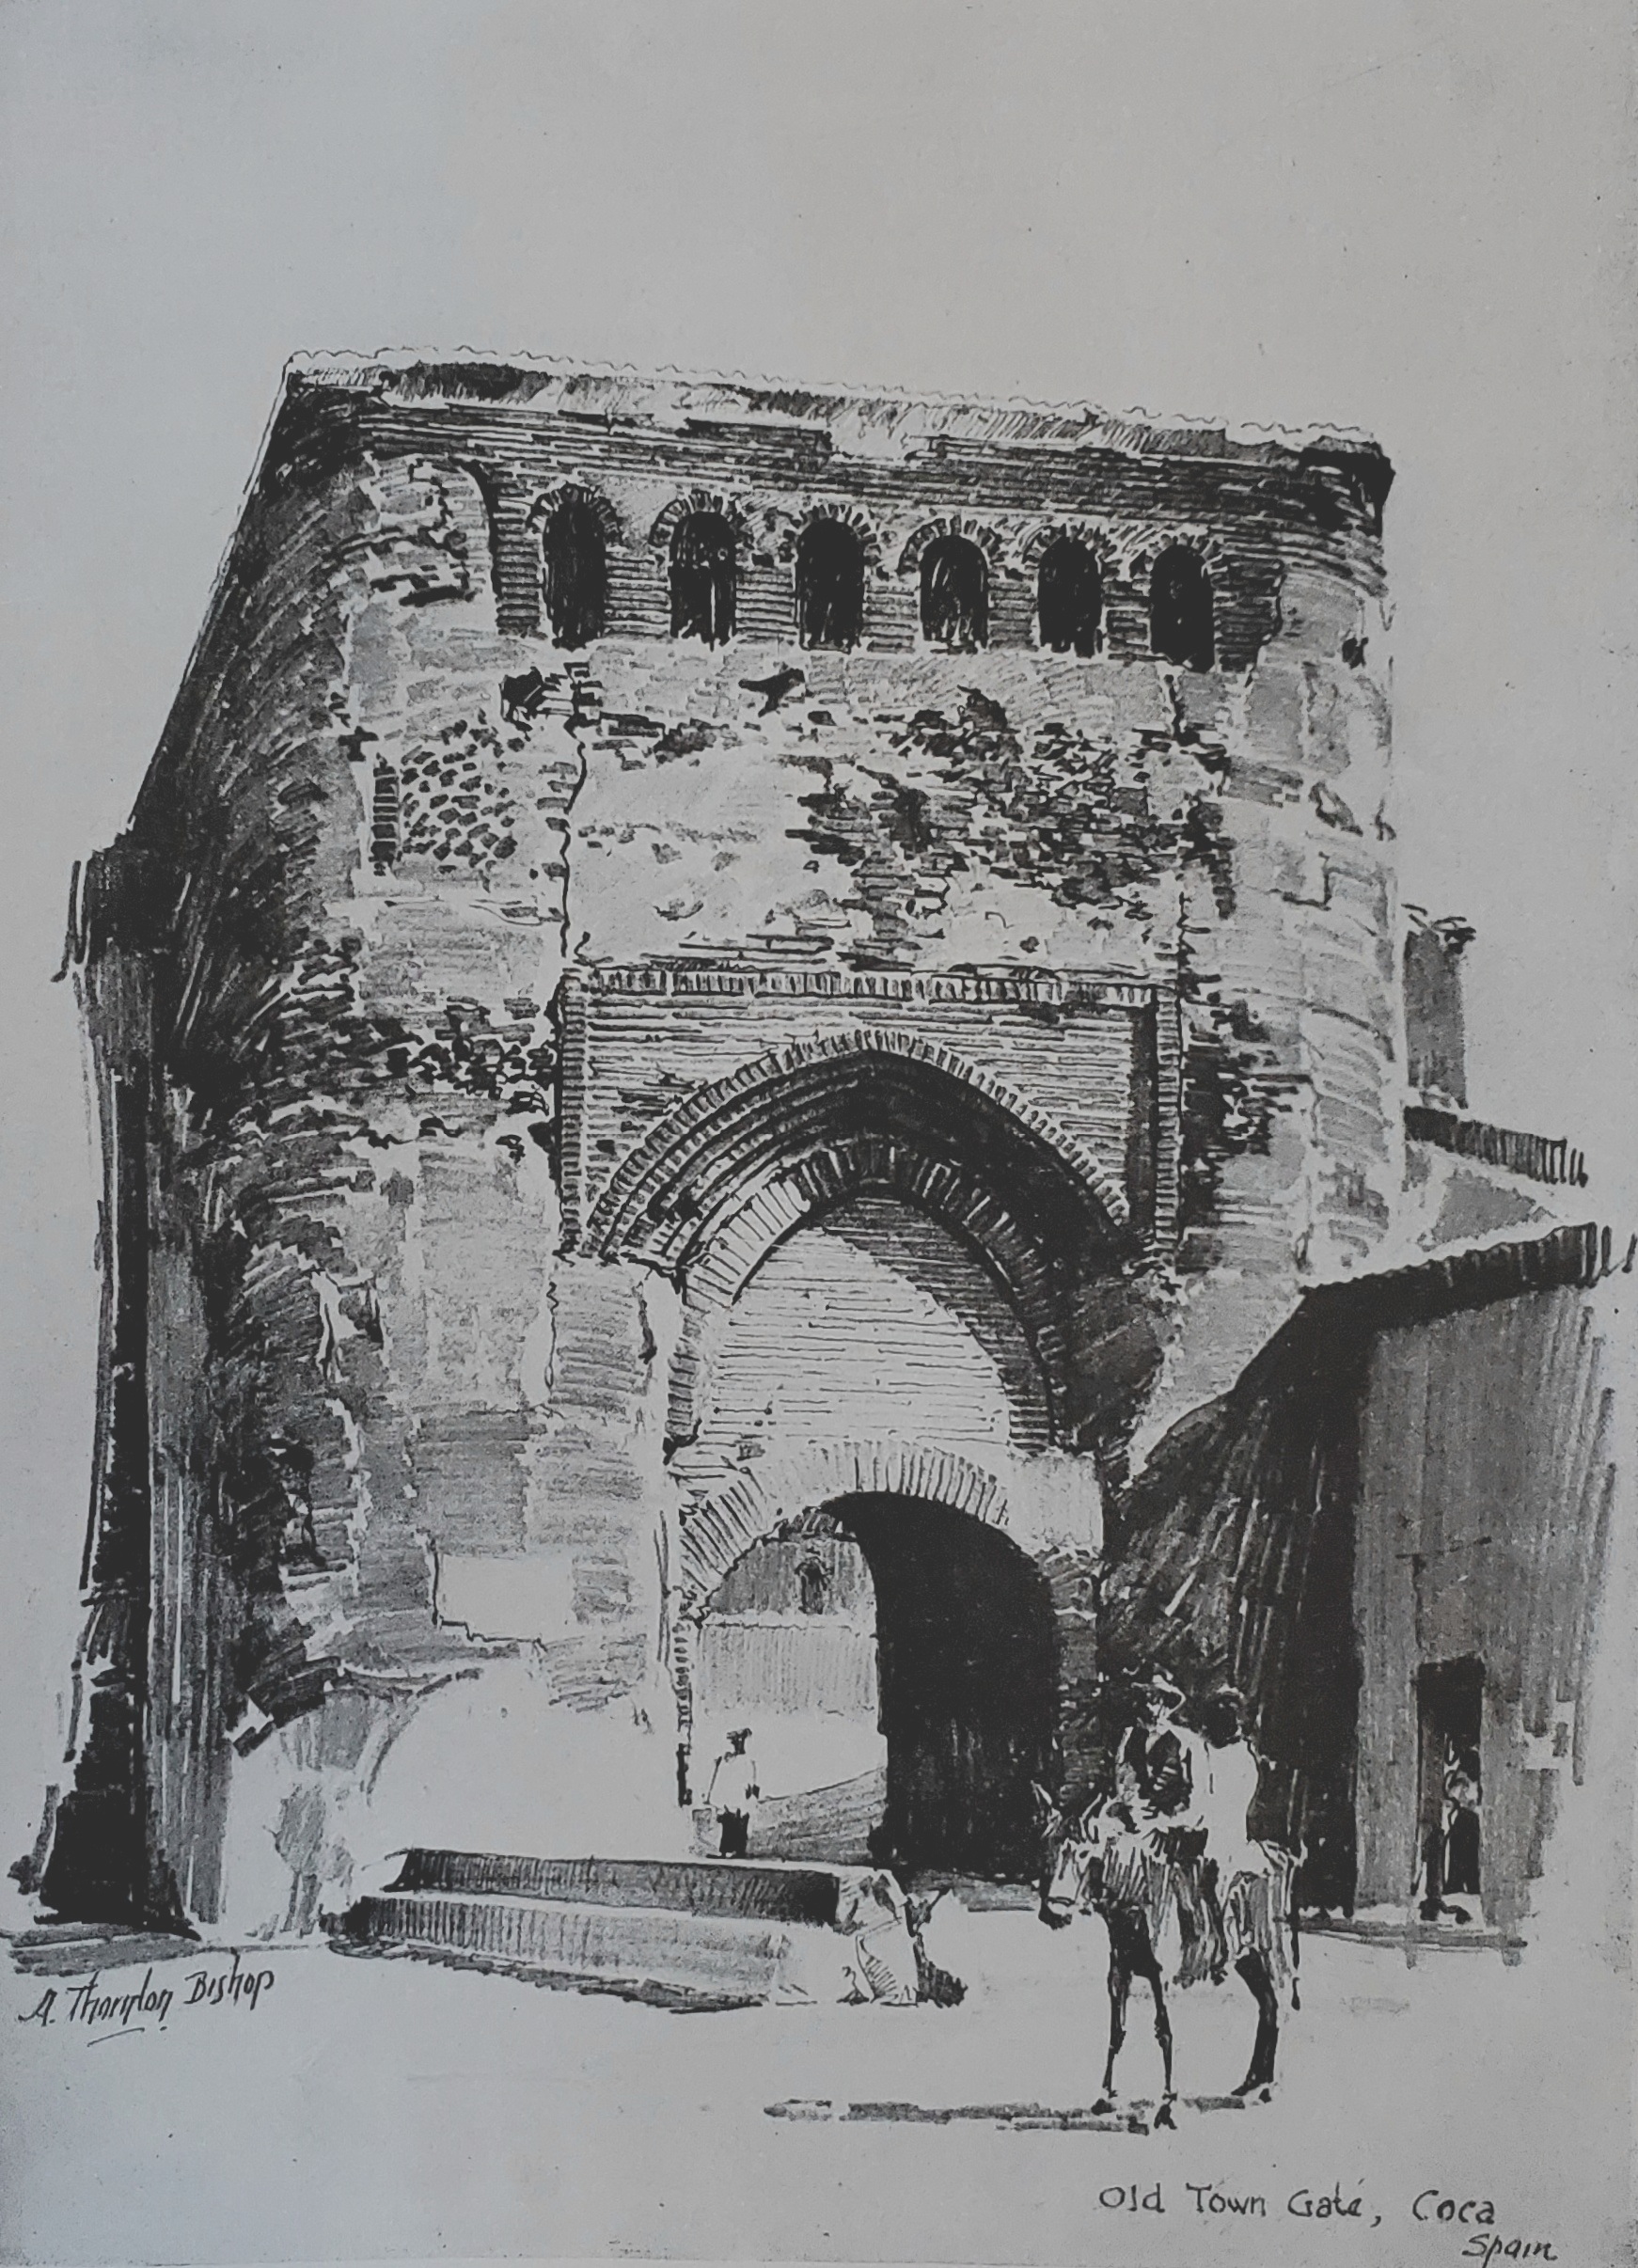
Below is a great example of how to create the desired texture of various building materials with shading, by varying line weight, thickness, and direction.
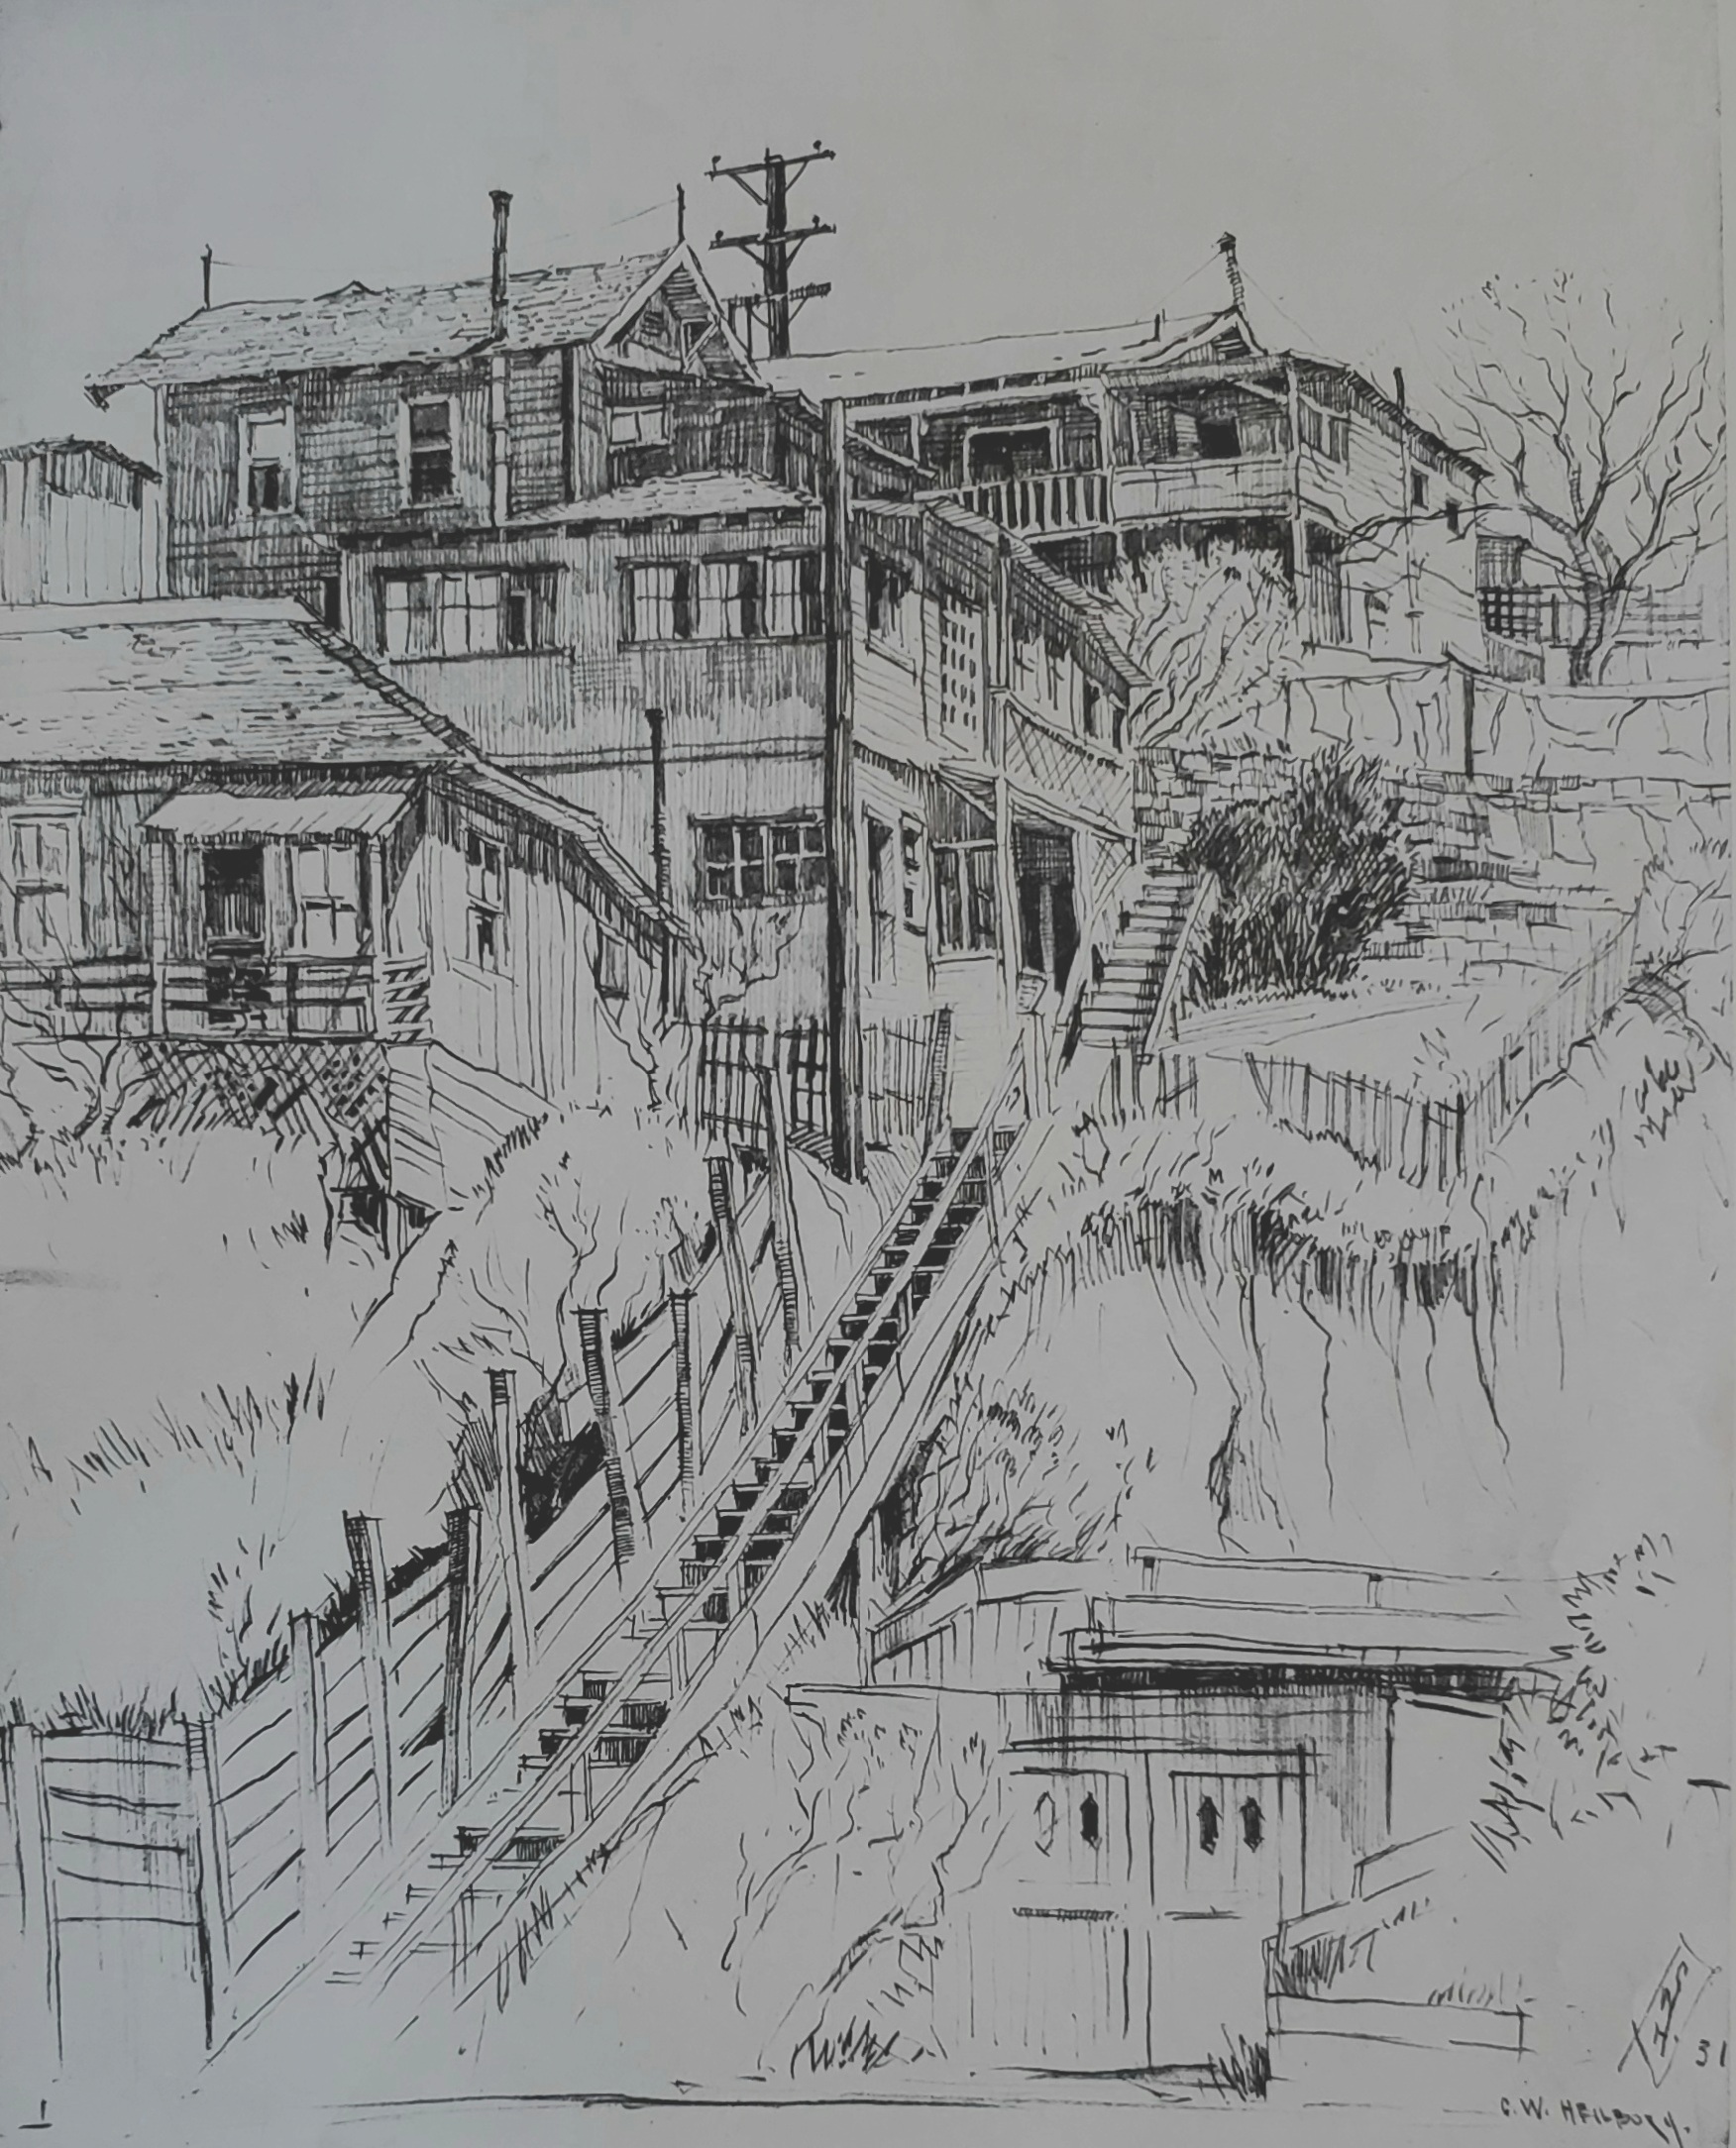
Below is another great example of using varying line types to create the desired texture.
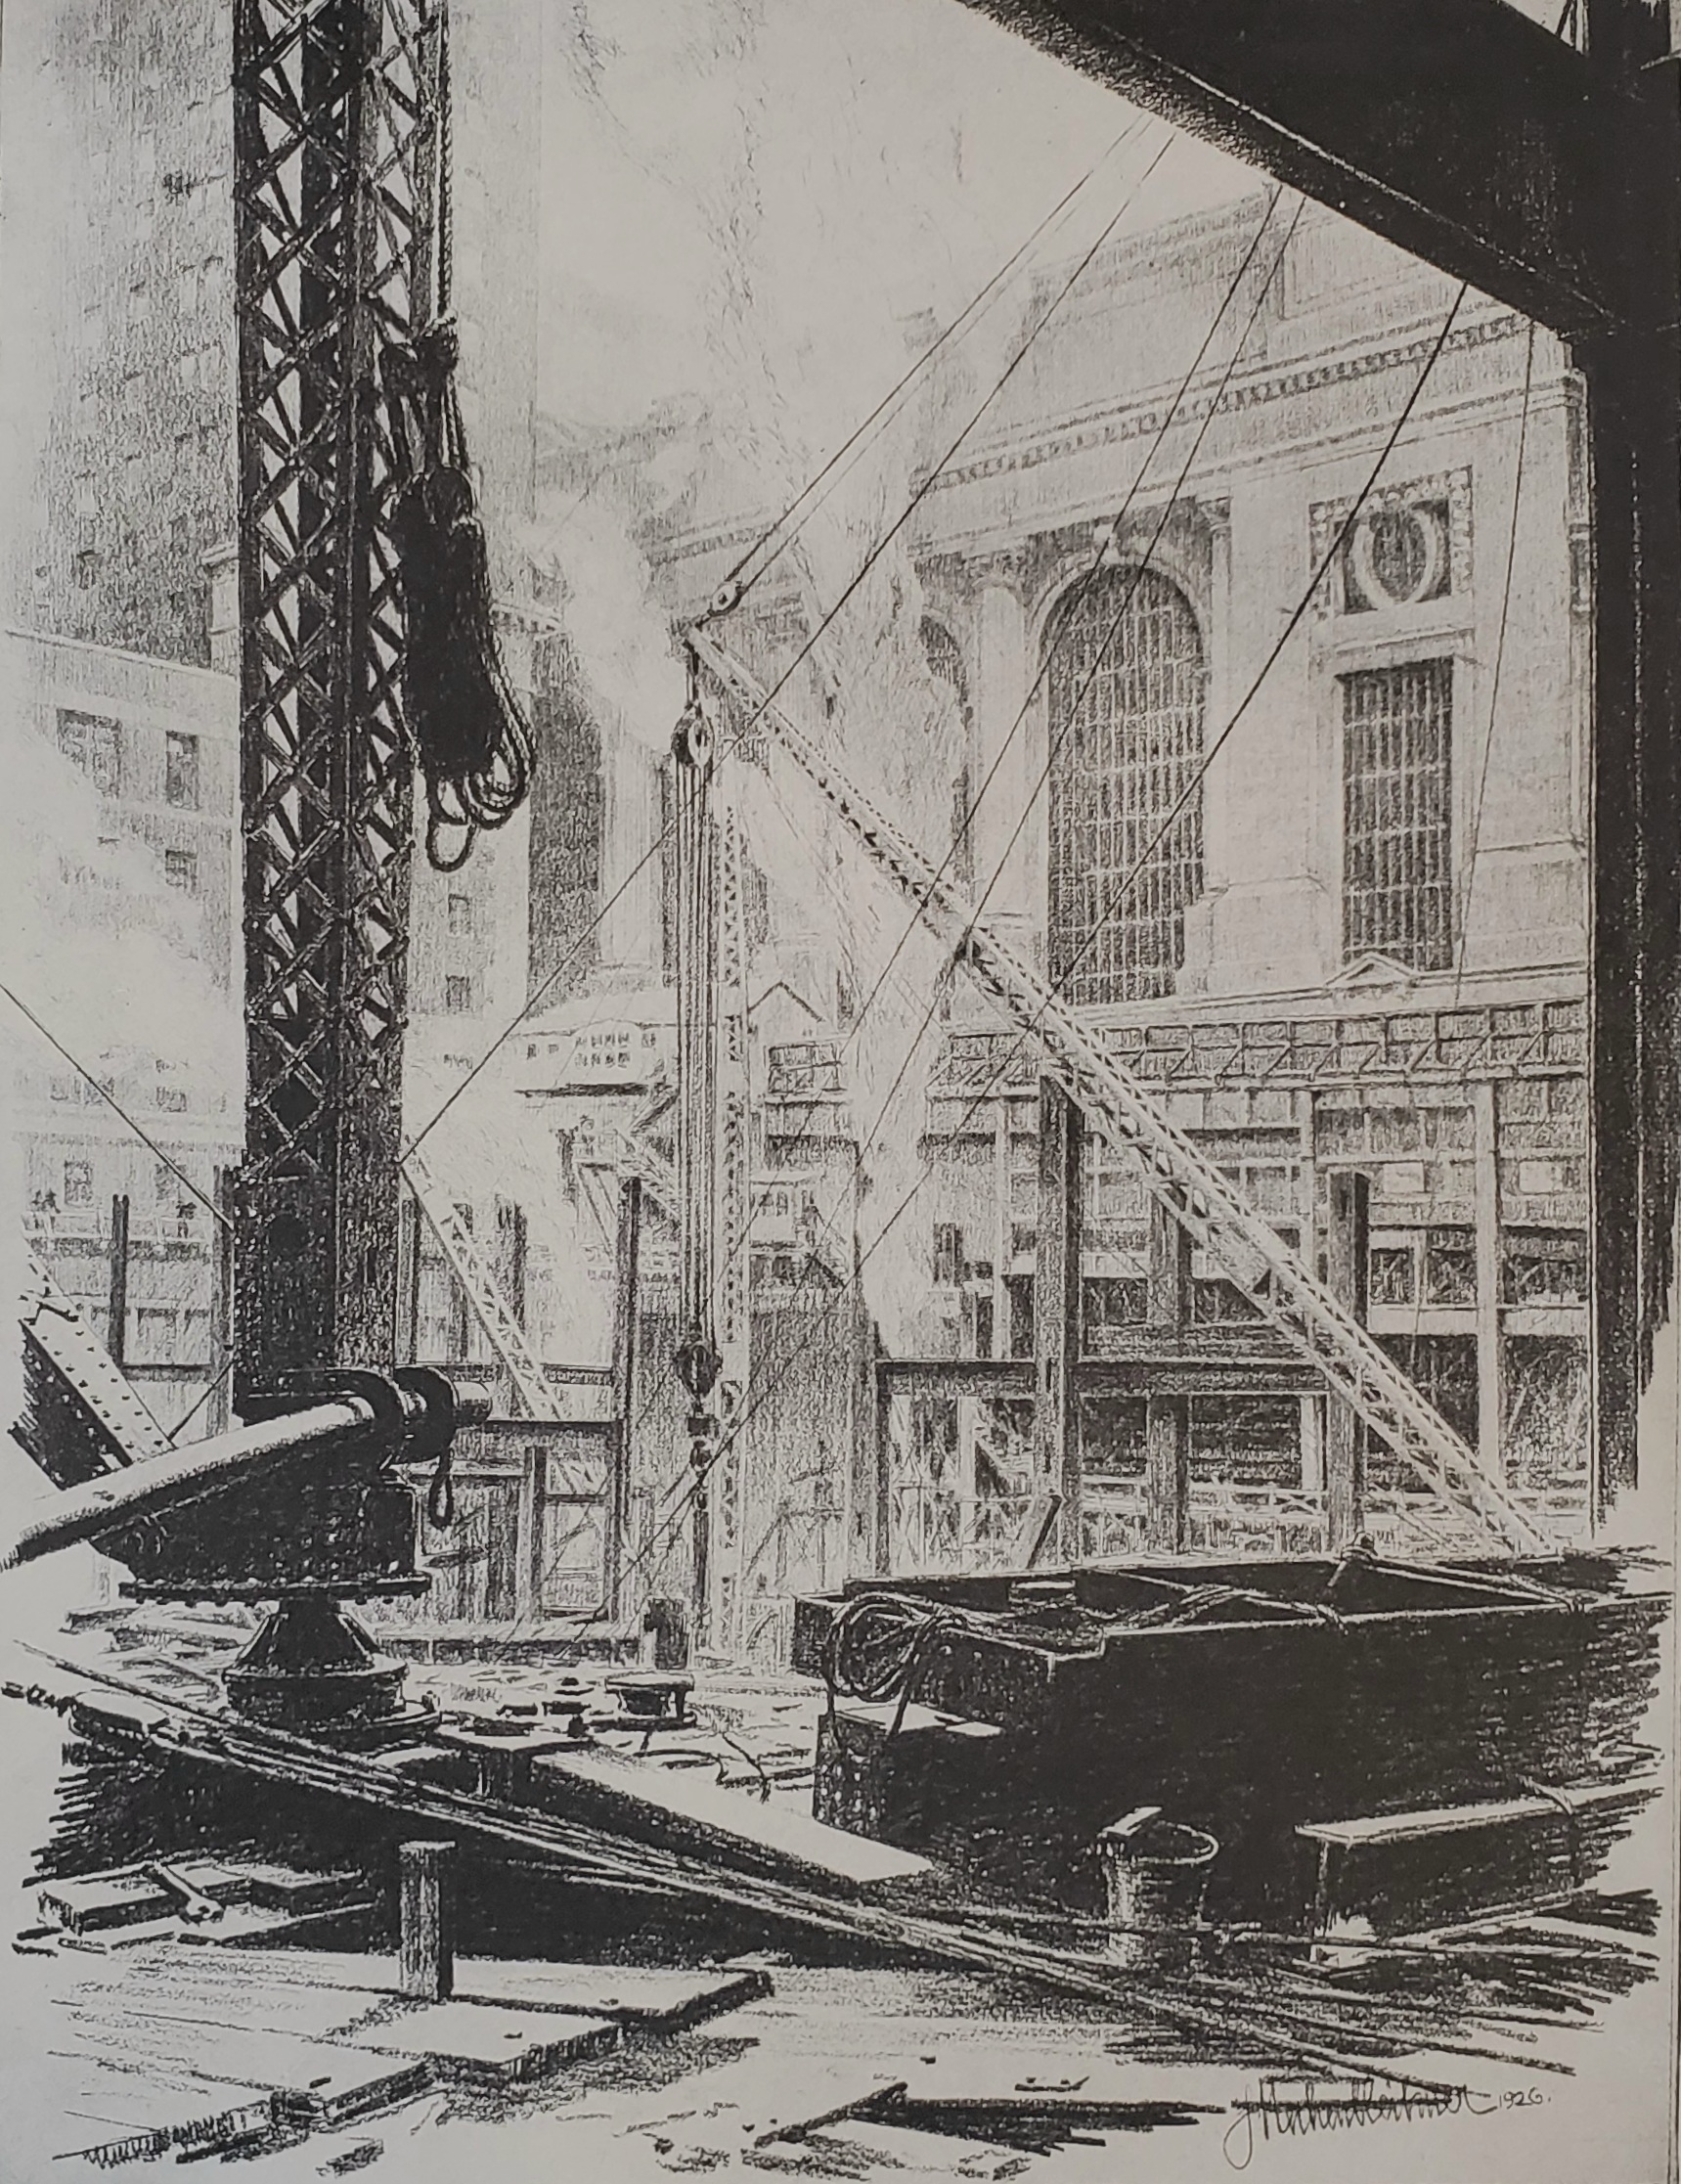
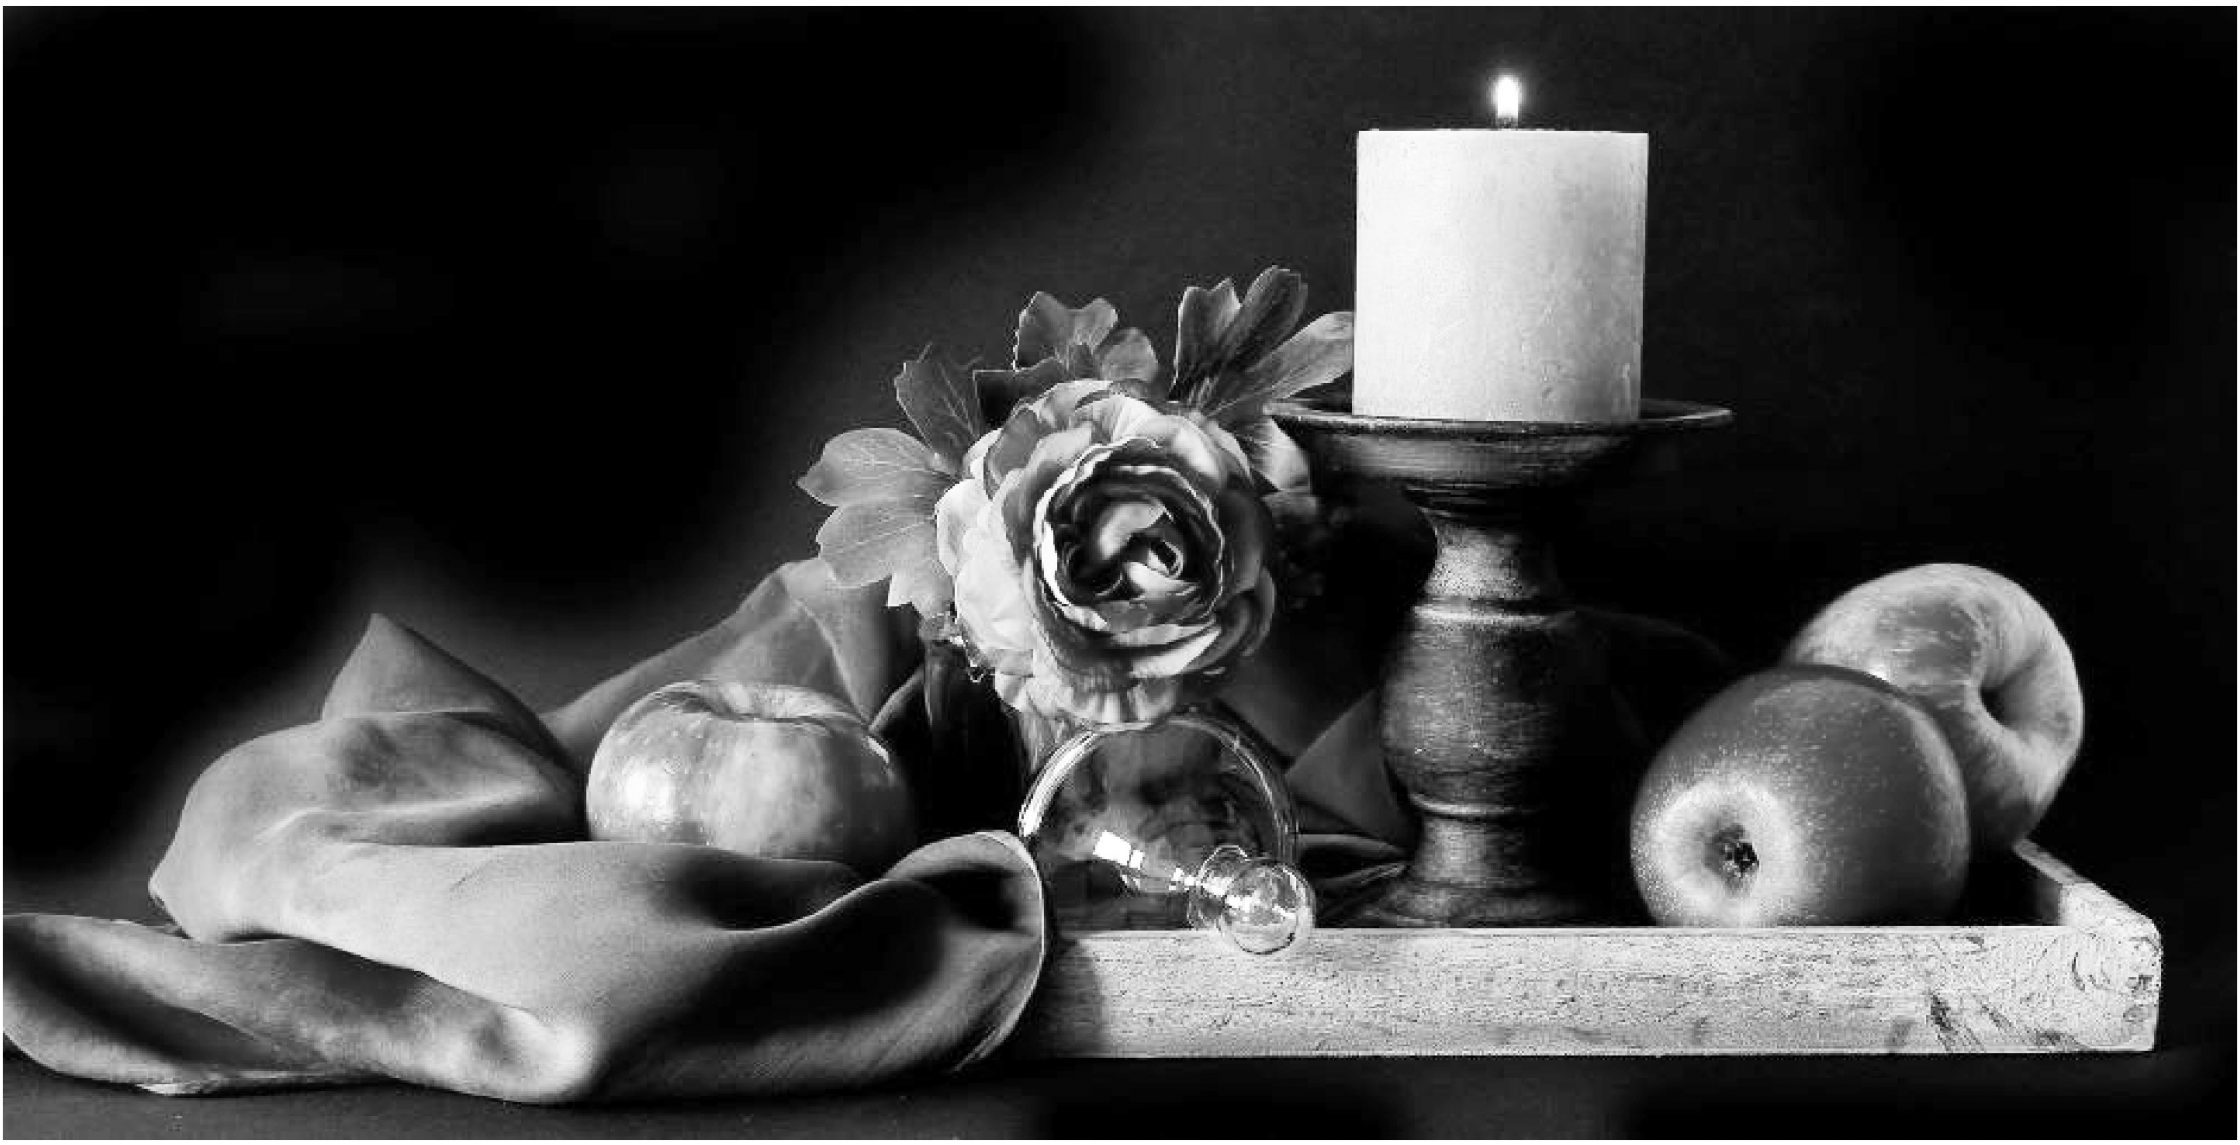
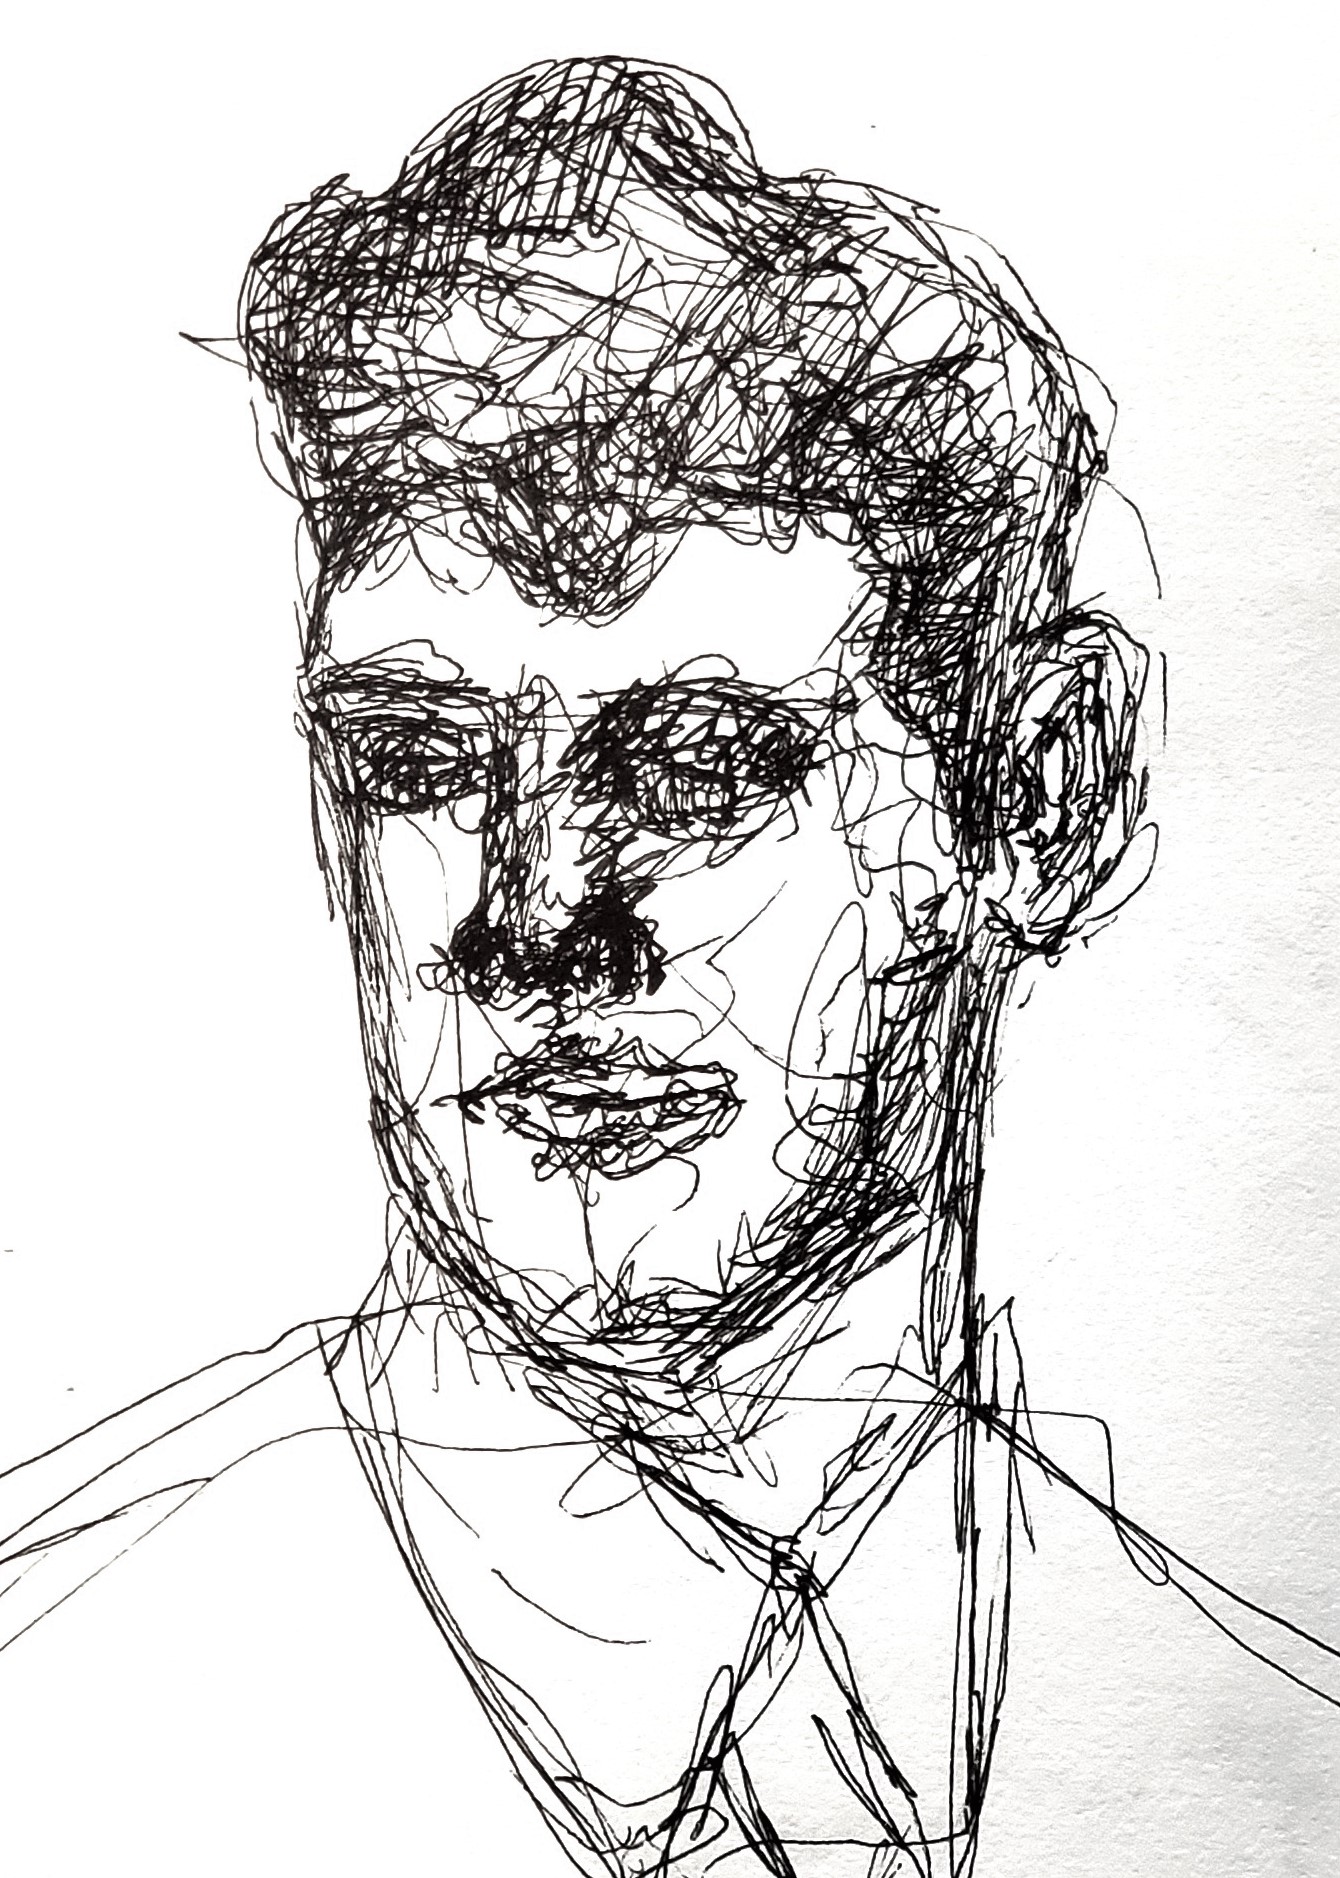
Below is a great example of a precise drawing with a high contrast between black and white. However, even though there are a lot of lines in this drawing, a border line does not define each object; the value of the object shade is what defines each object.