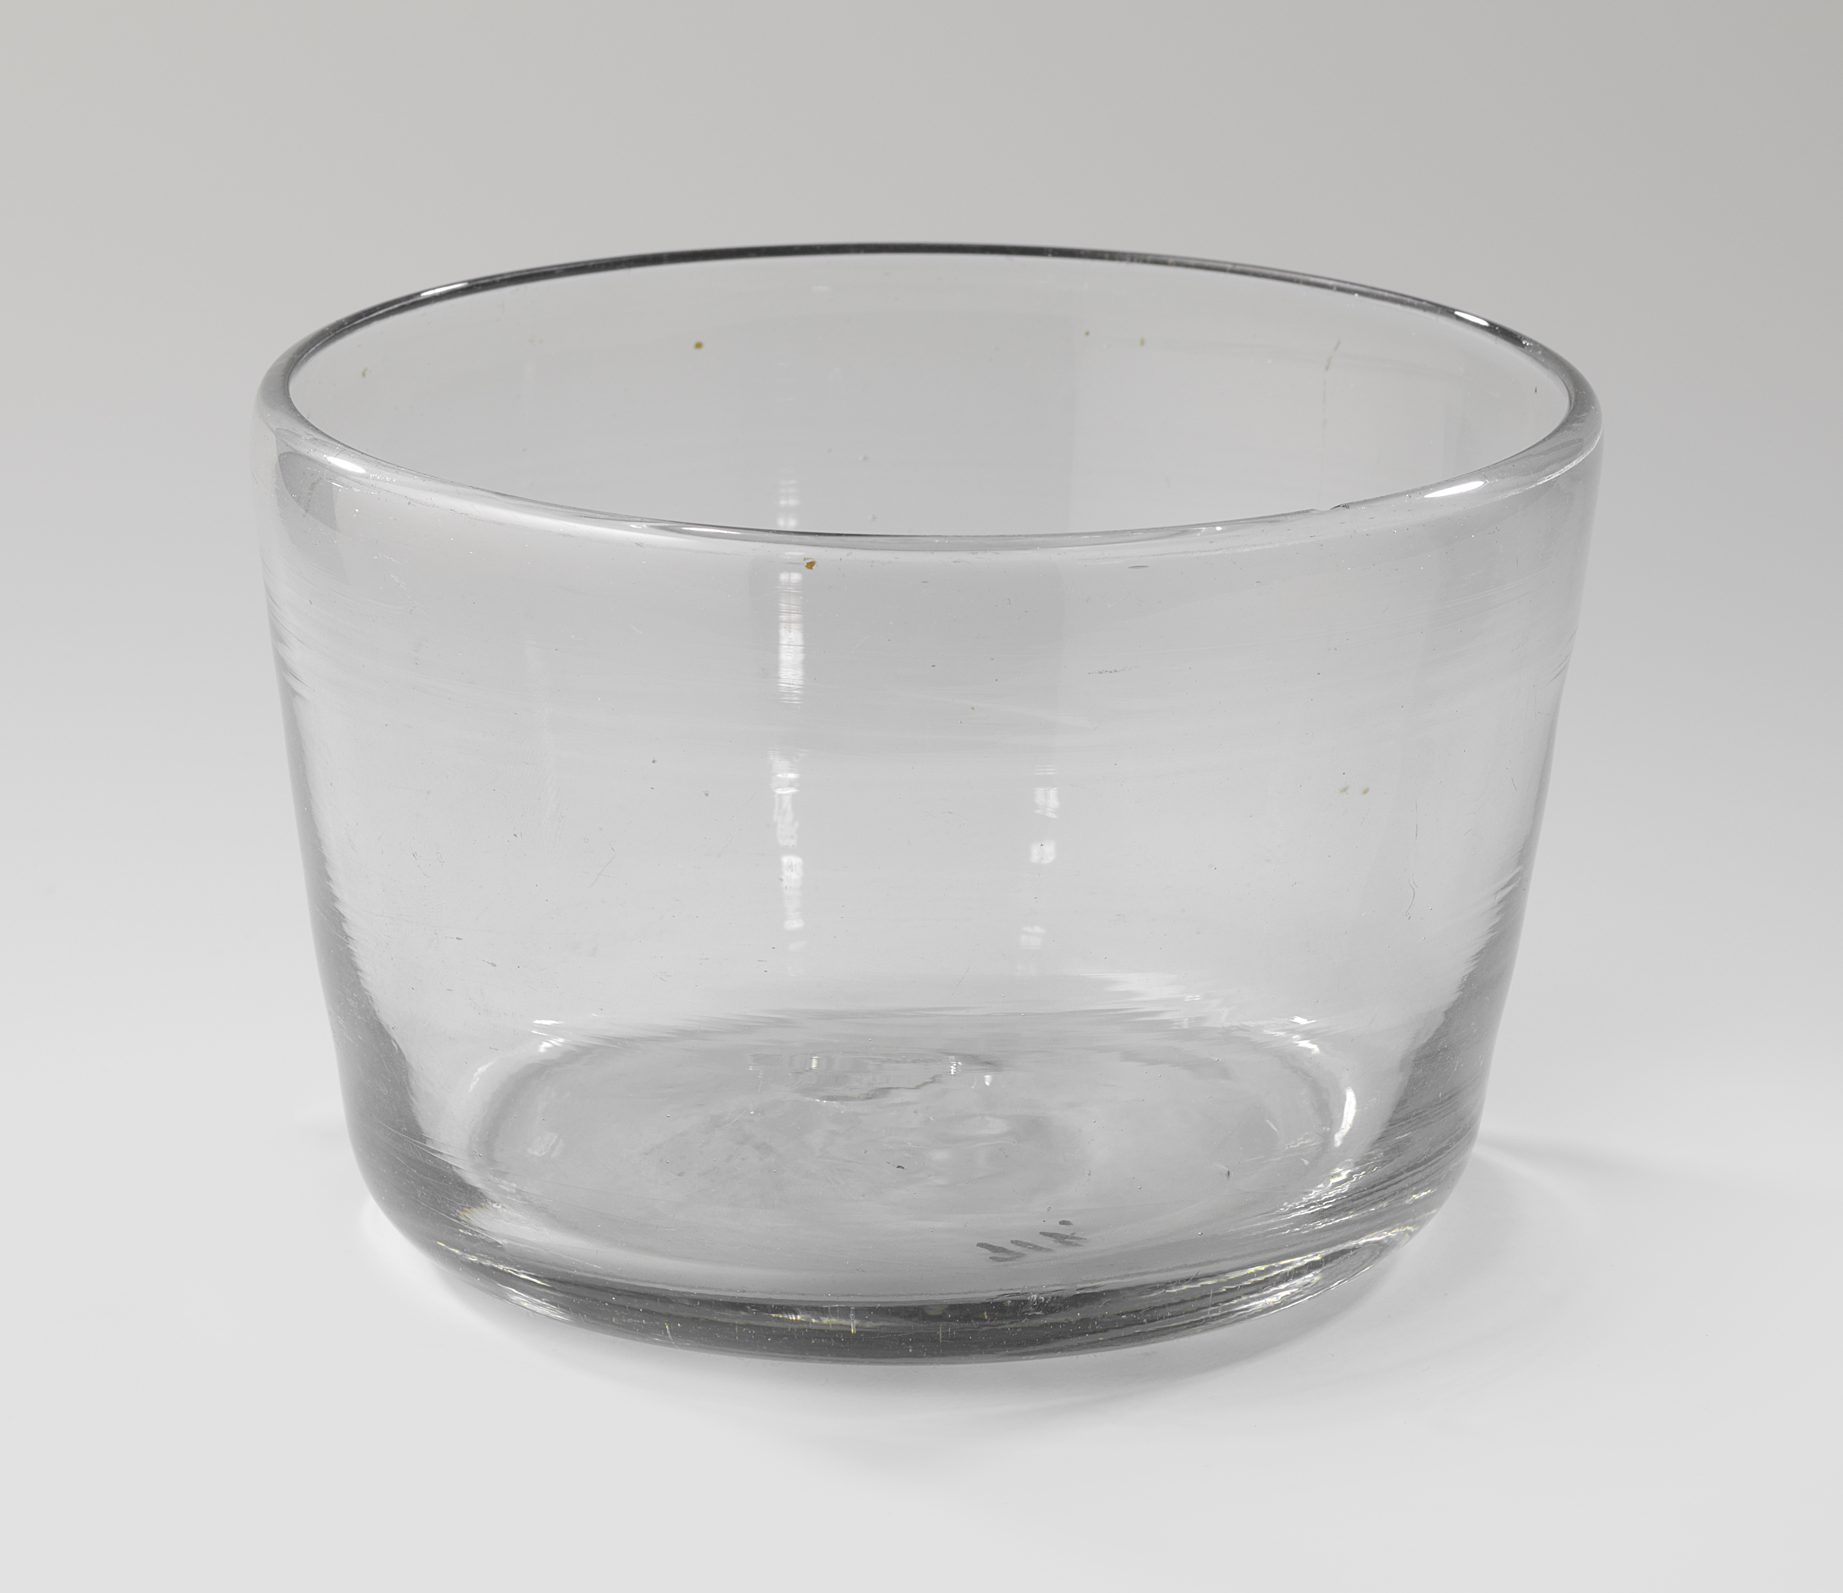
Exercise 6.4 Shading a Glass Object with Smudging
You will draw the object below and shade it with the smudging technique. The white areas where the light is reflecting off the object will be erased. The time to complete this object may seem like you are taking a long time to complete it. That is because you should really push the details and subtle variations in tone. You want to create this object with a soft appearance, with as little noticeable line as possible.
Materials needed:
- Pencils – 4H, HB, and 4B
- Stump
- Erasers – white and gray
Time to complete: 45 minutes
Instructions:
- Make sure your drawing of the glass object is as large as possible in the drawing area. There should be a space of about 1.5 inches from the object to the edge of the drawing area.
- First, the image needs to be carefully measured and a light line drawing of the main elements should be done with a 4H pencil. Make sure the drawing is as large as possible in the drawing area.
- Be careful to make sure the two ellipses are the correct dimensions and the shape is symmetrical.
- Start shading with the hard pencil first by any means (hatching, cross-hatching, scribbling) that works for you. Be careful to not create lines that cannot be smudged away.
- It may help to use the side of your pencil lead and not the tip. Dark areas will be added with a softer pencil towards the end of the drawing process.
- Be aware of how the glass is formed. Notice the cylindrical direction of the shading around the diameter. It will help to continue an elliptical motion with your hand while adding material, erasing, or smudging.
- Be careful not to darken the white highlighted areas. However, if you do, you can erase them after if the pencil marks are not too dark.
- The area can now be smudged with the stump and can be done at any point.
- Since the hard pencil will only get so dark, this may be a good time to start with your HB pencil and add some of the darker middle gray areas. Now you have your light and middle tones shaded and smudged. All that is missing are the very dark tones.
- Prior to adding the dark tones, it may help to erase any light highlights, if needed. If you didn’t push very hard, they will disappear. Use either the white eraser or the gray eraser. Remember, the gray eraser is not really meant to be rubbed on the paper. With the gray eraser you will push the eraser into the paper and the graphite will stick to it and be lifted off. If small areas need to be erased, the gray eraser can be shaped to a point to lift out material in the tight location. Also, the harder you push on a gray eraser, the more graphite will be pulled out. A light touch with the eraser will not pull much graphite out.
- Slowly add in the darkest areas with the soft 4B pencil. The area around the rim may need a sharp point, since it is such a thin area.
- Smudge some more and add material as needed, or subtract any areas that do not look right.
- Did you forget the shadow? How else will we know it’s not floating in space? The shadow will help show it is anchored to the ground.