
Blood Pressure Auscultation
Measuring a BP can be tricky at first, but with a little practice you will be nailing these with ease.
- Gather your equipment.
- You will need a properly sized BP cuff. Sizes range from child, adult to large adult. Choose the right size by using the circumference indicators on the cuff. Hint – unless they are very large, or very small you will use the adult size.
- You will also need a stethoscope to auscultate (listening via stethoscope) the BP. There are methods to obtain a “palpated BP” or “BP by palp” that does not use a stethoscope. More on that later.
- Ask the patient to remove any bulky clothing. You can take a BP over T-shirt material; anything more needs to be removed.
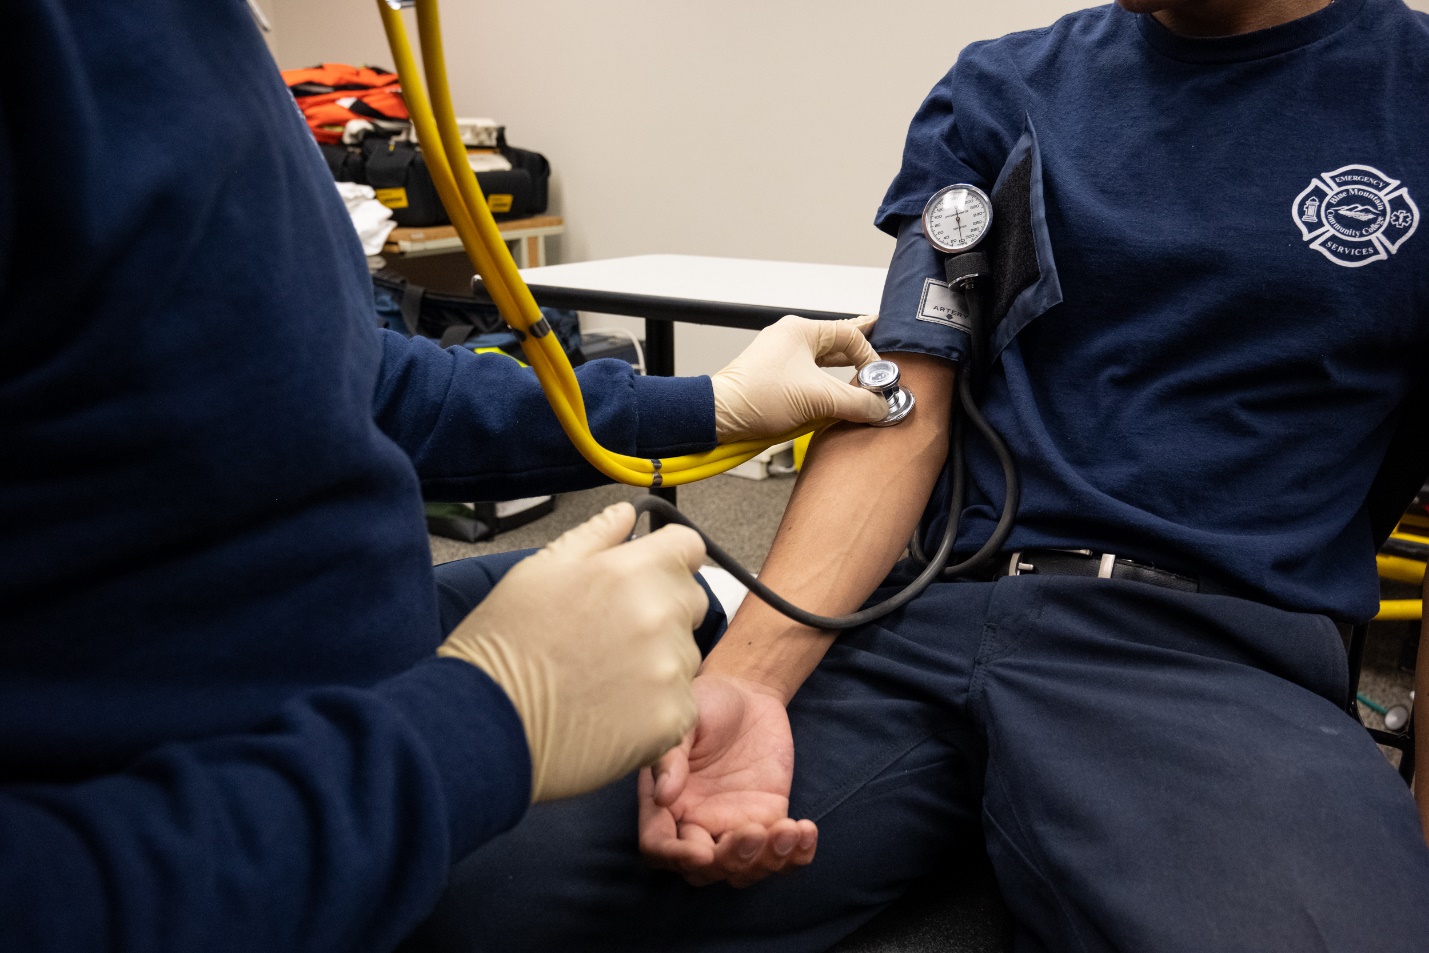
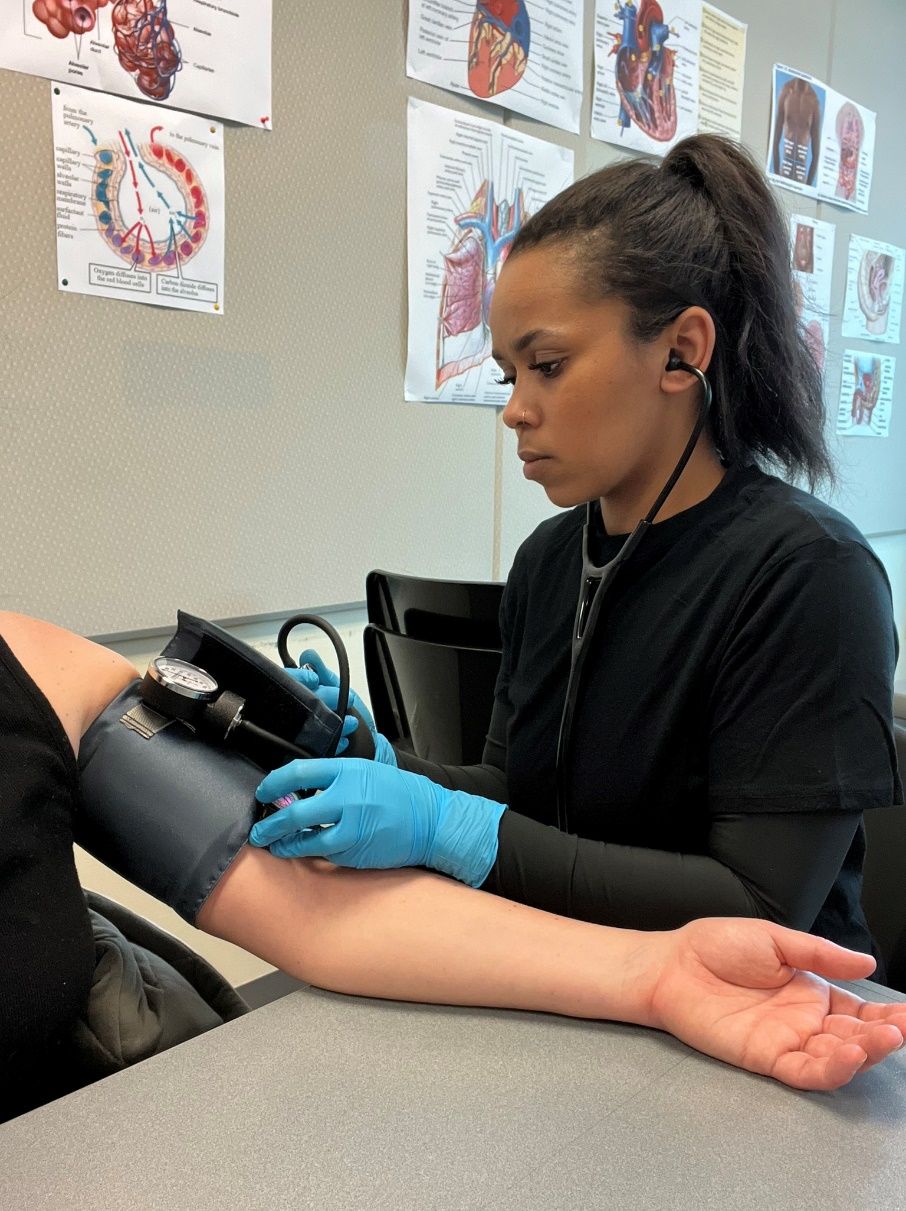
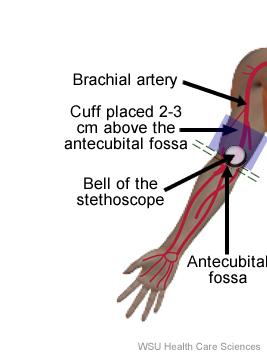
- Place the cuff around the desired arm. You will want to line up the “Artery” marker on the cuff with the anterior/medial (front/middle) side of the patient’s arm.
- Encourage the patient to turn their palm up. This brings the brachial artery to the surface making it easier to hear. Also encourage them to relax their arm.
- The patient should not be suspending or holding their arm in the air. Encourage them to rest their arm on their leg or allow the limb to be supported.
- Place the gauge in a comfortable position to view it while your hands are full. This may mean keeping it attached to the cuff or might be on the bench next to the patient or clipped to their shirt. Whatever works for you.
- Put on your stethoscope, ears facing forward. Test the bell if necessary (tapping the bell of the stethoscope with fingers to confirm you can hear the tapping sound).
- Place the bell on the anterior/medial portion of the patient’s arm.
- Pump up the cuff. Don’t over-do it. Most people feel discomfort around 160mmHg. Pause there and listen. If you hear thumping, keep pumping. Otherwise, it’s time to move to the next step.
- Release the pressure slowly as you are looking at the BP gauge. This part takes some getting used to. Your speed will quicken as you get practice, but for now, take it slow.
- While looking at the BP gauge, you are listening for a “thump”. When you hear the first “thump” the number on the gauge at that time is your systolic number.
- Keep deflating, when you no longer hear the “thump”, the corresponding number on the gauge is the diastolic number.
- Write it down! Don’t trust yourself to remember any vitals after the call has ended.
|
BP |
1 |
2 |
3 |
4 |
5 |
6 |
7 |
8 |
9 |
10 (instructor) |
|
Blood Pressure Recording |
|
|
|
|
|
|
|
|
|
|
|
Initials |
|
|
|
|
|
|
|
|
|
|
The original copy of this book resides at openoregon.pressbooks.pub/emslabmanual. If you are reading this work at an alternate web address, it may contain content that has not been vetted by the original authors and physician reviewers.
