
Spot Pulses
Spot pulses are used to quickly assess for the presence of a pulse and not necessarily recommended for assessing a pulse rate. This technique helps you quickly determine if CPR is indicated.
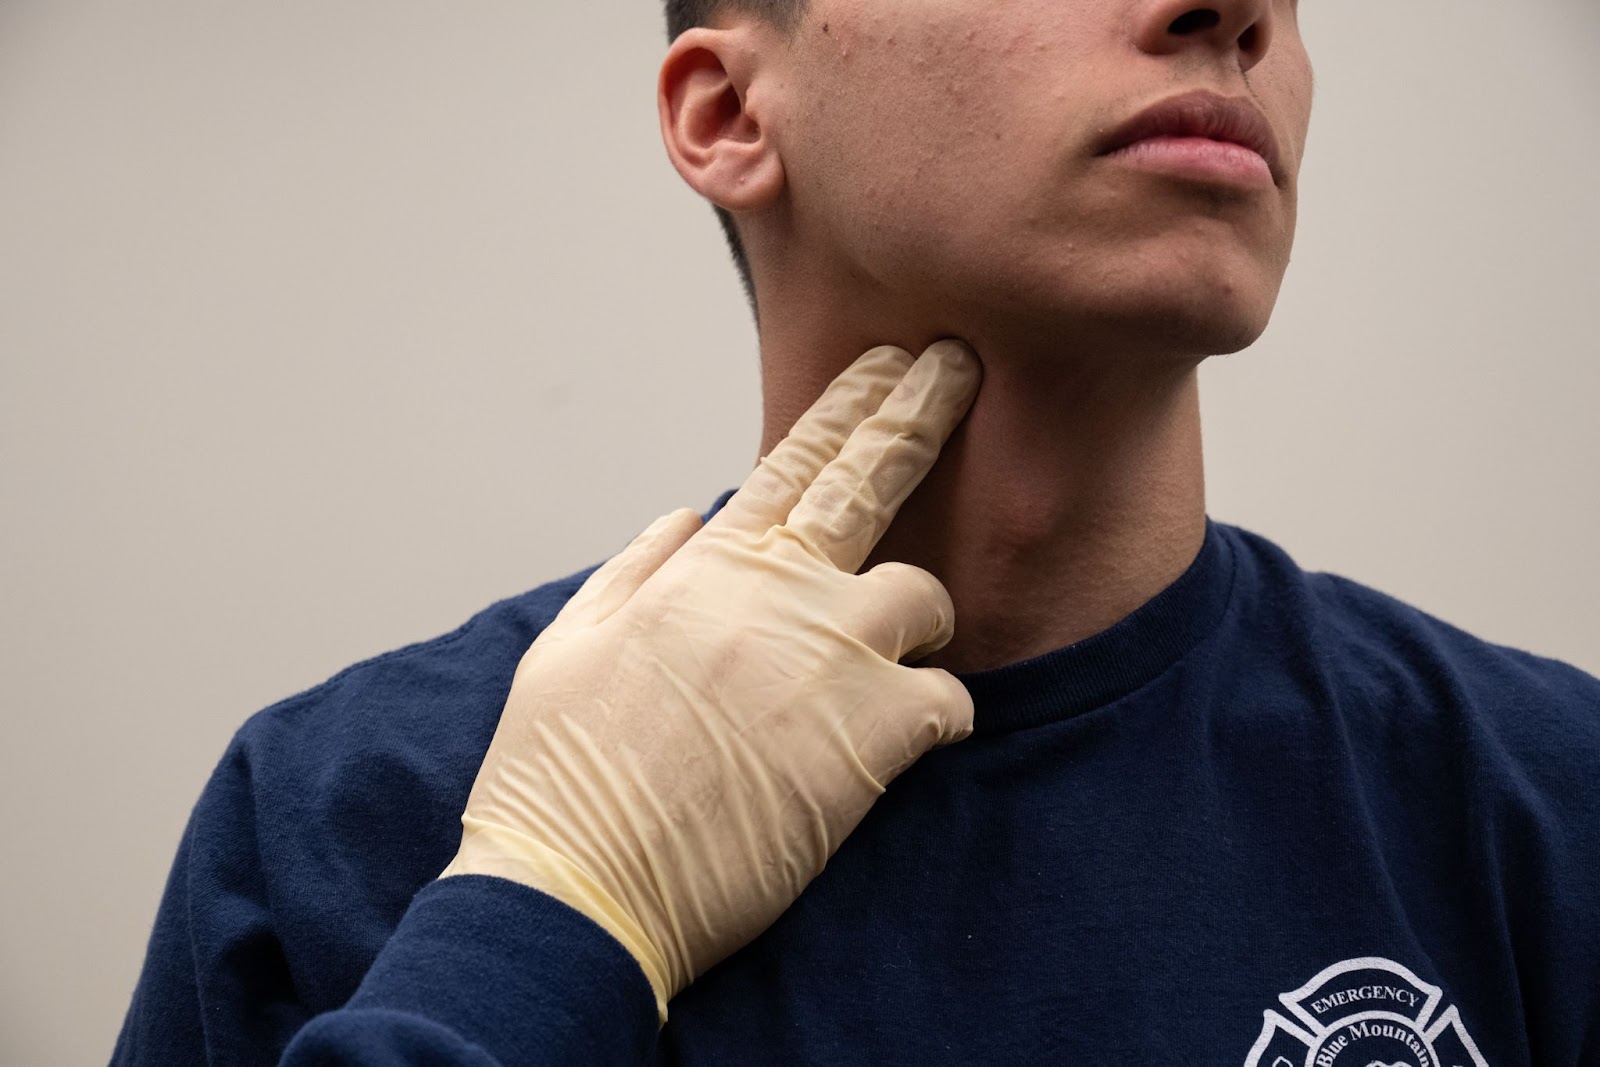
Carotid Pulse
- Using the index and middle finger find your thyroid cartilage (Adam’s apple). Yes, all genders have this landmark!
- Which hand did you use? The right (or left)? Great, slide your fingers to the side of the body the assessment hand (right hand > right, left > left) into the groove created by your trachea (windpipe/throat) and your sternocleidomastoid (neck muscle on the front). We try to avoid reaching over the trachea (windpipe) when feeling for a carotid pulse.
- Gently press down, separating the trachea and sternocleidomastoid until you feel the beat.
- Find it? Pretty simple. Great! They won’t all be that obvious. Practice starting gently and applying pressure just until you feel it. All pulses will disappear if you push too hard, so use just enough pressure, not too much.
- Assess for 5 seconds, but no more than 10 seconds. This is to avoid prolonged pressure on the carotid artery that supplies the brain AND because this pulse is usually assessed in emergent situations, we don’t want to waste time looking for a pulse if there isn’t one.
- We usually don’t count the pulse using the carotid, so confirm the presence and move on.
Femoral Pulse
Due to proximity of the genitals, attempt femoral pulse assessments on yourself first. Be sure to obtain consent for all procedures practiced on others, especially more invasive ones like this.
-
- Lay flat.
- Using the front of your fingers, place your hand on the anterior (front) lateral (side) portion of your own lower abdomen under the waistband where the leg meets the abdomen. Gently press down with the front of your fingers until you locate a beat.
- When you find the beat, switch to using the tips of your index and middle finger to confirm presence.
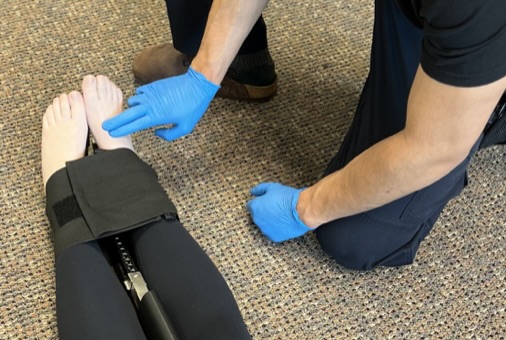
Posterior Tibial Pulse
-
- Find the medial (inside) portion of the ankle. That big knobby bone is called the medial malleolus.
- Slide the tips of your index and middle finger posteriorly (towards the back) to the back of your ankle. Just as your fingers drop off into soft tissue, there is a tiny groove outlined by the medial malleolus and tendon of the gastrocnemius (calf muscle). It is right behind the bone.
- Gently press down with the tips of your index and middle finger until you feel the beat to confirm circulation to the lower limb.
Dorsalis Pedis
-
- On the dorsal (top) portion of the foot. We will use the big toe and 2nd toe as landmarks.
- Using the tips of your index and middle finger, feel halfway between the base of the toes and ankle. You may need to adjust several times to locate this pulse, keep at it until you locate.
- Gently press down with the tips of your index and middle finger until you feel the beat to confirm circulation to the lower limb.
- On critical patients, mark this location with a pen to facilitate reassessment.
|
Pulse |
1 |
2 |
3 |
4 |
5 |
6 |
7 |
8 |
9 |
10 (instructor) |
|
Location Assessed |
|
|
|
|
|
|
|
|
|
|
|
Initials |
|
|
|
|
|
|
|
|
|
The original copy of this book resides at openoregon.pressbooks.pub/emslabmanual. If you are reading this work at an alternate web address, it may contain content that has not been vetted by the original authors and physician reviewers.
