
Intramuscular Autoinjector
Medication administration by an intramuscular injection (IM) autoinjector is the quickest and easiest way of getting a medication into the bloodstream for systemic distribution. The most common IM autoinjector medication to be delivered by EMS is Epinephrine for patients experiencing anaphylaxis. Other rescue medications can be administered IM autoinjector however, these are rarely encountered outside of HAZMAT teams.
The autoinjector was developed for military applications and does not necessitate removal of clothing. However, you need to ensure the injection doesn’t find a wallet or phone; it will not penetrate more than a few layers of thin clothing.
Auto Injector epinephrine is a common medication prescribed to the public. However, these devices, while effective, are extremely expensive in the United States and patients may hesitate to use them for fear of replacement costs. In such cases, if your service carries epinephrine, you should use the medication in your kit and let the patient keep their prescription. However, if you don’t carry it, do not hesitate or wait until ALS arrives to provide this life saving medication.
To administer medications by IM autoinjector follow these steps: *NOTE – if practicing on other students or manikins, confirm your epi-pen is marked “Trainer” before proceeding.
- Ensure the patient is suffering from a condition warranting administration (Anaphylaxis, etc.)
- Ensure injector is not expired, has clear liquid, and is prescribed to the patient.
- Identify your site of injection. Ideal placement for autoinjector IM sites is:
- Lateral thigh, into the quadricep muscle or the gluteus maximus.
- When holding the autoinjector, be sure to keep your fingers off the end!
- An accidental discharge into your thumb will not only hurt but may also cause medical complications from administration of epinephrine into a small area.
- An accidental discharge will also cost your patient valuable time and create a second patient for your team.
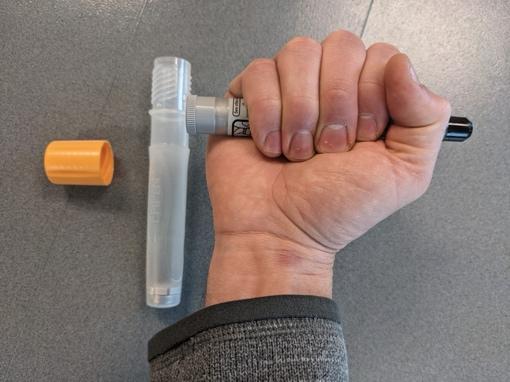
Image by Chris Hamper, licensed under CC BY-NC-SA 4.0.
- Final confirmation of medication “rights”
- Right medication, dose, route, patient condition, and timing.
- Remove safety cap from back of the device.
- Place the needle end against the injection site.
- Press firmly until you hear the “click”.
- If you do not hear the click, ensure that you have the needle end on the patient.
- Again, keep your fingers off the ends.
- Hold in place for ~10 seconds.
- Remove and place directly into sharps container.
- Document the time, medication and dose administered.
The original copy of this book resides at openoregon.pressbooks.pub/emslabmanual. If you are reading this work at an alternate web address, it may contain content that has not been vetted by the original authors and physician reviewers.
