Chapter 4: Type on a Grid
4.1 Exercise 1: Using guides to create a grid
- Create a new document (File > New) using the “Print” preset category and the Letter size preset. Name your new document the_grid and set unit of measure to Inches. make sure the orientation is set to portrait (8.5 by 11 inches, as opposed to 11 by 8.5 inches).
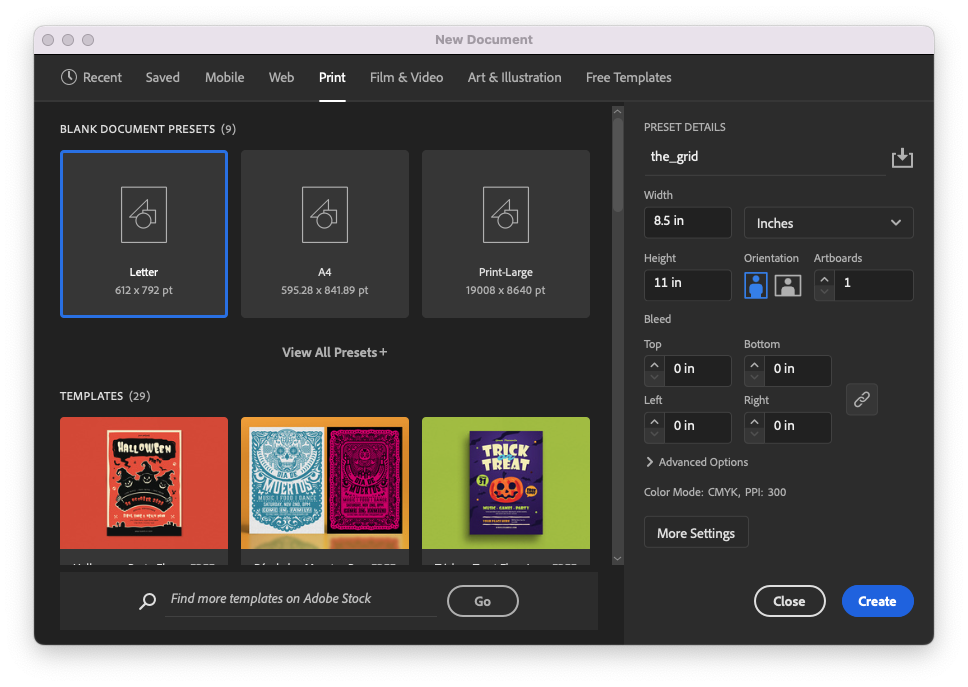
Check your New Document settings to make sure they match the specifications given in this step. - Illustrator’s interface has Rulers can be turned on or off. They appear at the top and left side of the document window. If you don’t see any rulers, turn them on by choosing View > Rulers > Show Rulers from the menu bar (or press CMD+R on your keyboard). Right-click or CTRL-click on the ruler to see all of the available units of measurement. Since you set the unit of measure in your document setup to inches, you should see that as the unit that the rulers are set to use. You can change the unit of measure at any time by right-clicking on the rulers.
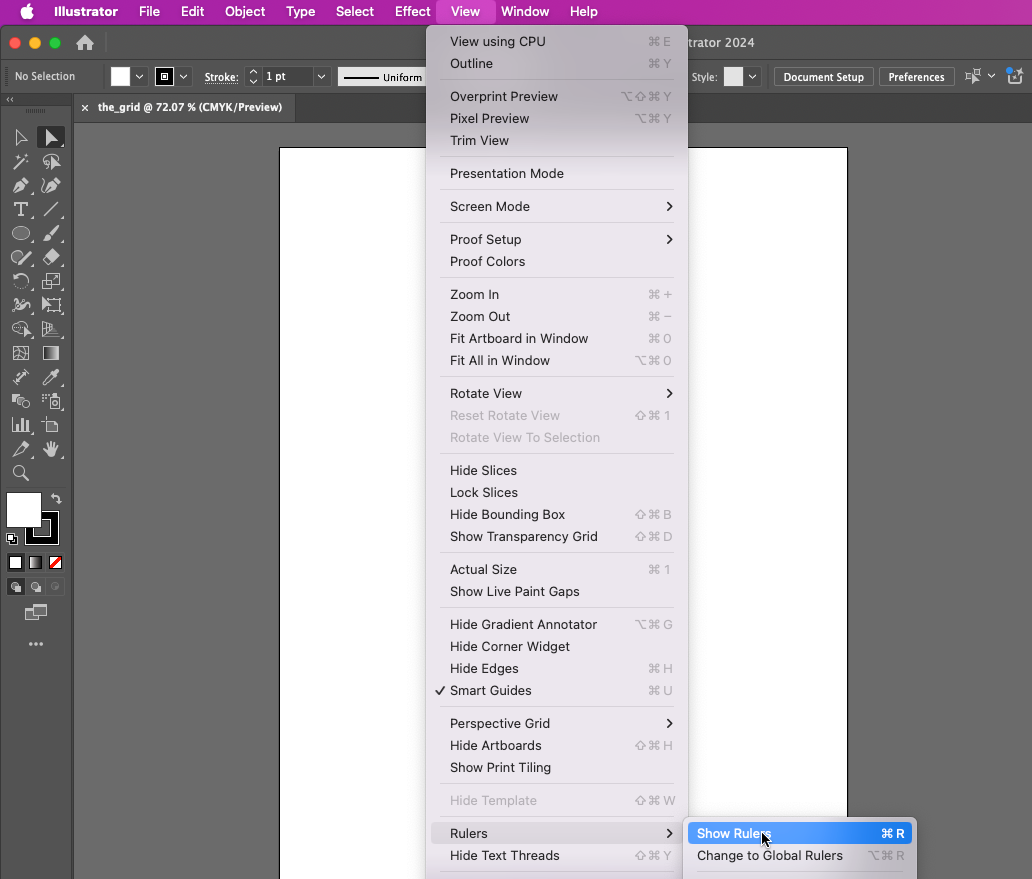
Choose View > Rulers > Show Rulers to display Illustrator’s rulers if they’re not already on. Hot Key: CMD+R reveals and hides rulers.The rulers will now show that the Artboard measures 8.5 by 11 inches. The rulers should be set up so that the horizontal (top) ruler’s zero mark is at the left edge of the artboard and the vertical (left) ruler’s zero mark is at the top edge of the artboard. This is usually the default setting but sometimes the vertical zero will be at the bottom of the artboard instead. To reposition zero so that it is located in the same place both vertically and horizontally, put the mouse in the top left corner of the ruler area, where the vertical and horizontal rulers seem to overlap, then double-click. You can also click and drag from that corner where the rulers meet to reposition the zero marks anywhere on the Artboard.
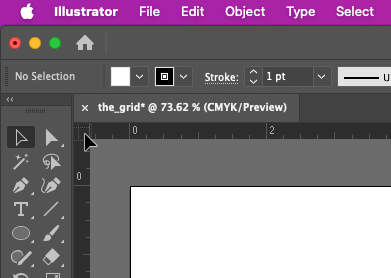
Double-click the corner where the rulers meet to reset the ruler origin points so that zero is at the upper-left corner of the Artboard for both rulers. - Illustrator’s rulers can do more than just show you measurement along the edges of the Artboard. In this step we will pull guides from within the rulers of the document. Guides are available in all Adobe® Creative Cloud® applications and are always pulled from the rulers.Guides can be used to create grids on the Artboard. A grid is created when at least two guides (one horizontal and one vertical) intersect. The grid is used for assessing the relationship of the formal elements within the composition (images and text) to the positive and negative space (where other elements are and where there is nothing but empty space). Grid lines can also be used to mark a position in a composition so that objects can be easily aligned to that position.
Click on the Selection Tool, then place your mouse cursor within the horizontal ruler area at the top of the document. Click and hold on the ruler, then drag the mouse in a downward motion. You’ll see a dotted horizontal line representing where the guide will be placed when you release the mouse button. Pull the guide down until it’s at the 5 inch mark on the vertical ruler, then release the mouse button to set a horizontal guide at that location. (Tip: you may need to zoom in to see the number 5 on the ruler. Hold down the CMD key and press the + key to zoom in.)
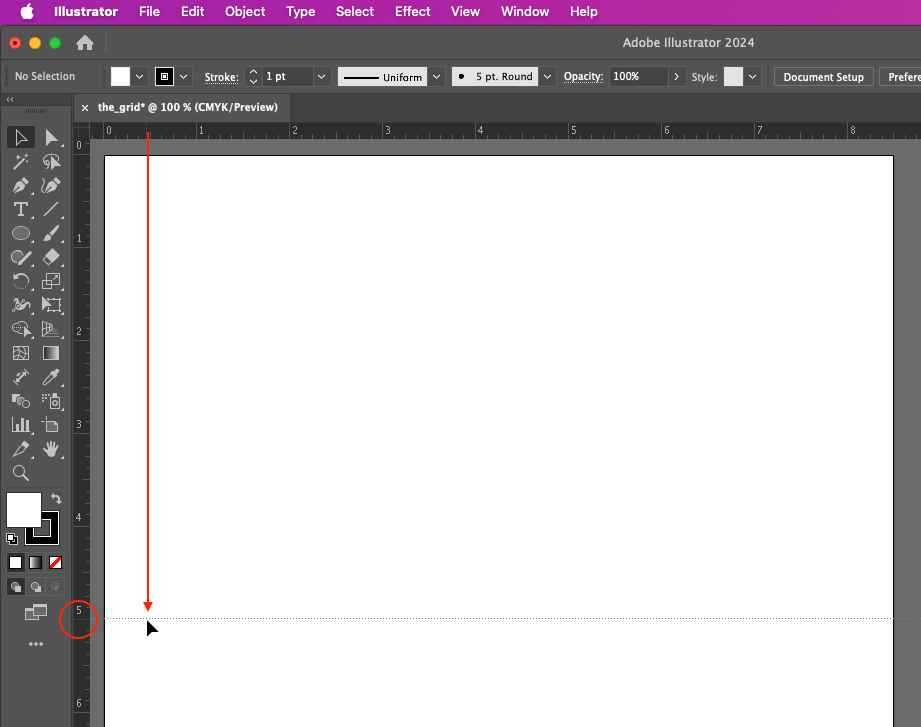
Click and hold on the horizontal (top) ruler, and drag a horizontal guide down to the 5 inch mark on the vertical (left) ruler. Let go of the mouse button to set the guide. Watch Out! If you release the mouse too soon, guides will be made in places where you don’t want them! In Illustrator®, guides are automatically locked when they are released. To get rid of a guide that is locked into position, first unlock it by clicking View > Guides > Lock Guides. When the guide is not locked, simply click on it with the Selection Tool and press Delete on the keyboard. - Now create a vertical guide, by repeating that same process but this time pulling from the vertical ruler on the left edge. Releasing the mouse when the vertical guide is at the 4 inch mark on the horizontal ruler.
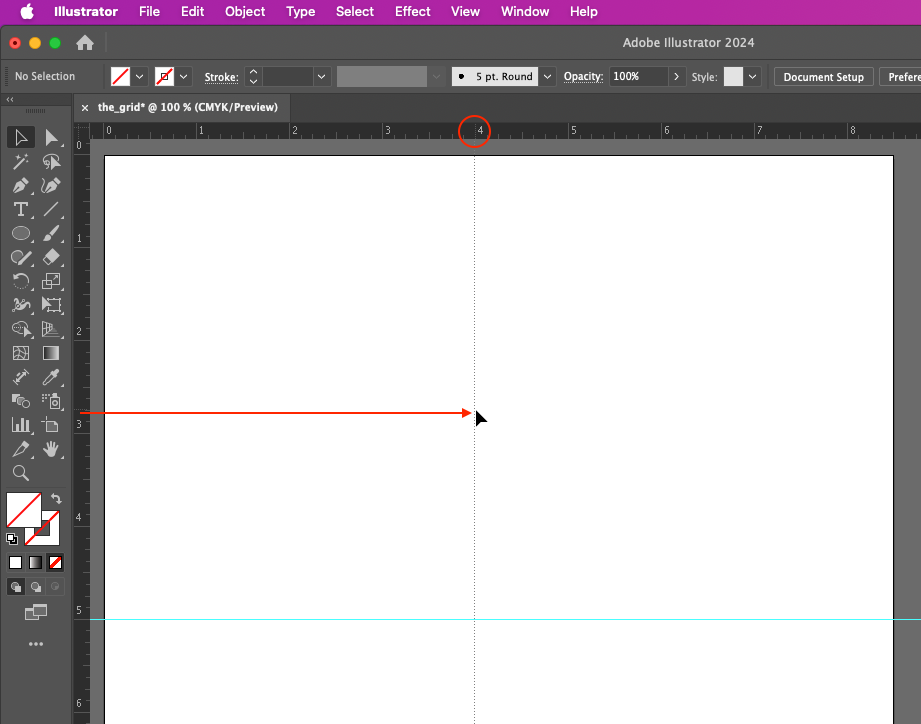
Click and hold on the vertical (left) ruler, and drag a horizontal guide over to the 4 inch mark on the horizontal (top) ruler. Let go of the mouse button to set the guide. After you have set your guides, it can be helpful to lock them. So once you have your guides in place, check the View > Guides menu to make sure that the guides are locked. If they are, the menu will say Unlock Guides. If you see Lock Guides in the menu, click it to lock them. This will help prevent you from accidentally moving the guides as you work on the composition we’ll be creating.
Remember to save your files as you work!

