
Chapter 11: Non-Destructive Editing
11.4 Exercise 4: Adding a shape layer
- Choose the Rectangle tool from the Toolbar. All of the tools grouped beneath the Rectangle tool are called Shape tools. In Photoshop®, Shape tools and typography created with the Type tool can be added to the document as vector layers.

- Look in the Options Bar to verify that you are using the Rectangle tool to make a Shape layer, instead of a Path (which creates a path like the Pen tool) or a Pixel layer (which creates a selection).

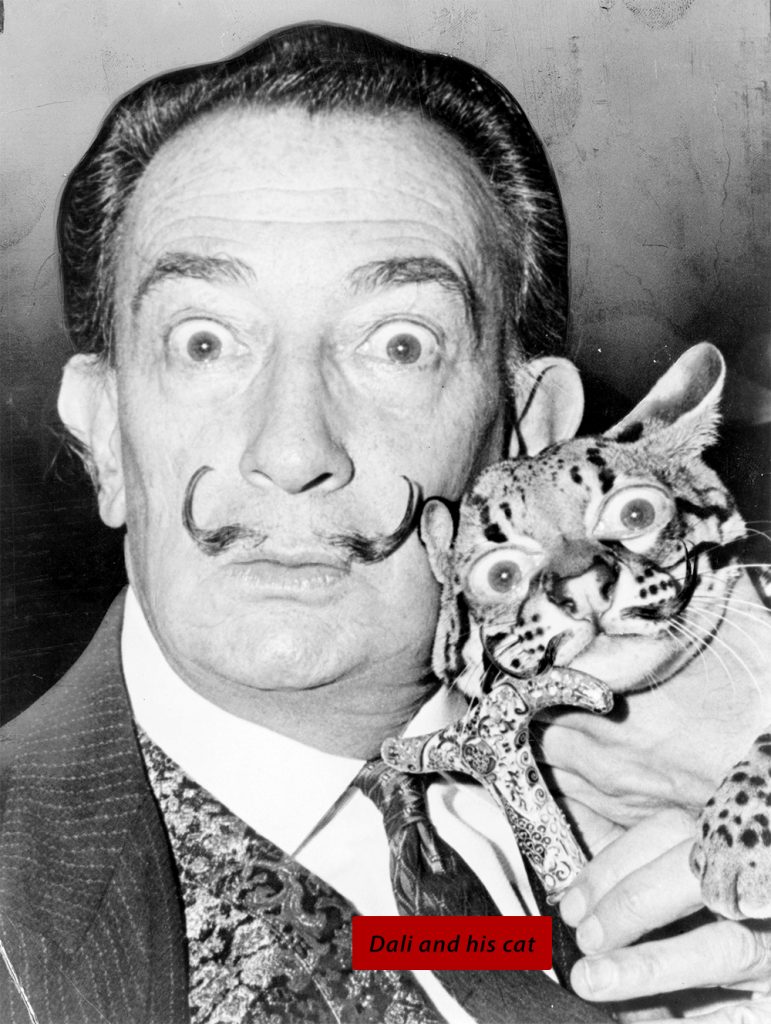
- Draw a rectangle in the image near Dali’s fingers and round the corners to 10 pixels. Notice that after you create your rectangle, you will have a new layer named “Rectangle 1” in the Layers Panel. Shape layers can be moved with the Move tool and they appear in the Layers panel as an overall path of color with a vector mask defining where the color is applied and where it is hidden, based on the way the shape was drawn. Additionally, after you draw the shape, the Properties Panel will open allowing you to set various attributes of the rectangle shape you created.
You can also preset the radius of your corners in the options bar BEFORE forming your rectangle shape as shown in red in the image above. Alternately, as with the Properties Panel, you can adjust the radius on the corners of your rectangle after you create it by clicking and dragging on any of the corner toggles inside your rectangle.

- It’s easy to change the color of a Shape layer as long as the document is in a mode that supports color! Try to load a red hue into the foreground color chip. It’s gray! Use Image > Mode > RGB Color to convert this grayscale image to RGB color mode. At the “Merge layers before mode change?” warning, choose “Don’t Merge.” We want to preserve all of the non-destructive work that we’ve done, and merging would eliminate that!
- Now put a red hue into the foreground color chip using the Color Picker or the Color Panel. As long as the Shape Layer is active, use the key command Alt/Opt+Delete to fill the “Rectangle 1” layer with the color you loaded into the foreground color chip. You can also set the color for a Shape Layer by double-clicking its thumbnail icon in the Layers Panel, or by using the color chips in the Properties panel while the Shape Layer is active.
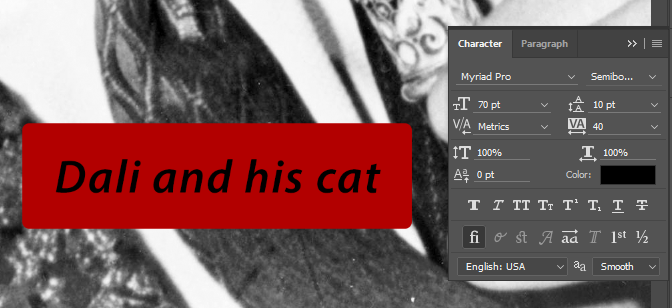
- Activate the Type Tool (press T on your keyboard) and click into the red rectangle. Type Dali and his cat on top of the rectangular box and click the checkmark button in the Options Bar to exit type editing mode. Note: If you still have red set as your foreground color, you’ll need to change the type color to black. You can fill your type with black however you like, but try a fill key command on this layer, too. We loaded black in the background color chip and used Cmd+Delete to fill with the background color.Now set your font and other type specifications. We used Myriad Pro Semibold Italic as our font, set in 78 points with 40 point tracking. You can set the tracking and other type attributes in the Character Panel (use Window > Character if you don’t have the Character Panel displayed).Finally, use the Move Tool to position the type layer so that it’s vertically centered on the rectangle.
 That’s it, you’ve made it through another chapter! Save your work and take a well-earned break.
Attribution
“Digital Foundations – Intro to Media Design” by Xtine Burroughs and Michael Mandiberg is licensed under CC BY-NC-SA 3.0 / This is a derivative from the original work. Content is available under Creative Commons Attribution Non-Commercial Share Alike unless otherwise noted.
