Chapter 3: Symmetry
3.3 Exercise 3: Symmetry with less passive negative space
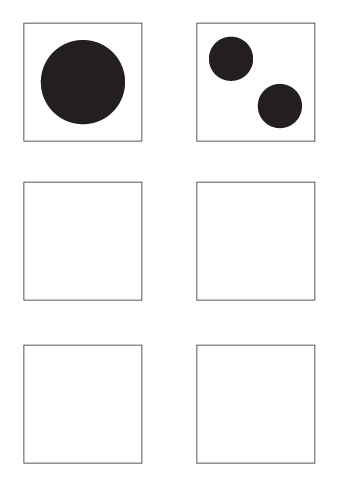
In this exercise, the two new circles create a balanced, symmetric composition. The visual weight is the same in the four quadrants created by the intersection of the x and y axes; and the circles are reflective over a diagonal line. However, notice the tension between the two circles at the middle of the page. This tension is created when the two active forms are so near to each other that the eye cannot help but notice the negative space between them. The negative space fights for the viewer’s attention. Therefore, the negative space is slightly less active than it was in the first exercise.
- Copy the black circle and move it into the second square by using the Select Tool to click and drag on the original circle while holding OPT. Drag the new copy into place and release the mouse before releasing the key.
Watch Out For This: If you are new to using the mouse and the keyboard together, practice using your non-mouse hand to activate hot-keys while keeping your mouse-hand on the mouse. It is ineffective to lift up the mouse hand!
- The new circle should still be selected, and anchor points surround the edges of the selected area. Use the Selection Tool to reduce the scale of the circle by clicking and dragging on one of the four anchor points at the edges of the circle towards its center. Hold SHIFT while reducing the scale of the circle to keep the proportions of the circle the same.

Results of copying, moving and sizing your circle. FYI: The units of increment that an object moves when using the arrow keys are defined in the General Preferences (Illustrator® > Preferences > General). They are referred to as “Keyboard Increments” and the default setting is 0.0139 inches. All preferences are user-defined.3. Hold down OPT and SHIFT and click on the circle with the selection tool, then drag to the bottom right corner of the square. This will duplicate the circle and move the new square at an exact 45 degree angle.

