Chapter 7: Scanning
7.1 Exercise 1: Creating a scanogram and understanding file resolution
Scanners are hardware devices that use light and sensors to capture an image and through special software send the image data from the scanning bed to the computer hard drive. All flatbed scanners operate in the same manner, but the scanning software varies among various brands. In this exercise, the basic ideas of scanning, resolution and file size will be addressed.
- Typically, a scanner is used to create a digital image of a printed work. In this exercise, a scan will be made of a three-dimensional object. Start by placing your object on the scanning bed and close the lid. If the object you’re scanning doesn’t allow the lid to close completely, put a dark piece of cloth over the scanner so the light from the device doesn’t bounce out of the surface of the scanner (a jacket or dark sweater will work). Our example object for this exercise is a flower from an orchid – it lays flat so it will be easy to close the lid on the scanner.
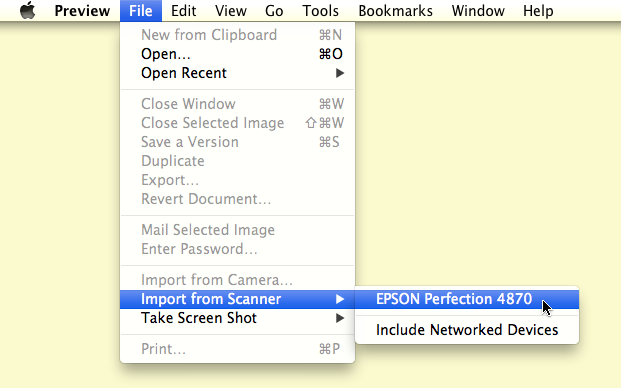
- Open the scanning application. On the Canon scanners in the labs where we teach, the application automatically opens through Image Capture (a Macintosh application that is useful for capturing digital images from scanners and digital cameras), located in Macintosh > Harddrive > Applications > Image Capture. Here we will use Preview, however the following steps can also be performed in Photoshop® which we demonstrate at the end of this exercise. Open Preview and click File > Import from Scanner and click on the scanner plugged in to your computer.
- The scanner may automatically create a preview of whatever is placed on the scan bed. If it does not, a preview of the last item scanned may be visible. If a preview does not happen when the application is launched, look for a button to create a preview (it is often labeled, “preview”, “overview”, “view” or “prescan”).

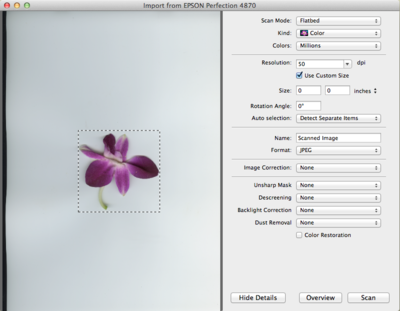
As a result of clicking on the “Overview” button in the bottom left area of the scanning application, the size of the flower is small in comparison to the entire scan bed. - The scanner will digitally capture the entire flatbed area. If your object is smaller than the flatbed, select just the area that you want to digitize by marqueeing (clicking and dragging with a selection tool – on most scanners just click and drag) over the image area. In Preview, part of the scan will be selected after pressing overview. You can adjust the size of the selection by dragging the corners to fit your image. You may have to look for a selection tool in order to constrain the area of the scan to just the image area on the flatbed. At this point, your selection designates the location of the object on the flatbed. If you lift the lid and move the object, you will have to re-preview the digital file in order to adjust the selected area.
Notice the selection edges are very close to the edges of the flower on the scanning bed. - This is the crucial step. Before scanning the selected area, the artist must decide upon the final file resolution. The resolution specifically accounts for how many pixels are present in one inch of the digital file.
Resolution for printed images
Resolution is measured in dots or pixels per inch (dpi or ppi). The resolution of the scanned image is a necessary factor in the final print or on-screen output. In consumer or prosumer situations, such as personal ink jet printers or laser printers at stores that will make prints from your digital images, the print will look fine at a resolution of 200 to 300 dots per inch. In professional print environments, the rule is simple: ask the printer for the print specifications including file resolution and color space.
Resolution for screen presentations
Any image that will be used on-screen, for instance on a website or in a video, will need to be saved only at screen resolution, or 72 dots per inch. The file size is directly connected to the amount of pixels saved in each inch of the bitmap or raster file. Image files saved at screen resolution are much smaller in file size than images that are saved for printing.
To determine the resolution to enter into the scanner software, simply acknowledge the size of the object on the flatbed, then decide how large you want the object to print on the page. If the object is, for example, 4 by 5 inches and the objective is to make a 4 by 5 inch print, scan the object at 200 – 300 dots per inch. If you want to make an 8 by 10 inch print, either scan the object at 300 dpi and increase the scale to 200 percent, or scan the object at 600 dpi at 100 percent scale.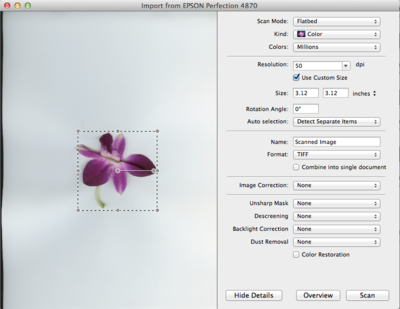
In Preview after resizing the selection, the size of your final image is displayed next to the scan preview. Our image is roughly 3 by 3 inches. This is important information, as it will help me to determine what resolution I will use when I scan the file. - Use the guidelines above, choose a resolution and be sure that the color mode is appropriate (black and white line art, grayscale or color).
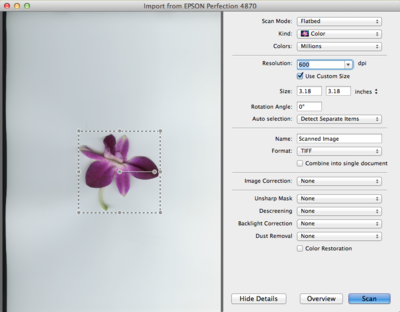
Here you can see that I am scanning at 600 dots per inch. I know that I can make a very good print on my ink jet printer at 300 dots per inch. Since 300 multiplied by 2 is 600, I know that I will be able to make a very good print of this scan at close to 6 by 6 inches, or the width and height multiplied by 2. - Finally, choose a file format for saving the scan. File formats such as JPEG, PNG, and PDF are used to compress the size of the file, and therefore often result in a loss of digital information. File formats such as TIFF and PSD are less “lossy” (the image does not lose digital information due to compression), and are therefore better format choices if the intent is to manipulate the image in an editing program such as Photoshop®.
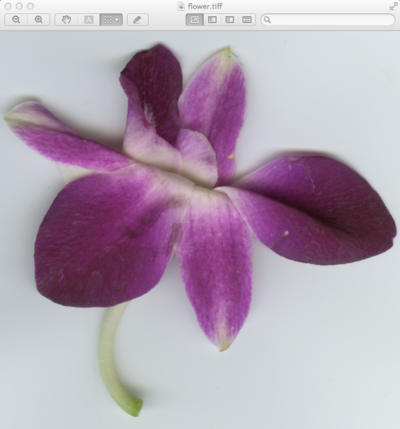
Here is my final TIFF file as seen in Preview. I will be opening this file in Photoshop® for the next exercise. - The last step is to click on a button that reads something like “scan” in order to create the digital scanogram image file. Once your image is scanned, save it as ch7-yourlastname-scanogram.tiff (or .jpg if you’re saving in JPEG format).
Scanning in Photoshop®
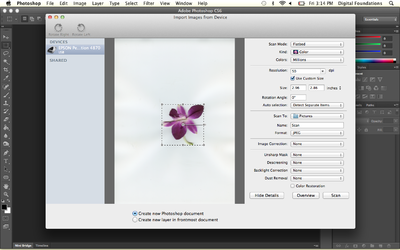
To scan an image in Photoshop®, click File > Import > Images From Device.
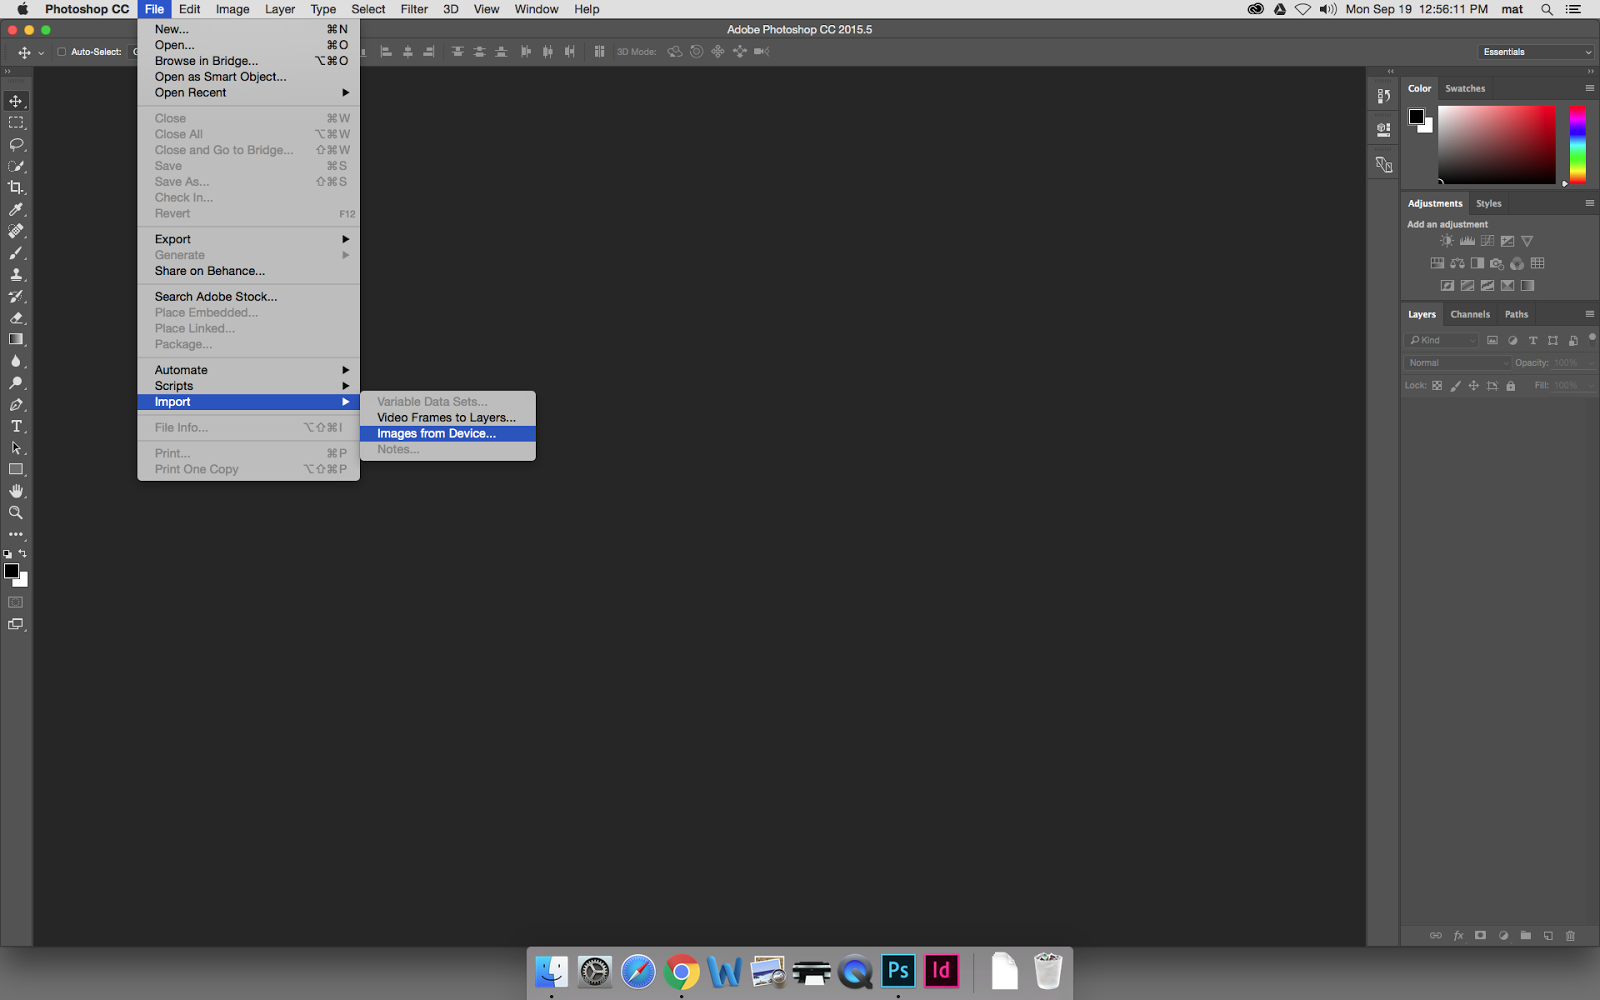
A dialog box will appear where you will be able to perform steps 3 through 8 from Exercise 1.