Chapter 7: Scanning
7.3 Exercise 3: Image Size, file size, and resolution
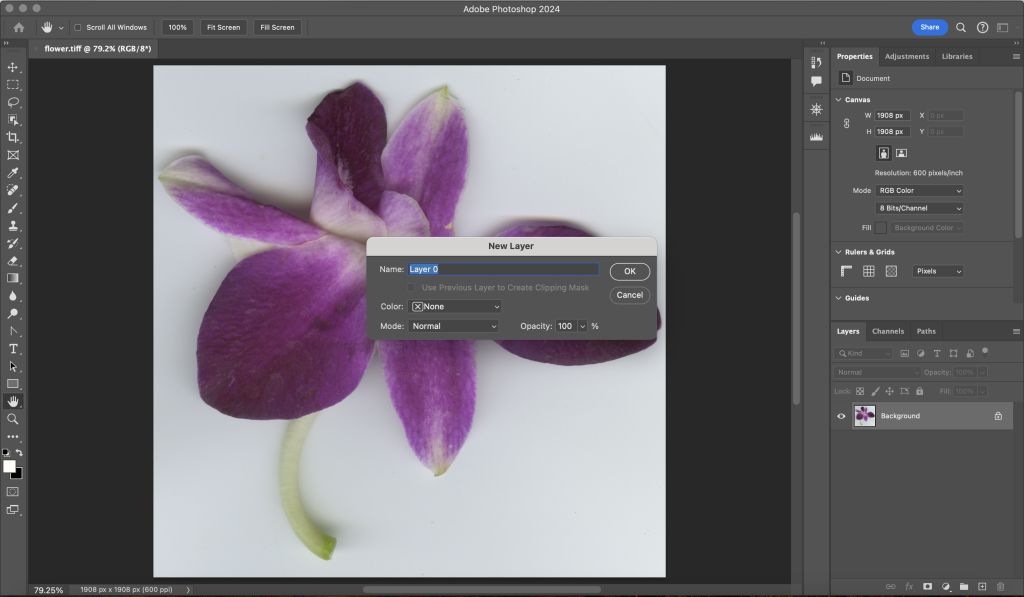
- When an image or object is scanned or input from a digital camera, it appears in the Layers Palette as “Background Layer.” Look in the Layers Palette (Window > Layers) and notice that the background layer is locked. Double-click on the words “Background Layer” in the Layers Palette to use the Rename Layer dialog box. When you rename the layer it is automatically unlocked.A layer is like a single sheet of transparency paper. A “blank” or empty layer is transparent. When a scan or digital photograph is first opened, it lives on the “Background” layer. Layers can be added and deleted using this panel. Unlocking the background layer is a good habit, as it encourages the user to rename the layer (which is always a good idea) and enables the layer to be affected by tools and effects that can be “locked out” when the layer is locked.
Tip: Double-clicking on the icon of the layer will open the Layer Style dialog box. If this happens, hit Cancel, then try again by double-clicking specifically on the name of the layer.
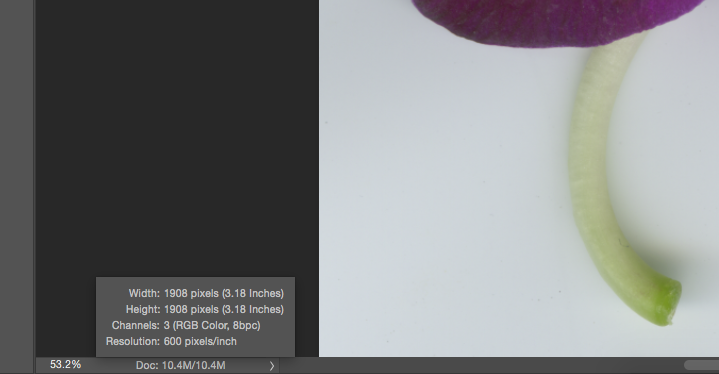
- The Status Bar runs along the bottom of the file. Click and hold on the area of the Status Bar that reads, “Doc:” followed by a number in kilobytes or megabytes. You’ll see the file’s dimensions (in pixels and printed dimensions), color mode, and resolution.
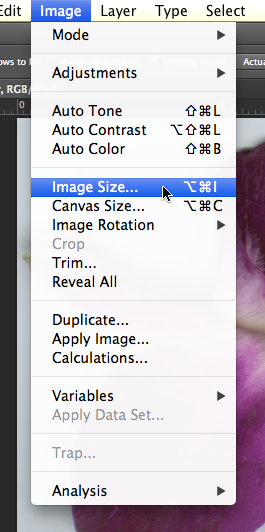
Click on the status bar to see the overall size of the print on the page. Our print would be very small at the current file settings. - Click Image > Image Size to see the resolution of the image.
- Our scan (flower.tiff) is about 3 by 3 inches at 600 dots (on the print) or pixels (on the screen) per inch.
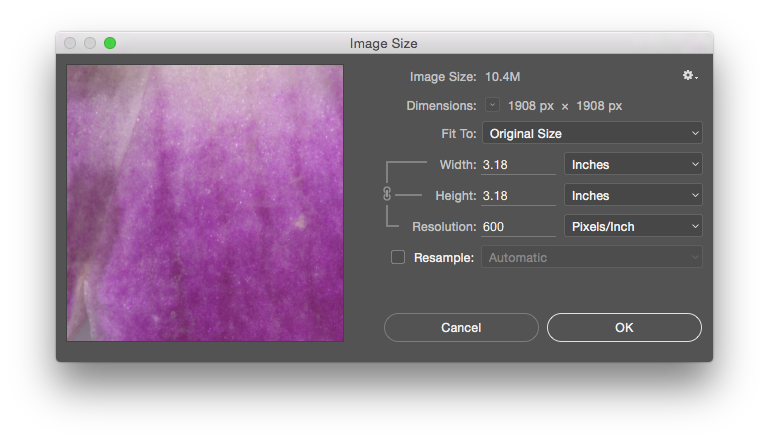
- Uncheck “Resample Image” if it is checked, so that Width, Height, and Resolution appear linked together. Notice that the pixel dimensions at the top of the Image Size Dialog Box are no longer editable fields. The pixel dimensions will not change if a change is made to the editable Width, Height, or Resolution values. Modifying any one of these values results in corresponding changes to the other two. I set my height at 6 inches. This resulted in a width of 6 inches and a resolution of approximately 318 dpi. A print made at 318 dpi on my personal ink jet printer will be fine, that is, it will not be blurry or pixelated.

Using the Image Size dialog box with “Resample Image” unchecked enables the user to change the dimensions of the printed image or the resolution (dpi) without changing the overall number of pixels in the digital file. This is a good thing – you would never want to change the amount of pixels within the image, unless you simply want to delete some pixels in order to make the file size smaller. Pixels are created during the scanning process, on a scan bed or within the digital camera. The only way to make “new” pixels is to rescan or re-capture the digital file using a higher resolution. It is not possible to create new pixels inside Photoshop® after the fact. OK, that’s actually a lie. You can make new pixels, but you never want to. If Photoshop® resamples the image (or, makes new pixels based on the surrounding pixels) the result is a blurry or pixelated image. - Click OK. Notice that nothing seems to happen to your file on the screen. This is because there was no change made to the actual number of pixels in the file. What changed is the amount of pixels that will be printed in one inch when the image is printed. Use the Status Bar to examine the result of changing the dpi in the Image Size dialog box while the option Resample Image was not selected. By nearly halving the resolution, the dimensions of the printed image have doubled. The size of the file stays the same.
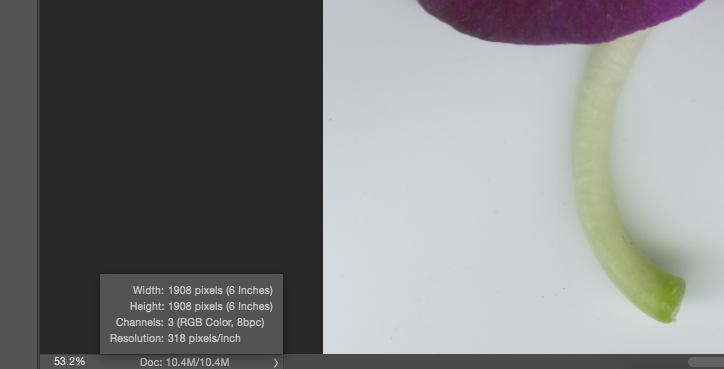
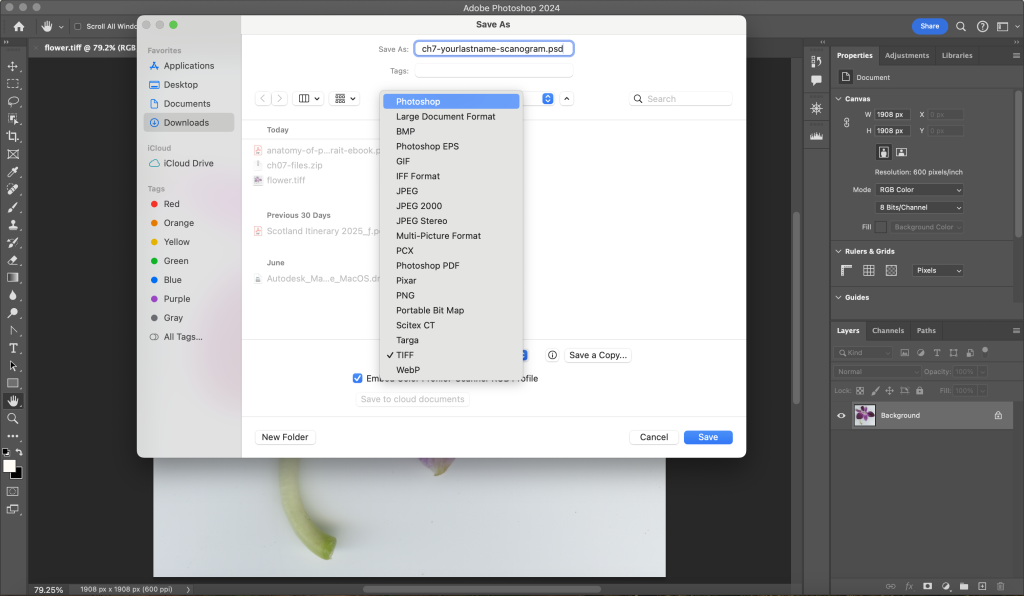
Clicking and holding in the Status Bar area demonstrates that my scan will print at a much larger size than it would have printed before I changed my resolution settings in the Image Size dialog box. - Choose File > Save As and change the format of the file from TIFF to Photoshop®, name your file ch7-yourlastname-scanogram.psd. Always save your work in progress using the native or master Photoshop® (PSD) format, it will give you more flexibility and options for revising your work as needed.