
Chapter 8: Tonal Scale
8.1 Exercise 1: Minor adjustments to the original file
- For this exercise, open in Photoshop® the file named Fig08_rgbimage.jpg (a photograph of a purple flower by Fred Benenson) included in the Chapter 8 Download Work Files.
- Whenever an image is scanned or captured digitally, the process of digitizing a three dimensional reality into a two dimensional file results in a loss of contrast. Unsharp Mask is a Photoshop® filter that is commonly used to compensate for this loss. From the menu bar, click Filters > Unsharp Mask. Photoshop® has many filters available which can be used to manipulate, enhance, or otherwise alter a digital image.
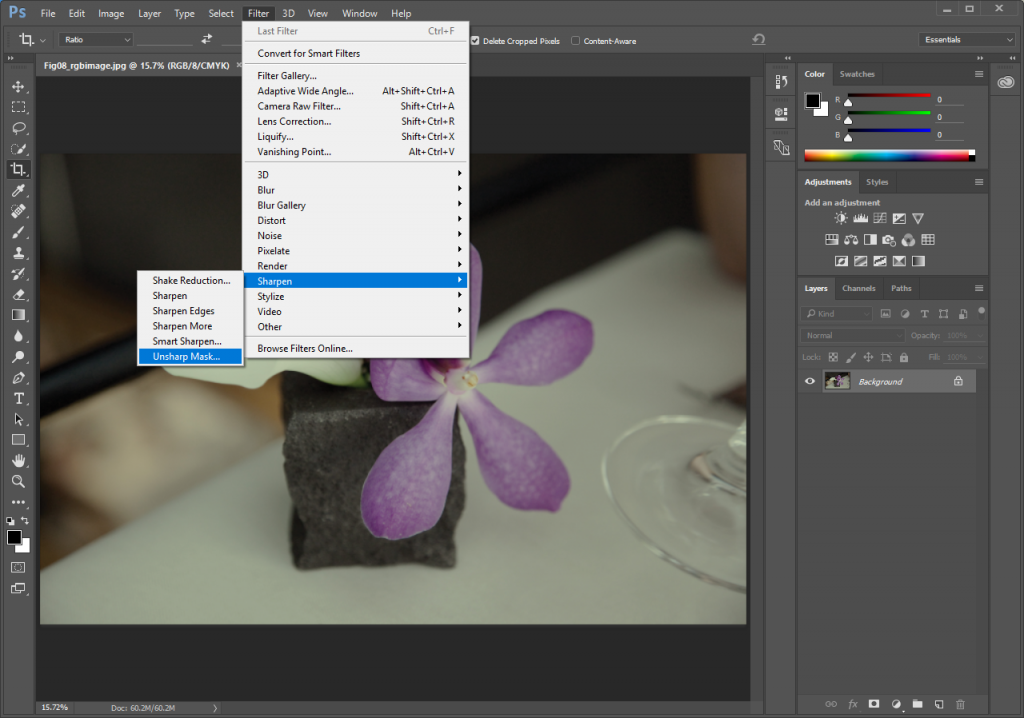
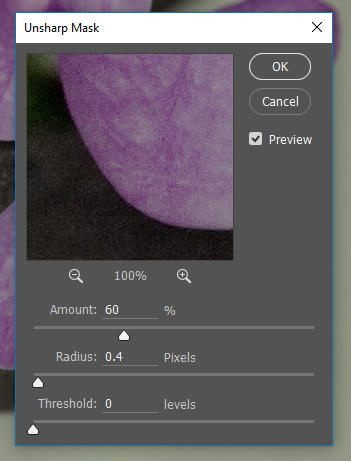
The Unsharp Mask filter analyzes the contrast in edge areas of an image and increases the contrast of those pixels. Be sure that the Preview button in the Unsharp Mask dialog box is checked. Look at the image while clicking on the Preview button. Un-checking the Preview button displays the “before state” (the unfiltered image) and checking the Preview button reveals what the image will look like after the filter is applied. There are no set rules, but the guiding relationship is between the settings in this dialog box and file size. The larger the file size, the higher you will set values for Threshold, Radius and Amount. With smaller file sizes (anything less than 30 megs) you will probably leave the Threshold at 0, the Radius lower than 1.0 and adjust the Amount to somewhere between 20 and 250 percent, use your best judgement for an image that looks good. You will know when you’ve gone too far, the increased contrast will result in an image that looks pixelated and forced. Applying this filter should produce a minor modification. Once you’re satisfied with the settings, click OK to apply the filter.
- Now we’ll use the Crop Tool to crop the image. Click the Crop Tool in your Tools panel (or press the C key on your keyboard). When you activate the Crop Tool you will see a dashed border with control anchors appear around the image (if you don’t see the dashed border and control anchors, click and drag across the image to define a crop box). Click and drag the anchors along the side edges of the crop box to adjust where the crop box is located in relationship to the image. The Crop Tool displays the cropped area by setting a dark gray cast on the parts of the image that will be cropped out of the scene. When the crop area looks appropriate, press Enter/Return on your keyboard or click on the checkmark in the Options bar Control panel at the top of the Photoshop® interface to “commit current crop operation.”(Note: Sometimes you may need to rotate an entire image 90 degrees clockwise or counter-clockwise, or 180 degrees. To do this you can choose Image > Rotate Canvas and select the desired rotation from the submenu.)
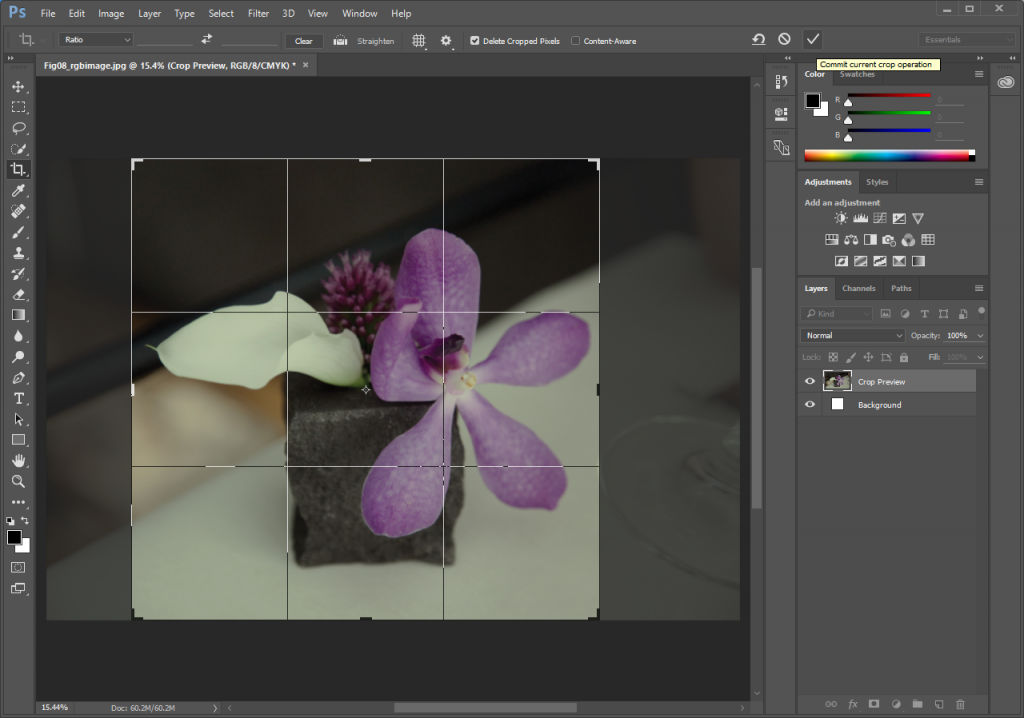
Tip: If it seems like the Crop Tool is sticking to the edges of your image, click on the anchor to readjust the crop area then hold down the CTRL key, which temporarily turns off “snapping” (a feature in the View menu that can be helpful when moving multiple objects into position). Let go of the mouse before letting go of CTRL. - When processing, capturing, or cropping images for use in print, it is a good idea to check the Image Size dialog box (Image > Image Size) to evaluate the resolution settings. Think about what size you need this image to be when printed and keep that in mind as you check the information in the Image Size dialog box. Remember from Chapter 7 that a printed image will be clearest if its resolution is between 200 and 300 ppi. Many digital cameras record very large images, but the resolution is set at 72 ppi and may need to be adjusted. Looking at the Image Size information for our Fig08_rgbimage.jpg file, we see it has a resolution setting of 240 ppi and the cropped Width and Height of the printed image will be around 15.8” by 15.6” (your crop may be slightly different).Let’s try adjusting the Resolution to values of 900, 600, and 300 ppi and observe how that changes the printed Width and Height. Be sure to uncheck “Resample Image” before adjusting the resolution to a higher number. You should see that as the value of the resolution (measured in pixels per inch) increases, the width and height of the file decreases and the amount of pixel information (labeled as Dimensions near the top of the Image Size box, which should be grayed-out) remains the same. If all of this is not happening for you, and you are trying to increase the resolution of the file, something is wrong – double check your Resample setting and make sure that checkbox is unchecked. When you are finished experimenting with Resolution settings, set the Resolution value to 300ppi and click the OK button.
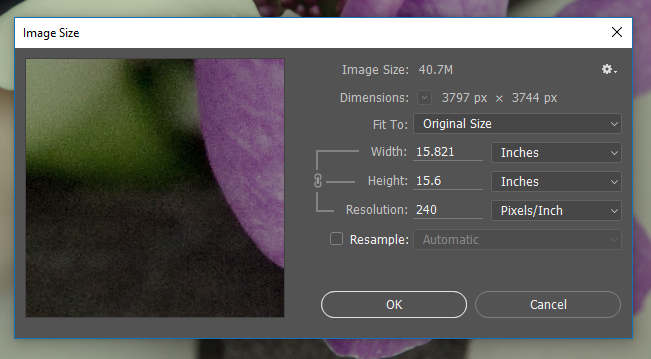
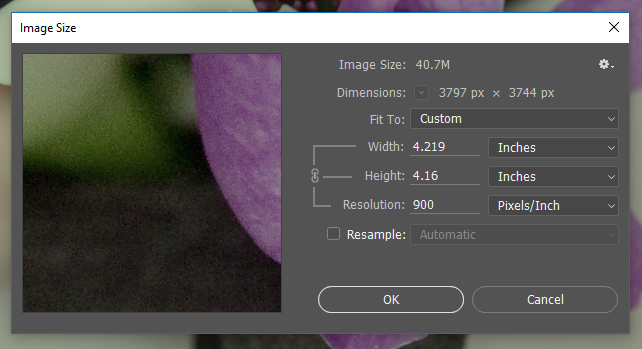
Notice the button for ‘Resample Image’ is not checked in the Image Size dialog in the above images. In the Image Size dialog box in the second image, where the resolution value was changed to 900 ppi, the width and height that the image will be when it is printed is reduced to 4.219 by 4.16 inches and the amount of pixels (in the top part of the box) remains the same. Tip: If you clicked with the Crop Tool and simply want to start over, the ESC key on the keypad will return you to normal editing mode.Use File > Save As and save your file as a Photoshop® file named ch8-lastname-flower_cropped.psd – make sure you select Photoshop as the type/format and use your own last name in place of lastname when you name your file.


