
Chapter 11: Non-Destructive Editing
11.2 Exercise 2: Saving a selection on a layer mask
Important Note: The remaining exercises have many steps, so make sure to save your work often as you step through. You don’t want to risk having to start over if Photoshop® crashes while you’re working!
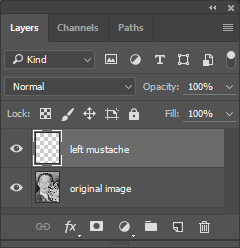
- To start this exercise, make sure you have loaded the left mustache selection from your Alpha Channel.
- Duplicate the selected pixels into a new layer by pressing Cmd+J on your keyboard (or you could copy and paste using the Edit menu or Cmd+C and Cmd+V key commands).
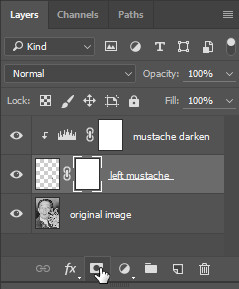
- Rename the Background layer to “original image” and the copied Layer 1 to “left mustache”.
- Make sure that “left mustache” is your active layer. Use the Move Tool to position the mustache on the left side of the cat’s face.
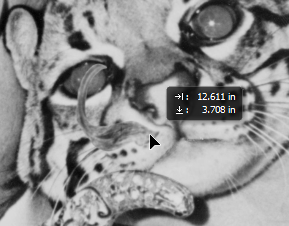 Watch Out: If the left mustache layer was not active (highlighted) you may have moved the layer containing the original image. Make sure the layer that you want to edit is active before editing.
Now we’ll rotate the mustache to match the angle of the cat’s head. Use Edit > Free Transform (or Cmd+T) to activate the transformation bounding box. Before you start rotating, move the Free Transform’s reference point from the center of the bounding box to the right end of the mustache by clicking and dragging the center crosshairs as shown below. This will allow you to rotate from that point instead of from the center of the layer’s pixels. Rotate the mustache and press the Enter key on your keyboard to finalize the transformation.
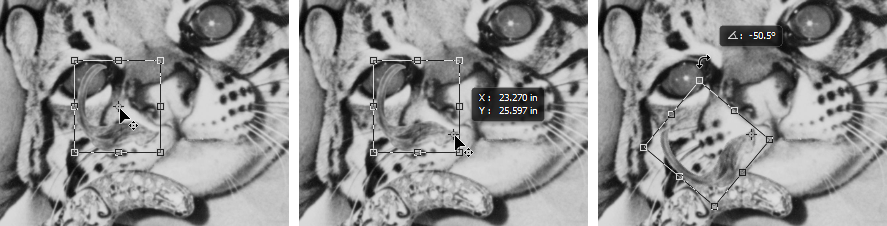
1) Click and drag the Transform bounding box’s reference point; 2) position the reference point over the right end of the mustache; 3) rotate the mustache into position. (Your movement coordinates and rotation angle don’t have to match the numbers in the images.) Finally, add a Levels Adjustment Layer and clip it to the left mustache layer. Adjust the levels to make the mustache darker. We will add a final adjustment for contrast at the end of this exercise, but making this adjustment now will make our next steps easier to see.
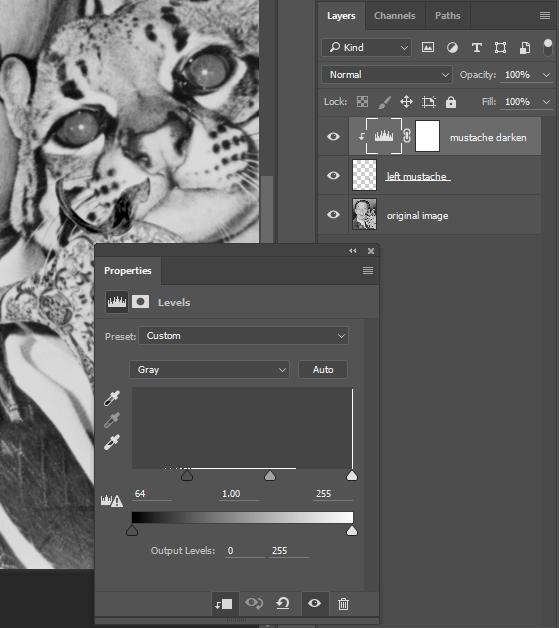
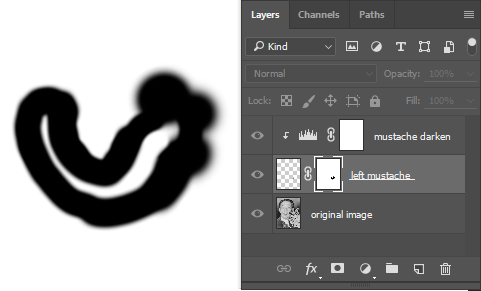
Darken the cat’s mustache with a clipped Levels Adjustment layer so that it’s easier to see. - Now we will add a mask to the left mustache layer in order to further refine how the layer blends with the original image. Make sure the “left mustache” layer is your active layer, then add a layer mask by clicking on the Add Layer Mask button in the bottom of the Layers Panel.
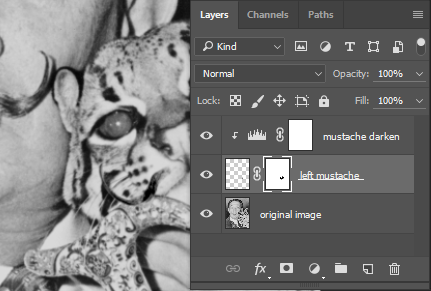
- Zoom in to at least 100% before editing the mask. Notice that the layer mask’s thumbnail icon in the Layers Panel is white (everything on the layer is revealed) by default.The mask is currently active in the Layers Panel. Remember, you can tell which part of the layer is active – the content or the mask – by the white brackets framing around corners of the icon for the active layer component.
Tip: Click on the icon of the layer content or the layer mask to activate either layer component.
Now we will blend the edges of the mustache using the Brush Tool on the layer mask. This will make the mustache appear more realistic on the cat’s face. Click on the Brush Tool in the Tool Panel (or press the B key on your keyboard), then get set up with the following steps:
- Make sure black is set as your foreground color. Black will be used on the mask to hide parts of the layer content.
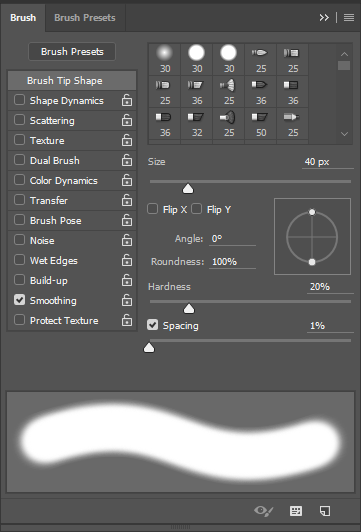
- Use Window > Brush to show the Brush Panel. Adjust your Brush settings to a big, soft brush. We set our brush size to 40 pixels with a 20% hardness. We also find that setting the Spacing to 1% results in a much smoother painting experience.
Now, paint just around the edges of the mustache with the edge of the Brush Tool brushing against the edge of the mustache. You may need to increase or decrease your brush size while painting – remember that you can use the ] key to increase brush size and the [ key to decrease.
Tip: In Photoshop® Preferences (press Cmd+K), go to the Cursors settings and select “Full Size Brush Tip” under “Painting Cursors”. This will show a more accurate brush cursor when using a soft brush and will make it easier to tell where your brush edge is, including the soft fade.


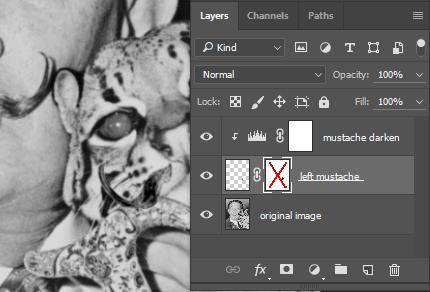
Use a soft brush in your layer mask to clean up the edges of the mustache - When you have finished painting into your layer mask and are satisfied with your blending of the mustache edges, zoom out to “Fit on Screen” viewing mode by using Cmd+0 and then view the image with and without the layer mask. Shft+click on the mask icon to disable the mask. Then Shft+click again on the mask icon to enable it. This is a way that you can check how much of a difference your mask has made compared to the unmasked layer.
- View the mask in the document window by Alt/Opt+clicking on the mask icon in the Layers Panel. While it is possible to edit the mask with black or white paint in this mode too, it’s not very helpful without being able to see the effects of editing the mask with the image visible. To restore your view to Standard Editing Mode, simply click on the layer’s content thumbnail icon.
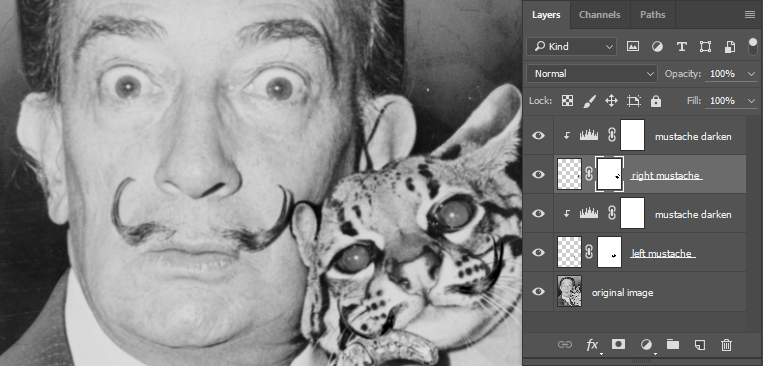
- Now for the true test: repeat all of the steps in both exercises with the other half of the mustache! You should end up with something like the image below.
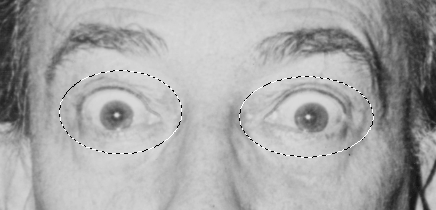
- Once again, repeat these steps for the eyes. Use the Ellipse Selection tool to select one of Dali’s eyes. Then hold Shft while selecting the other eye with the same tool. Make the “original image” layer active by clicking on it. Press Cmd+J to float the selected eyes to a new layer. Rename the layer “eyes” and position it as the topmost layer.
 Tip: If you see a warning that says “Could not make a new layer from the selection because the selected area is empty.” then you probably did not make the correct layer active before pasting or floating.
 - With your “eyes” layer active, use the Move Tool to position the eyes onto the cat’s face. You will have to select each eye individually to move it into place and use Edit > Free Transform to rotate it. Add a layer mask and use black paint to hide the edges of the eyes.
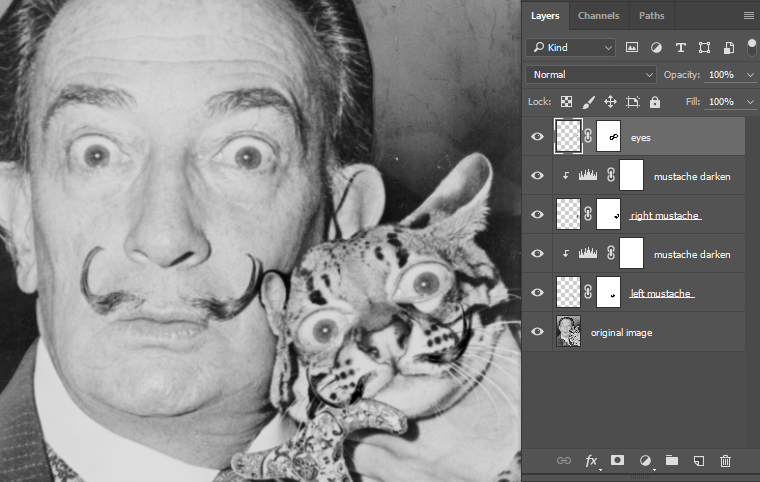
Okay, now things are getting weird.
