
Chapter 9: Layering and Collage
9.4 Exercise 4: Adding an adjustment to specific layers
In this exercise we want to add an Adjustment Layer to the top of the Layers Panel, in order to bring some variation in color into the composition.
- Make sure the top layer in your Layers Panel is your active layer. Add an adjustment layer for Hue/Saturation and use the “Colorize” button again to add a wash of orange. Notice that we’ve encountered a problem here – this adjustment colorizes the entire document and overrides the cyan Hue/Saturation layer we added previously. We want to retain those colors in our composition so we’ll need to solve this problem.

Oh no, we’ve lost our cyan! Don’t worry, there’s a solution… - Fortunately, current versions of Photoshop® give us an easy solution. Our first step will be to group the layers that we want the Hue/Saturation adjustment to colorize. To do this, click on the “ear” layer to activate it, then hold down the SHIFT key, and click on the last layer in the stacking order above the adjustment layer from Exercise 2. This will select all of the layers that make up our exquisite corpse.
- Next, click on the Layers Panel Pull-Down Menu in the top right corner of the panel and choose “Create Group From Layers…” In the New Group From Layers dialog box, name the new group, “corpse.” This will make a new folder in the Layers Panel for all of the body parts. Layer Groups are used to help keep the Photoshop® Layers Panel organized and work in a similar fashion as Illustrator® Layers in that they contain the layers that comprise different parts of a Photoshop® document.
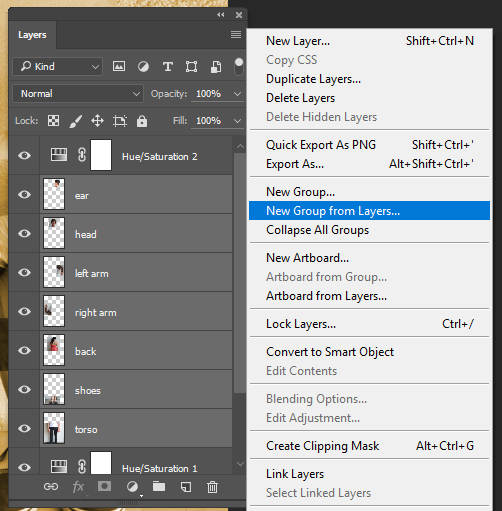
With layers selected for grouping, choose “Create Group from Layers…” in the Layers Panel menu. 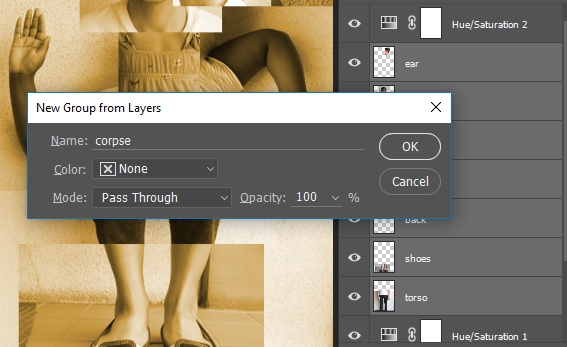
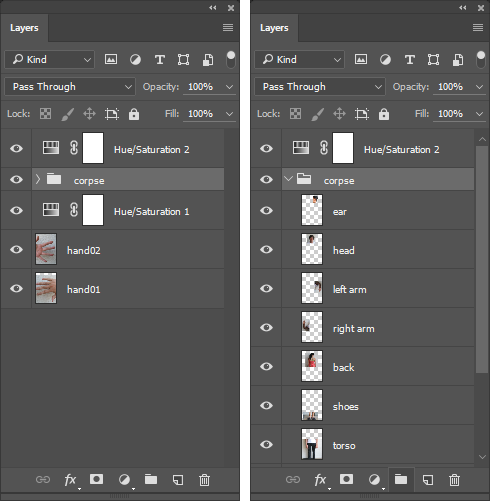
Creating a Group from our selected Layers. Notice there’s a thin arrow to the left of the “corpse” group’s folder icon. Clicking that arrow will expand the group so that you can see the layers it contains. Expand your “corpse” group so that your Layers Panel looks like ours in the second image below.
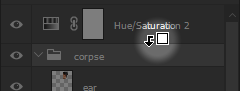
Clicking the arrow next to a Layer Group’s folder icon will expand or collapse that Layer Group. - Now we come to the solution to our Hue/Saturation conflict. Hold the ALT/OPT key while moving your mouse pointer over the line between the top Hue/Saturation adjustment layer and the “corpse” layer group. You will see the cursor change to an icon that looks like a square next to a downward-pointing arrow.
Watch for this cursor as you move your mouse pointer between layers while holding the Alt/Option key. When you see this cursor change, click the mouse button. This will create a clipping group between the adjustment layer and the merged layer. Now the adjustment layer will only affect the merged layer. The background images should appear cyan again.
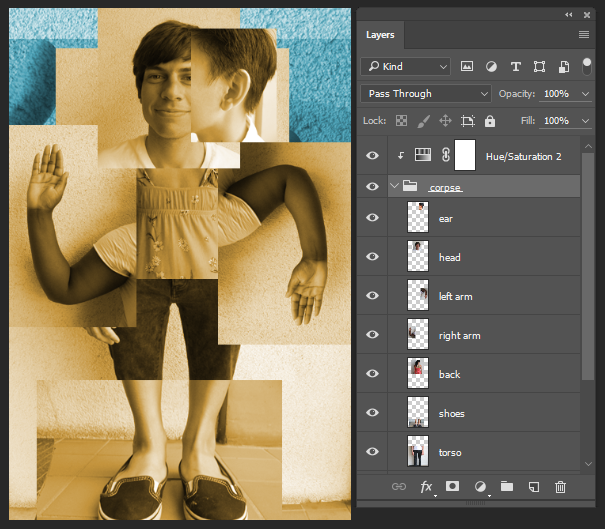
Our result after clipping the “Hue/Saturation 2” Adjustment Layer into the “corpse” Layer Group.
- Make sure that the “corpse” Layer Group is active, then use the Blending Mode Pull-Down Menu in the Layers Panel to set the group’s mode to Linear Light and enter 50% for the Layer Opacity (to the right of the Blending Mode Pull-Down Menu). A decreased opacity enables the viewer to see through the a layer or layer group, and helps to blend it with the layers underneath. Sometimes these methods can create a murky image where the foreground and background are hard to decipher. Remember that every image communicates a message, so you’ll want to be aware if certain blending modes or other techniques result in a loss of clarity in your composition.
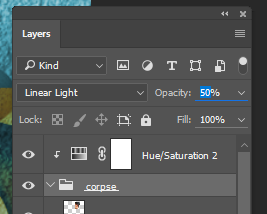
Set the “corpse” layer group’s blend mode to Linear Light and set its Opacity to 50%
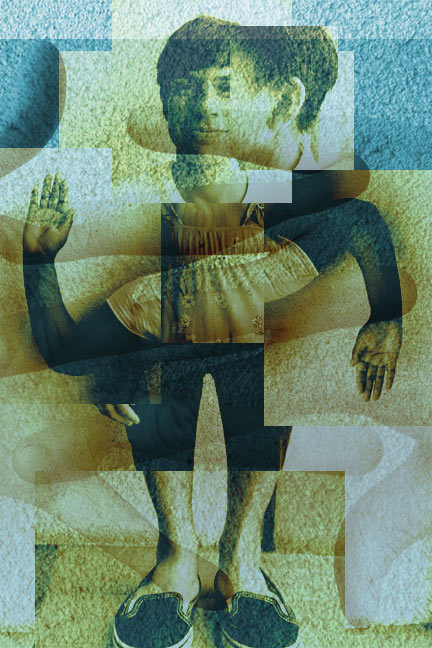
You’ve finished the exquisite corpse! Your result should resemble the image below. Save your work and take a break, you’ve earned it!
Attribution
“Digital Foundations – Intro to Media Design” by Xtine Burroughs and Michael Mandiberg is licensed under CC BY-NC-SA 3.0 / This is a derivative from the original work. Content is available under Creative Commons Attribution Non-Commercial Share Alike unless otherwise noted.
![]()
