
Chapter 6: Line Art and Flat Graphics
6.4 Exercise 4: Curves and angles
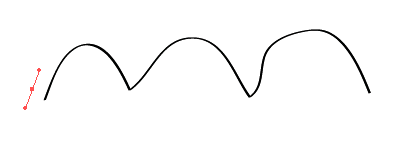
The last sample on the template is an example of a curve next to an angle, next to a curve, next to an angle, and so on. The Convert Anchor Point Tool is used to create this juxtaposition. This tool becomes active if you place your mouse near an anchor point while drawing a path. It is also available as a separate tool, hidden beneath the Pen Tool in the Tool panel.
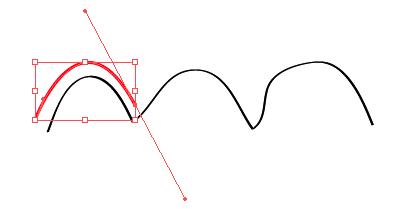
- Use the Pen Tool to click once and drag in the direction of the curve at the first anchor point.
Step 1 - Click at the second anchor point and drag to finish the first curve.
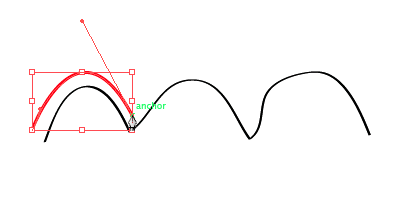
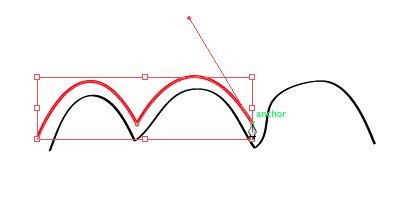
Step 2 - Now place the Pen Tool close to the anchor point you just created, wait until you see the Convert Anchor Point Tool, then click the mouse. The bezier handle disappears because you no longer have a curve.
Step 3 - Click after the next curve and drag the mouse down to create the curve.
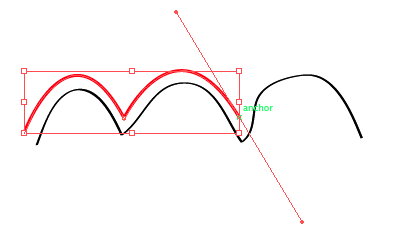
Step 4 - Click on the anchor point to convert it to an angle.
Step 5 - Repeat this process until you trace the template.
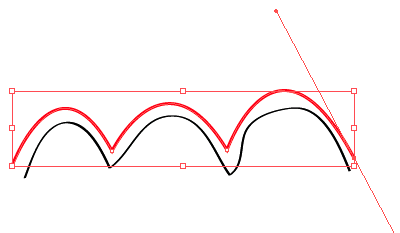
Step 6 By understanding how to create straight lines and curves, and by converting anchor points from curves to angles or angles to curves, any image can be traced.
…and yes! It’s time to save your files!
