
Chapter 3: Symmetry
1 3.5 Exercise 5: Asymmetry with imbalanced visual weight
In this exercise, the negative space is the white area surrounding the four black circles. The four black circles are asymmetric in regards to the overall composition. The negative space creates more mass than the positive space, and the four black circles pull the viewer’s eye to the bottom of the composition. What is also noteworthy about this exercise is that the four black circles are read as a line by the gestalt law of similarity, where like elements (four circles) are read as a whole line before being perceived individually.
- Copy the smaller circle in the fourth rectangle and move it to the empty composition to the right.
- Create three copies of the small circle within the composition.
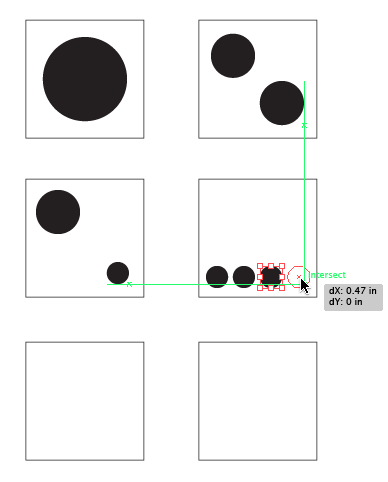
Results for square 4. Duplicate and aligning circles. - Select all four circles using the Selection Tool by marqueeing over them (click and drag over all four, beginning on the Artboard) or by selecting the first circle and then holding SHIFT while clicking on each one time with the mouse to add the remaining circles to the selection.
In the lab, we call this “shift-clicking”. Since we will probably refer to “shift-clicking” in future chapters, this always means holding SHIFT while clicking on an object in order to add to a selection.
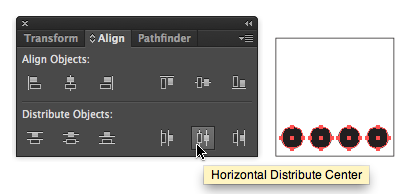
- With the four circles selected, view the Align Palette (Window > Align). This panel will be used to distribute the four small circles evenly. Click the fifth button from the left under the “Distribute Objects” part of the Align Palette. Hold the mouse over this icon to see a pop up dialog box that displays, “Horizontal Distribute Center”.
Location of the Horizontal Distribute Center on the Align panel. If the circles were not duplicated with the SHIFT key activated (to keep their position in order on one line), the Align Palette can also be used to align the objects with the button, “Vertical Align Top”.
Watch Out: One time I was demonstrating this and my circles were misbehaving. It turned out I had “Align to Artboard” activated within my Align panel. If your distribution seems far off, be sure that this option is not active in the bottom section of the Align panel.
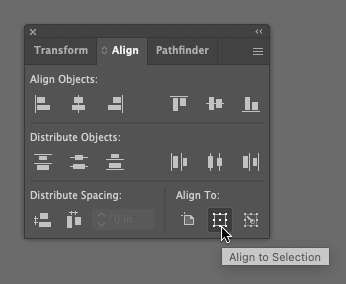
Location of the Align To controls in the Align panel. If you don’t have the Align panel displayed, use the menu bar and choose Window > Align. In the Align panel, if you don’t see the bottom third shown in the image above, click on the small ‘hamburger’ menu icon at the right of the panel’s tab bar, and choose Show Options (or you can double-click the tab for the Align panel and it will cycle through the display modes for the panel).
