
Chapter 3: Symmetry
3.7 Exercise 7: A focal point is defined within symmetric patterning
In the last exercise, the repetition of the sixteen circles created a pattern. In this exercise, the repetition is broken by changing the value and hue of one circle (one part of the whole) in the lower right quadrant of the composition. A focal point is created by the contrast of value and hue. When the contrast between like and unlike forms is as extreme as it is in this exercise, the designer can direct the viewer’s eye to a particular part of the composition. Utilizing contrast to create a focal point is an essential design skill.
- Select all of the circles in Exercise 6, OPT-drag them to the final composition. Hold SHIFT as you drag to move the set of circles along a straight path.
- Once the group of black circles is composed within the last composition, change the fill color of one of the individual circles to set a focal point. All of the black circles are part of a group. If the group is selected and the fill color is modified, all of the circles are modified. While this is useful, it is not our current goal.Instead, use the Direct Selection Tool to select just one circle. The Direct Selection Tool can be used to modify a path, an anchor point, or to alter one part of a group of objects.
With your Direct Selection Tool click inside one of the circles and be sure to click inside the circle and not on the path around the edge of the circle. We do not want to modify the path, we want to modify the color of the whole circle.
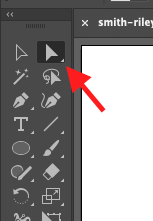
Location of the Direct Selection Tool 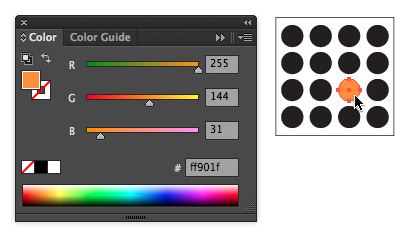
Using the Color panel to add color and change focal point - Set the fill color to a color of your choice by using the Swatches Palette, the Color Palette, or the Color Picker. Notice that as the value lightens, the contrast increases.
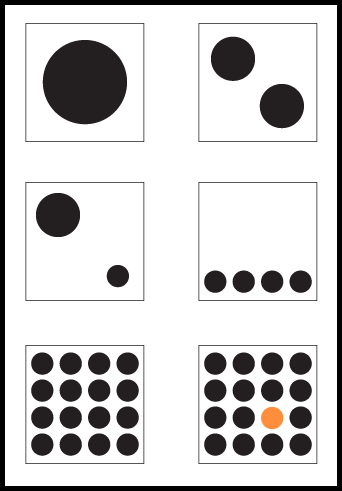
Completed exercise. Notice the balance and alignment of the composition. Further Reading: Primer of Visual Literacy by Donis A. Dondis and Principles of Form and Design by Wucius Wong - Save your file in the native/original file format (.ai). Save a second copy of your file as a Portable Document Format (pdf). To save as a PDF go to the menu bar File > Save As and choose the format Adobe PDF. A dialog box will pop up. For now we will go with the default settings. Choose Save PDF. These are the two files you will turn in.
Attribution
“Digital Foundations – Intro to Media Design” by Xtine Burroughs and Michael Mandiberg is licensed under CC BY-NC-SA 3.0 / This is a derivative from the original work. Content is available under Creative Commons Attribution Non-Commercial Share Alike unless otherwise noted.
![]()
