
Chapter 10: Repetition and Cloning
10.4 Exercise 4: Matching levels and image quality
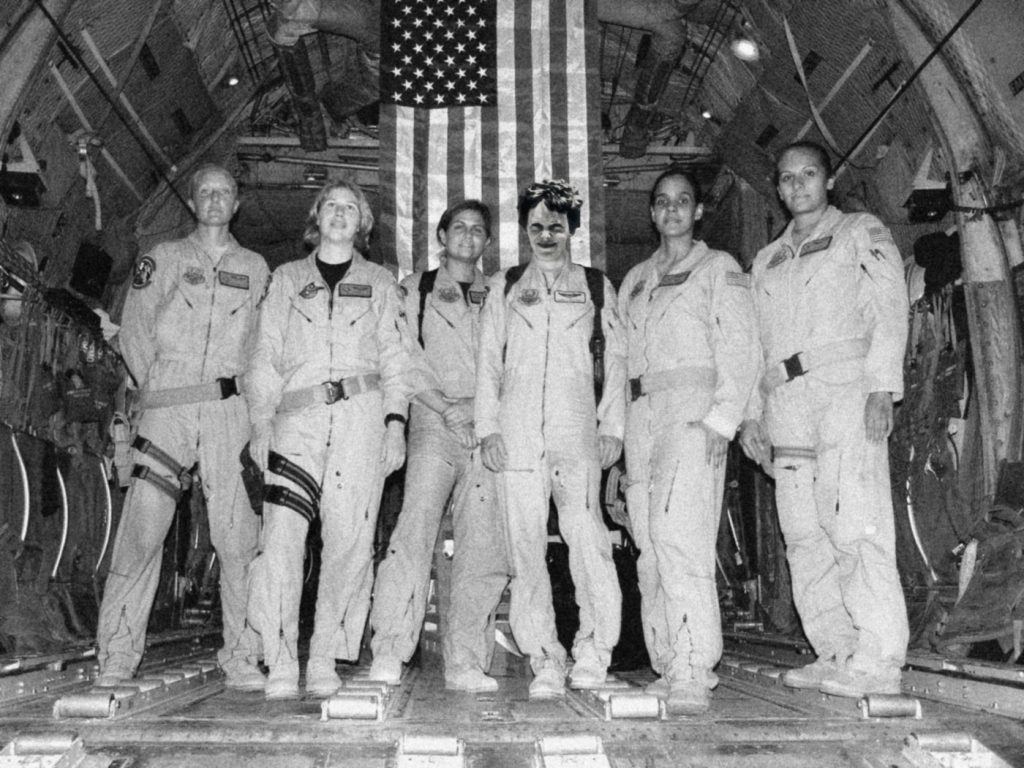
The last steps are to correct Amelia’s skin tones and match the quality of the images. Notice that Amelia’s photograph was taken outdoors, while the Air Force crew was indoors. The harsh light on Amelia’s face is noticeably different from the light on the rest of the crew’s faces. We will make a quick adjustment to Amelia’s skin tone in order to create a more realistic collage.
One method of making this adjustment would be to use the Burn Tool on the image pixels of the Amelia layer. Burning and dodging are photographic manipulations native to the traditional darkroom. In the darkroom, additional exposure time increases the amount of light hitting the paper. This can be done selectively, resulting in a “burned” area of the image. Burning darkens the value of that portion of the print. Light can also be blocked during the exposure by dodging over image areas where the tonal values are too dark with a small tool, resulting in a lightened area of the print. Photoshop® has Burn and Dodge Tools to provide a digital equivalent to their traditional darkroom counterparts.
However, using the Burn Tool in this case is a destructive method and we want to stick with non-destructive methods so that we can continue to make adjustments without permanently altering the pixels in any of our layers. We’ll work with Amelia’s skin tones using a Levels Adjustment Layer to achieve the results we want instead of using the destructive Burn Tool.
- With the Amelia layer set as your active layer, add a Levels Adjustment Layer. We only want this to adjust Amelia’s head, so make sure to clip the Levels Adjustment Layer into the Amelia layer. (Remember clipping from the Exquisite Corpse exercise in the last chapter?).
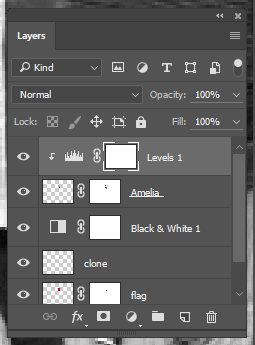
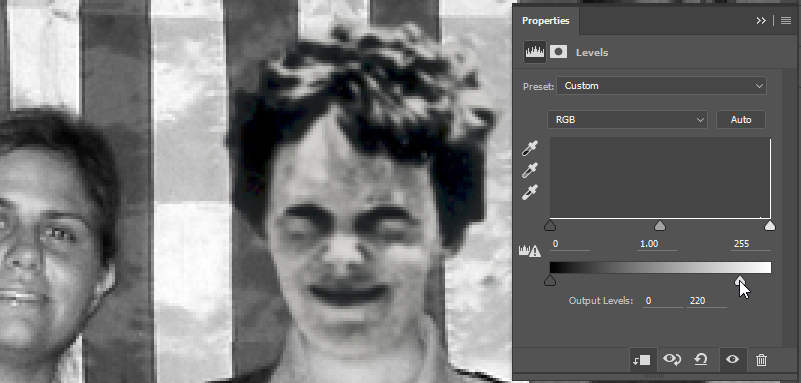
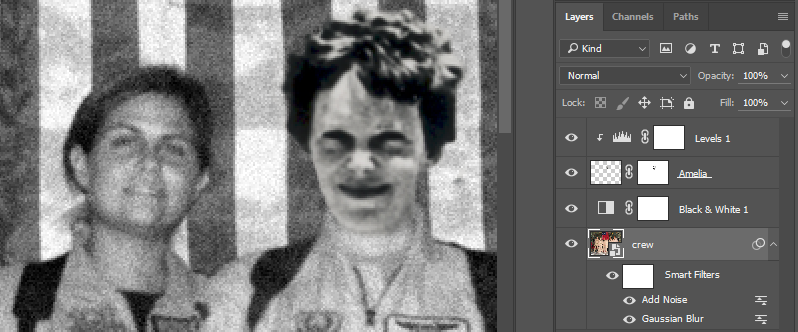
Make sure to clip the Levels 1 layer into the Amelia layer (hold ALT/OPT and click the line between those two layers in the Layers Panel. - In the Properties Panel, use the white slider on the black-white spectrum bar to limit the white values. This will bring the tone of the highlights on Amelia’s face down to match the other people in the image. We adjusted the slider so that the white Output Levels were at about 220.
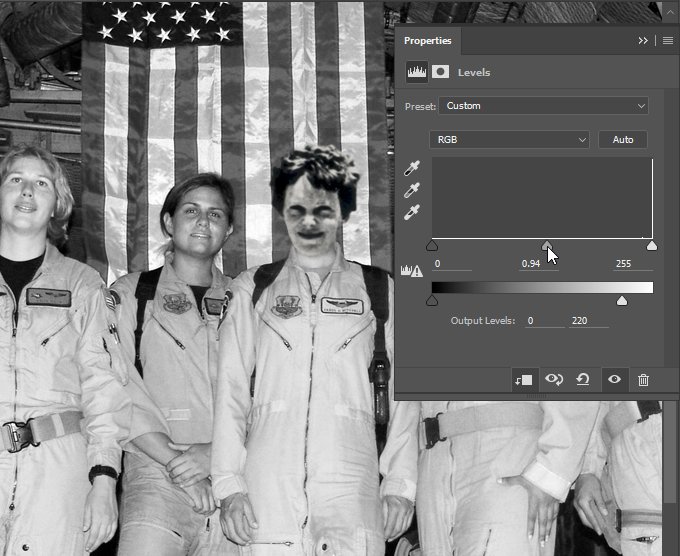
- Next, adjust the midtone slider in the histogram area of the Properties panel (it’s a flat histogram, but it’s still a histogram) until the midtones in Amelia’s face are closer to those of the other crew members. We went with a midtone value of about 0.94 to start with. The beauty of using an Adjustment layer is that you can adjust the lightness or darkness until you have an accurate match, and re-adjust later if you decide your first round of changes wasn’t quite right.
- Our final manipulation will be to match the quality of the images. We’re obviously working with two photographs taken many years apart from each other, and that shows in the quality of one image compared to the other. The photo of the crew is much clearer than that of Amelia. Since we can’t enhance the quality of Amelia’s photo, the approach in situations like these is to reduce the quality of the better image so that it matches the lowest quality image in the composition.
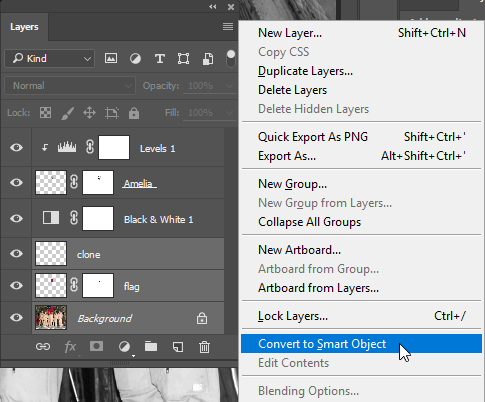
We’ll do this by using a combination of filters. Since filters alter pixels, we’ll also want to use Photoshop® Smart Objects to allow this step to be done non-destructively. In your Layers panel, click the Background layer so that it is the active layer. Then hold down the Shift key on your keyboard and click the clone layer, this should select the clone, flag, and Background layers. With those three layers selected, click the menu button in the upper right of the Layers Panel and select “Convert to Smart Object”.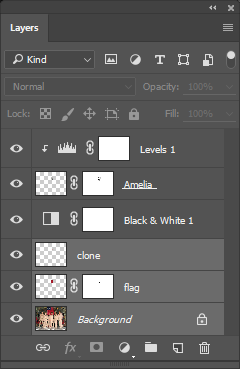
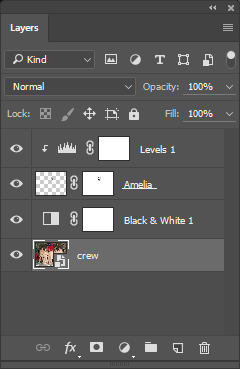
The Smart Object you’ve created looks like a layer named “clone” but has a thumbnail showing the full crew image and a Smart Object icon. Rename the Smart Object layer “crew”.
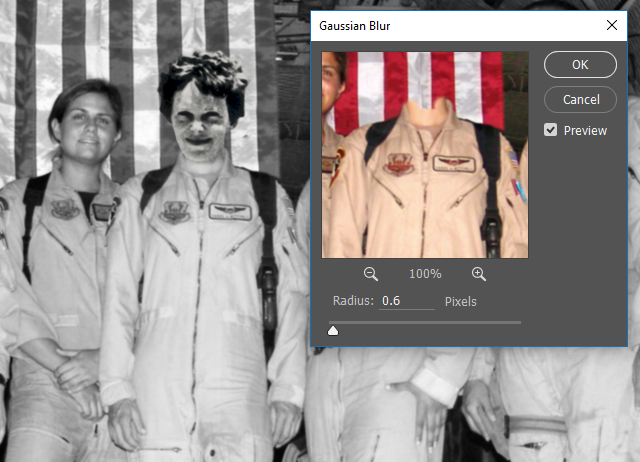
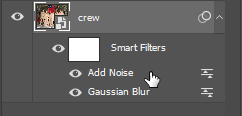
A Smart Object combines the selected layers into one layer, but retains their ability to be edited. If you want to edit layers within a Smart Object, double click the Smart Object’s thumbnail icon in the Layers Panel and the embedded layers will be opened as a separate tab. This is kind of like having a PSD within your PSD. The advantage of converting to a Smart Object is that filters can be applied to the Smart Object in a way that allows them to be re-adjusted. You’ll see in the next step. - When looking at the quality difference between the images, Amelia’s image is fuzzier and has more noticeable film grain. Let’s start by softening the quality of the crew image (now our Smart Object). WIth the “crew” layer active, use the Menu Bar and choose Filter > Blur > Gaussian Blur… then, in the Gaussian Blur dialog box, adjust the Radius until the quality of the crew image looks like a better match to Amelia’s photo. Make sure “Preview” is checked so you can see the effect in your composite image while you make adjustments. It won’t take much blur, maybe around a 0.6 radius. When you’re happy with your amount of blur, click OK.
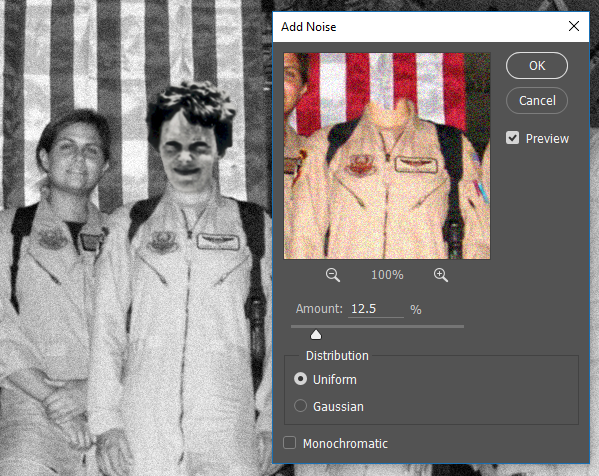
- Now let’s add some grain to the crew image. Choose Filter > Noise > Add Noise… from the Menu Bar. The Add Noise filter adds a graininess to an image. You’ll notice though that the noise isn’t being blurred and has a sharper quality than the grain in Amelia’s photo. For now, accept the default settings for Add Noise and click OK.
- Here’s where the power of Smart Objects and Smart Filters really becomes clear. In your Layers Panel, notice that the “crew” layer now has two Smart Filters. Each Smart Filter has an eyeball icon that can be used to turn the filter off or on. You can also click and drag on each individual Smart Filter to re-order them. Click on the Add Noise filter in the Layers Panel and drag it so that it is below the Gaussian Blur filter – you’ll see the noise is now blurred!
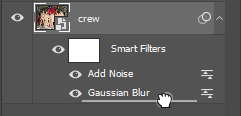
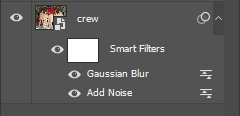

- Now that the Add Noise Smart Filter is underneath the Gaussian Blur Smart Filter, we can go back into Add Noise and re-adjust until the two photos match better in quality. To do this, double-click on name of the Add Noise Smart Filter in the Layers Panel. You’ll see a message notifying you that the Smart Filters stacked on top of Add Noise will not preview while you’re making adjustments – this means you won’t see blur effect when adjusting the amount of noise, so you’ll need to make a best guess. Click OK in that message and you’ll then the same Add Noise dialog box you used when adding the filter. Adjust the amount of noise to a level you think will make the images feel like they’re equivalent, then click OK. You may need to repeat this process, fine-tuning the amount of noise until you are satisfied with the results. If necessary, you can double-click the Gaussian Blur Smart Filter and adjust it as well, and you may wish to adjust the Levels 1 midtones.
Once you are happy with your results, Save your work. You’re finished with this chapter!
Attribution
“Digital Foundations – Intro to Media Design” by Xtine Burroughs and Michael Mandiberg is licensed under CC BY-NC-SA 3.0 / This is a derivative from the original work. Content is available under Creative Commons Attribution Non-Commercial Share Alike unless otherwise noted.
