
Chapter 6: Line Art and Flat Graphics
6.5 Exercise 5: Tracing an image and creating a clipping mask
Clipping Masks
The Pen Tool is often used in combination with images or vector art to create clipping masks. A clipping mask is used to redefine which parts of an object are revealed to the viewer. They are commonly used on photograhic images to “remove the background” from a figure in the image. Included in the files for this chapter is a photograph of a hand in front of a flat wall (ch6-hand.psd is a Photoshop® document). First the Pen Tool will be used to draw a path around the arm, then the resultant path will be used as a clipping mask to hide the rest of the photograph.
- Start with a new Print document in Adobe® Illustrator® set to standard Letter size dimensions, landscape orientation. You may change the unit of measure to Inches. Name and save your file as ch6-clippath-hand.ai.
- Choose File > Place to place the image of the hand (ch6-hand.psd) on the new layer. The cursor will ‘load’ the image. Click once anywhere on the artboard. Don’t click and drag. That will change the image size.
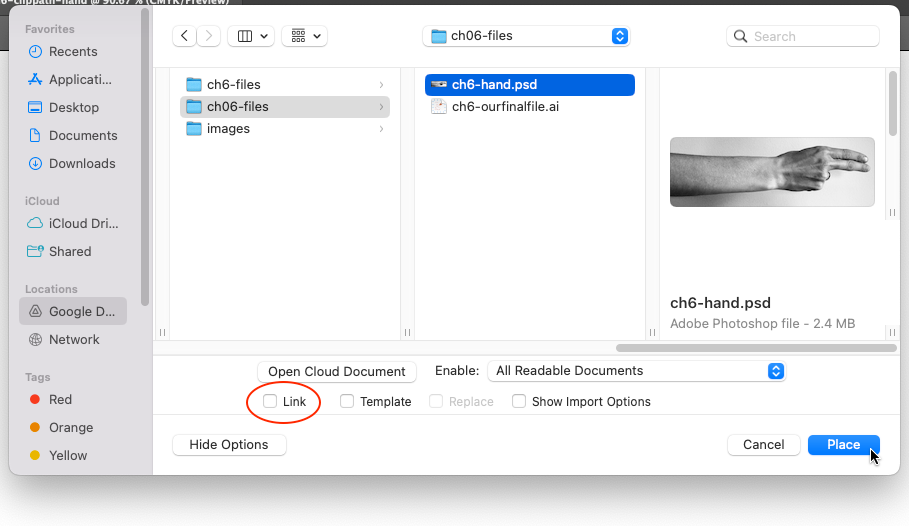
Locating and unchecking the Link box. The ch6-hand.psd being placed is included in the Chapter 6 Files you downloaded when starting this chapter. Watch Out: The “link” checkbox in the Place dialog box is used to link (when checked) or embed (when unchecked) the image file in the Illustrator® document. Linking files can be useful as the images are not actually stored in the Illustrator® document, so the file size of the Ai document is not affected by large images. However, linked files must remain available on the hard disk or in the folder, in the same relative position as they were when the relationship between the linked image and Illustrator® file was created in order to view and print the Ai document. For beginning students, it is recommended to embed images, or keep “Link” unchecked. - Double-click the icon in the Layers panel and click on the “Template” checkbox. The image will appear dim. Then rename Layer 1 to background and click OK. Next, create a new layer above this template layer. Name the new layer ‘hand’.
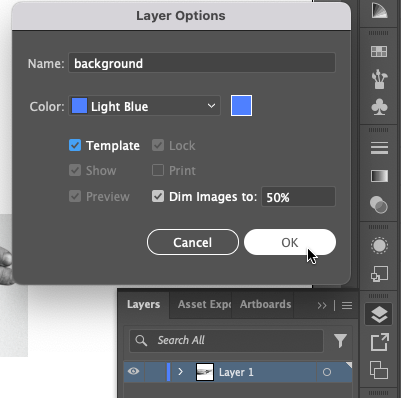
Setting up Layer Options to create a Template layer with the image dimmed to 50%. 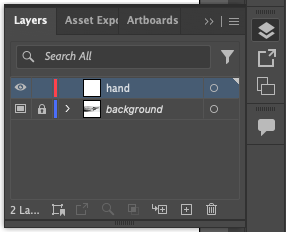
Create a New Layer from the Layers panel and name it hand. - Use the Pen Tool to create a path along the edge of the hand and arm. Remember to end your path at the same anchor point where you started so that it closes the shape. Also remember that the path doesn’t have to be perfect initially, as the Direct Selection tool can be used to modify the path once it has been created.
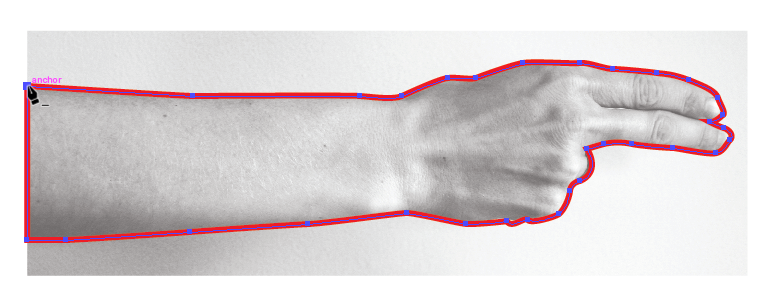
A path created around the edge of the hand and arm using the pen tool. - To transform the path into a clipping mask, you will select both the path and the image. First, unlock the background template layer. Next make sure the hand layer is active. Using the Selection tool, click on the path (around the arm/hand) then hold SHIFT and click on the photograph background somewhere above the arm/hand selection. You will see anchor points around the path you just plotted and on the four corners of the placed photograph. From the menu bar, choose Object > Clipping Mask > Make.
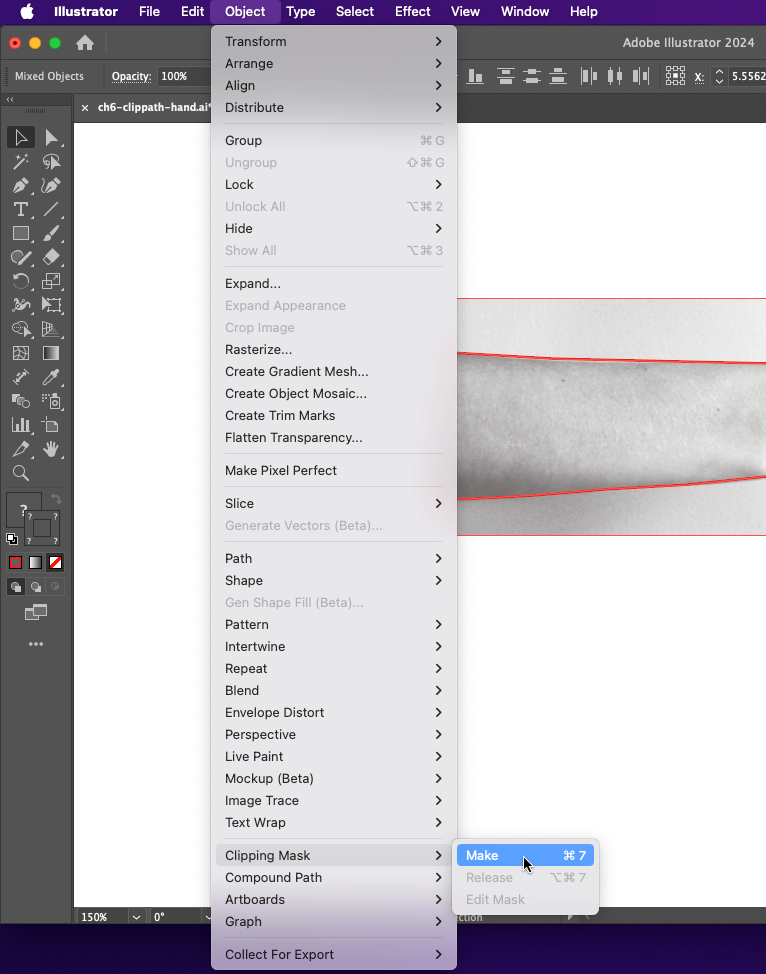
Transforming the path into a clipping mask. From the menu bar, choose > Object > Clipping Mask > Make. A clipping mask is used to define the areas that are revealed to the viewer, while any part of the image outside of the path is hidden.
Tip: If you are making a clipping mask, you should have a path that is placed inside the photographic image. That is, the photographic image should be larger than the path that will be used to mask it. If the path is larger than the entire image, the mask will simply reveal everything, in which case you don’t really need a mask.Tip: Be sure to click on the path, then shift-click the photographic image someplace outside of the path. Shift-clicking inside an area that includes both the path and the image deselects everything! -
Modifying the clipping mask or the image that is masked is possible, as long as you select just one or the other with the Direct Selection tool. For first time users, this is not always as easy as it sounds. The most fool-proof way to select the mask and not the image is to use the Layers panel. Expand the hand on the Layers panel by clicking the arrow button to the left of the layer’s icon. Now you have a group that contains the clipping mask and the photographic image. Expand the group so that you can see all of its parts by clicking on the sideways triangle to the left of the word, “Group”, in the Layer panel. Now you will see the mask and the image.
To the right of each path on a layer there is an area where a small colored box appears if that particular path is selected. Clicking on this part of the Layer panel will select a path within the Art Board. Click to create a blue box next to the clipping mask in the Layer panel. You should see the anchor points surrounding the mask within your document. Use the Direct Selection Tool to modify the mask without touching the photographic image.
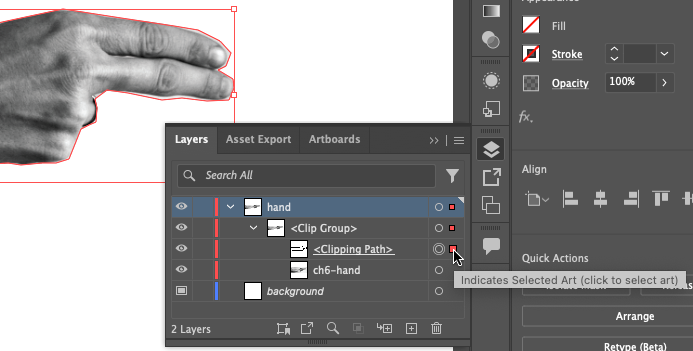
Left: Successful masking of the hand and arm. Right: The Layers Panel after clipping has occurred. To open secondary layers, toggle (click on) the gray triangle to the left of the layer’s icon. Click on the right end of the layer to easily select the objects in that layer. - The Selection Tool can be used to move the entire image and mask as one unit, since they are grouped together within the Layer panel. Once a clipping mask has been made, it will remain grouped in the Layer panel unless you release it.
Save your work, you’ve finished Chapter 6!
