
Chapter 11: Non-Destructive Editing
11.1 Exercise 1: Using Quick Masks and Alpha Channels
Photoshop® Quick Masks and Alpha Channels provide a method of working with selections that is similar to working with the Layer Masks you were introduced to in Chapter 10. They can be very helpful when creating a selection that you’ll want to use more than once.
- In Photoshop®, use File > Open to open the file of Salvador Dali holding a cat from this chapter’s Download Files.
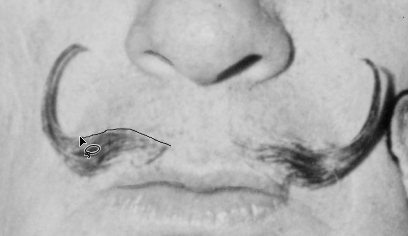
- Use the Lasso Tool from the Toolbar to make a selection around the left part of Dali’s mustache. The Lasso Tool can be used to make freehand selections. Click and hold with the Lasso Tool near the beginning of of the mustache and drag all the way around its contour. The selection is made when you bring the mouse pointer back to the point where you started and then release the mouse button. It’s okay if your selection is not be a perfect tracing of the mustache, we will modify the selection in the next step. The Lasso tool serves the purpose of making a fast draft of a selection which can be used as a starting point for masks.
- Enter Quick Mask Mode by pressing the “Q” key on the keyboard or clicking on the Quick Mask icon at the bottom of the Toolbar, just beneath the foreground/background color chip icons. Quick Mask Mode will put a red tint over all of the image areas that are not selected. This makes selected areas easily visible and provides another way to modify a selection, similar to other masks in the Adobe® Creative Suite® programs (like Photoshop® Layer Masks). Learning to use Quick Mask Mode will help you to understand masking.
Remember, Masks define which areas are visible and which image areas are invisible. Masks do not delete image areas (this is why we have classified this as “non-destructive”), they simply are used to hide or show parts of images. Since masks are either hiding or showing image areas (or partially showing), they operate in black and white and create transparency with shades of gray.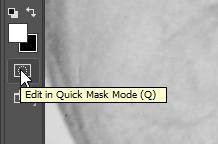

- Click on the Brush Tool and make sure that the default colors are loaded into the foreground/background color chips (black on top, white as the background color) by clicking on the small black/white color chip icon to the top left area of the actual color chips in the Toolbox.
Tip: Pressing the “D” key on the keyboard will load black into the foreground color and white into the background color chip. These are the default color positions.
As you’ve learned previously, in a Layer Mask the color black will hide part of the image and the color white will reveal part of the image. Quick Mask Mode works in a similar way, with the red overlay representing where you have painted with black or white to add or remove the to mask. Painting with white paint on the Quick Mask will take away red parts (masked parts). The big difference between Quick Mask and a Layer Mask is that the Quick Mask is actually creating a selection rather than hiding/revealing image pixels. The “masked” areas (painted with black and represented by the red mask) are areas that are not selected, while “unmasked” areas (painted with white, no red overlay) represent selected areas.
In other words, painting with black in the Quick Mask will add to the mask and subtract from the selection area. Practice painting with black and white paint. Paint with different size brushes and notice what happens with a soft or hard brush, or with the brush set at different opacities. As you are painting, press the letter “Q” to exit Quick Mask Mode. You will see the resulting selection. Press “Q” again to re-enter Quick Mask Mode and continue painting to modify the mask. After a little experimentation like this, you’ll begin to see how Quick Mask Mode allows you to use painting tools to create and/or refine a selection, instead of being limited to only using the selection tools (marquee, magic wand, lasso, etc.).
Use Quick Mask Mode to refine and clean up the selection you made around Dali’s mustache
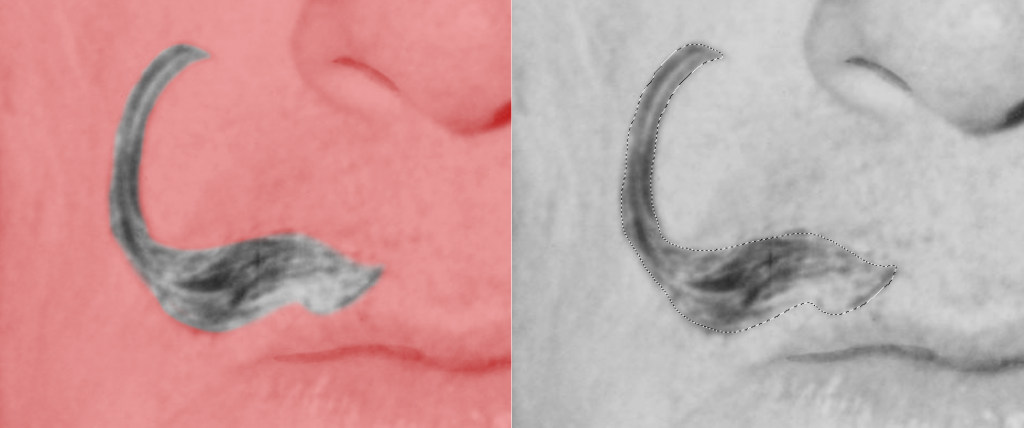
Our final brushwork in Quick Mask Mode and the resulting selection in Standard Editing Mode. - Exit Quick Mask and return to Standard Editing Mode when you are finished modifying the selection in Quick Mask Mode. Your selection should now more closely fit the contour of the mustache.
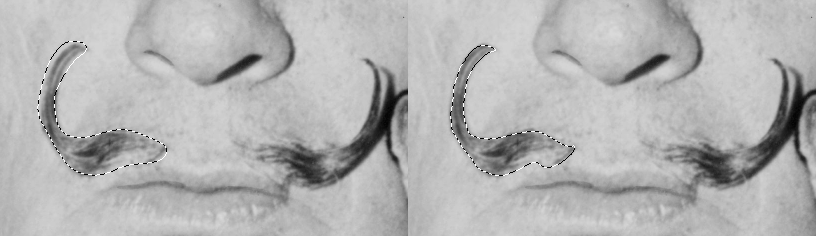
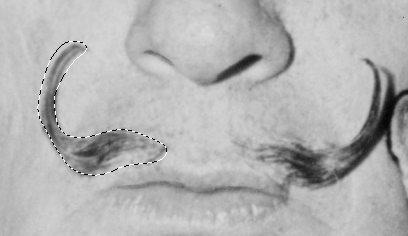
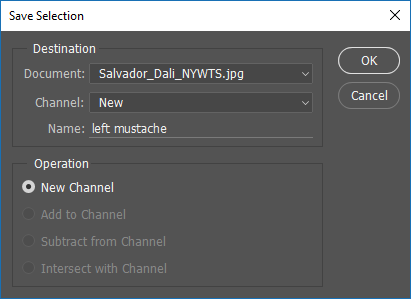
Here is an image of our Lasso tool selection before Quick Mask and the final selection after making modifications with the Paintbrush in Quick Mask. - Choose Select > Save Selection and name the new selection left mustache. Click OK.
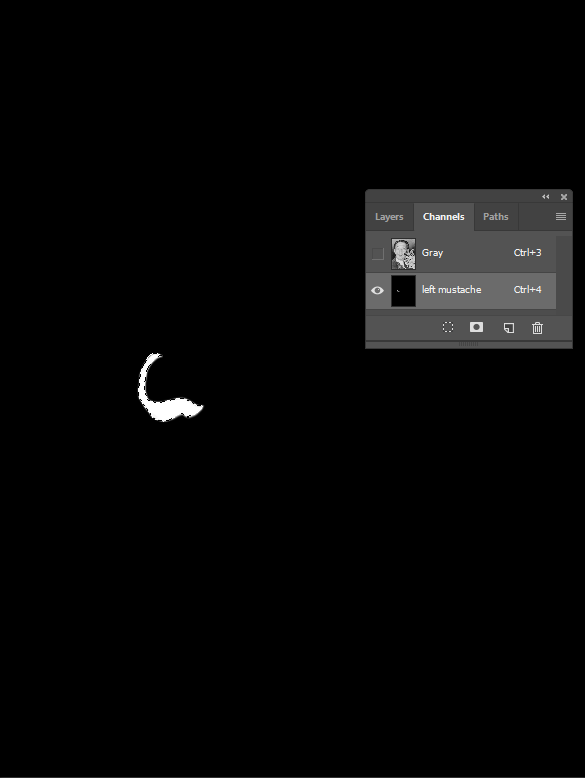
- When a selection is saved it becomes an Alpha Channel. An alpha channel is a grayscale channel that defines which parts of an image are visible. All channels can be viewed individually by clicking on their names in the Channels Panel.Click on the Channels tab in the Layers Panel, then click on the name, left mustache. The file now shows the left mustache alpha channel. Everything that is not included in the mask is black, and the once selected shape of the left side of the mustache is white.
You can also think of an Alpha Channel as a Layer Mask that’s not attached to a specific layer. Saving a selection as an Alpha Channel allows you to re-use that selection when needed without having to re-build it from scratch.
- Click back on the Gray channel in the Channels Panel to return to Standard Editing Mode. Deselect the left side of the mustache by choosing Select > Deselect from the menu bar or use the key command, Cmd+D.Now, we’ll reselect the left side of the mustache by loading our saved selection from the Alpha Channel we created. Start by holding down the Cmd key on your keyboard. Next, move your mouse pointer over thumbnail image of the left mustache Alpha Channel in the Channels Panel and click the thumbnail once.
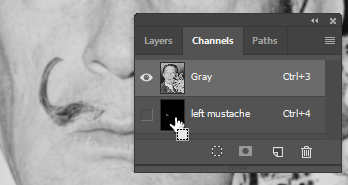
When holding Cmd and positioning your mouse pointer over an Alpha Channel thumbnail, you will see a “Load As Selection” cursor. Click once to load that Alpha Channel as a selection on your canvas. You should see the selection appear around the left side of Dali’s mustache again. This is referred to as “loading” a selection. Practice deselecting and then loading the Alpha Channel to re-select by using Cmd+D (deselect) then Cmd+click (reselect) on the alpha channel.
Windows users: Remember that you will use the Ctrl key instead of Cmd for any Cmd+ operations.. - Use File > Save As… to save your work as a PSD named ch11-yourlastname-dali-cat.psd
