
Chapter 9: Layering and Collage
9.3 Creating and manipulating layers
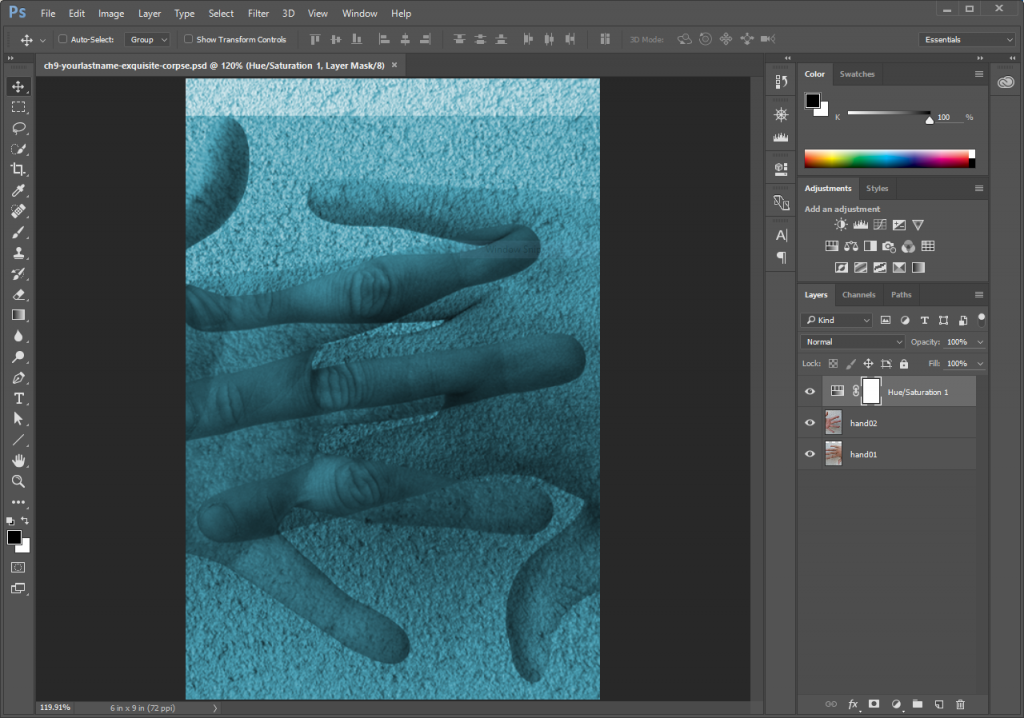
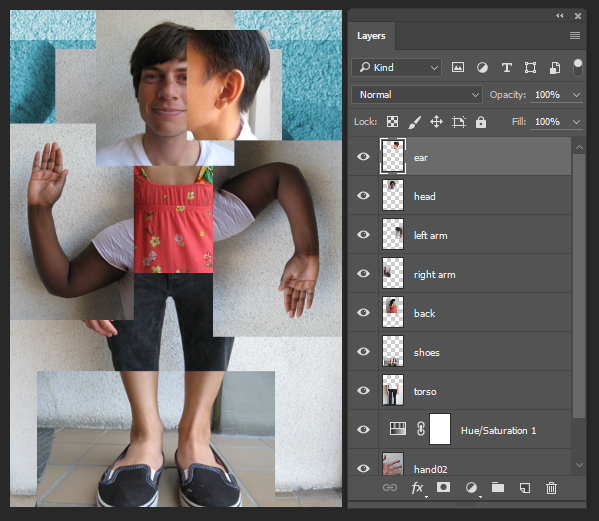
- We’ll use the double-exposure file that we just created as a starting point, so use File > Save As and save the file as ch9-yourlastname-exquisite-corpse.psd. Your file should look like the image in the screen capture below.
- Keep ch9-yourlastname-exquisite-corpse.psd open and use File > Open in Photoshop® to open all of the documents used in this exercise (from the downloaded Work Files, the files are: arm.psd, back.psd, ear.psd, head.psd, shoes.psd, and torso.psd). The files will open as individual tabs in the main Photoshop® window.
- Move all of the body parts into the exquisite-corpse document, just as we moved the hands into the double-exposure document in Exercise 1. Once all of the parts are on separate layers in the exquisite-corpse document, rename all of the layers to indicate which body part is on the layer. You can use the eyeball icon for each layer in the Layers Panel to hide and show the layer and quickly assess which image each layer contains. You can close the files for the various parts after you’ve added them all as layers, make sure to keep your exquisite-corpse image open (and save your work!)
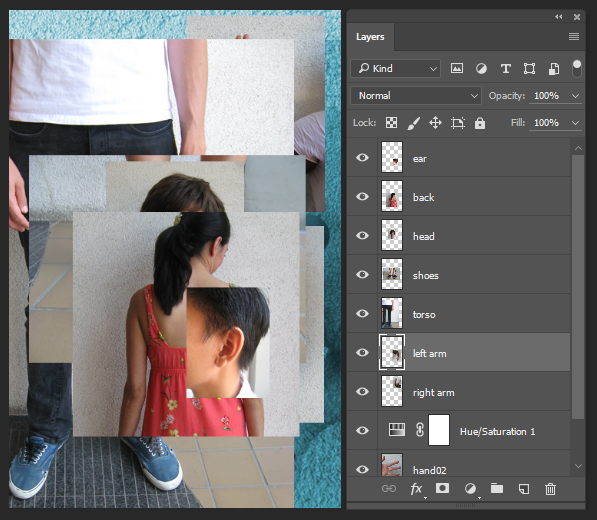
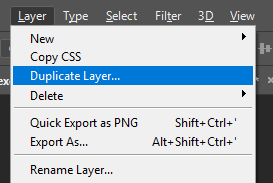
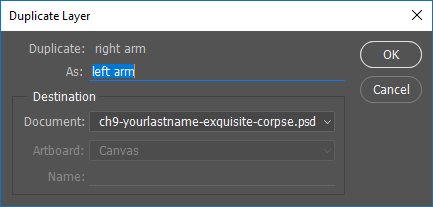
- Click on a layer and drag it above or below another layer. The order of the layers in the Layers Panel is referred to as the “stacking order”. This determines which image appears in the foreground (closer to the viewer’s eyes) and which images fall to the background. Organize the layers so that they appear like the stacking order in the screen capture above. Notice that our Layers Panel has a left and right arm! We named our arm layer “right arm” then used the menu item Layer > Duplicate Layer… and named the duplicate layer, “left arm.” Do this in your own file then, making sure “left arm” is the active layer, use Edit > Transform > Flip Vertical to flip the left arm and then Edit > Transform > Flip Horizontal to distinguish it from the right arm.
- Click on each layer to activate it, then use the Move Tool to reposition the layer and Edit > Free Transform to scale it. Some of the layers will need to be scaled and moved in the stacking order if you want your exquisite corpse to look just like ours. When scaling, remember to hold the SHIFT key while dragging on one of the four anchor corners in the Free Transform box to maintain proportion – or to link the width and height values if you are using the Options Panel to make the transformation. Also, be aware that it is safe to scale an image down in Photoshop®; however, it is typically not a good idea to scale an image up (or to make an image larger than it is) as this will create new interpolated pixel information in the image and will result in a degradation of image quality.Once you’ve finished this step save your file and move on to Exercise 4.
*Note: If the Auto-Select option is toggled on for the Layer option, clicking on an image in the canvas area will activate that layer regardless of what layer you select in the Layers Panel.

