
Chapter 9: Layering and Collage
9.1 Exercise 1: Using layers to create a double-exposure
In the camera, a double-exposure requires releasing the shutter to create one photograph, then carefully rewinding the film back to the same frame, and releasing the shutter again to create another photograph on top of the first one. An example of this process can be seen in Henry Van der Weyde’s image of Richard Mansfield as Dr. Jeckyll and Mr. Hyde.

In Photoshop®, the double exposure can be made by putting two images on separate layers, then adjust the blending mode of the top layer. We’ve provided two images on the disk, but you might explore taking two images with a digital camera or scanning two photographs that address the subjects of time, dreams, paranoia, schizophrenia, otherworldliness, duality, etc. The double exposure is often used to express duality or the passing of time (also see Duane Michaels’ photographs).
- Create a New Document using File > New. Name it ch9-yourlastname-double-exposure (using your own last name in place of yourlastname). Set the Width to 12 inches and the Height to 10 inches (make sure that your units of measurement are set to inches and not pixels – otherwise you’ll have a much smaller document than intended). Set the resolution to 72 Pixels/Inch and leave the color space in RGB mode. Lastly, make sure the Background Contents setting is set to Transparent.
 72 Pixels/Inch (PPI) is also known as “screen resolution.” Working at 72 PPI is appropriate for any content that will appear on a screen and that will not be printed.
 - Open the hand01.jpg file from the Chapter 9 Downloaded Work Files. The file will open as a new tab in the main Photoshop® window. Click on the tab for the hand01.jpg image and pull down and away from the toolbar so the image is opened in its own window. There are many ways to copy the hand into the new document we are using to assemble the double-exposure. One method is to use the Move Tool to drag the hand layer (in this case, the Background layer is the hand layer) into a different document. Click on the Move Tool in the Tool Panel (or press the V key on your keyboard), then click on the hand image and drag it to the center of the double-exposure document we created in step 1. After you have copied the hand into the double-exposure document, you may close the hand01.jpg document.
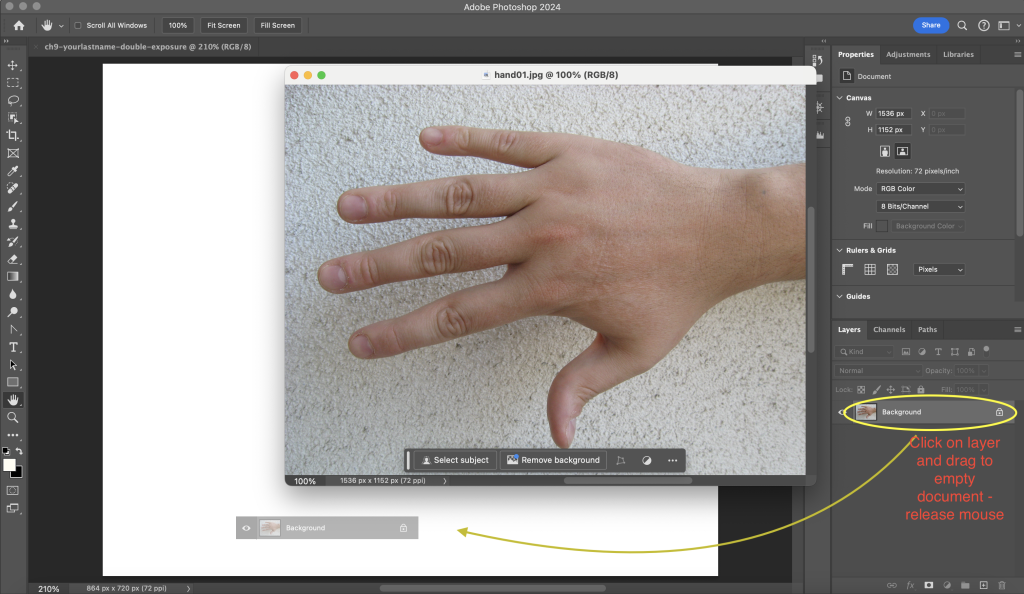 Alternately, the hand could have been copied and pasted using Select > Select All, then Edit > Copy, and finally clicking on the new document before choosing Edit > Paste. Layers can also be dragged from the Layers panel into another open document.
Notice that when the hand is dragged into the double-exposure document it appears very large. The hand file contains more pixels than the double-exposure file does. We did this on purpose for two reasons: 1) To demonstrate that the number of pixels in a document has a noticeable affect on the way that the file is previewed in Photoshop® and 2) To distinguish the hand, originally a digital photo (the camera we used stored a significant amount of information), from the new working file that we generated in step 1. You can always create a new file with a higher resolution value, but for exercises that will not be printed it is faster to work in a file with resolution no greater than the screen. The larger the resolution, the larger the file size; and larger file sizes require greater computer processing power. Larger file sizes, requiring more processing power, tend to slow down the work process. In a learning environment, we try to avoid hindrances.
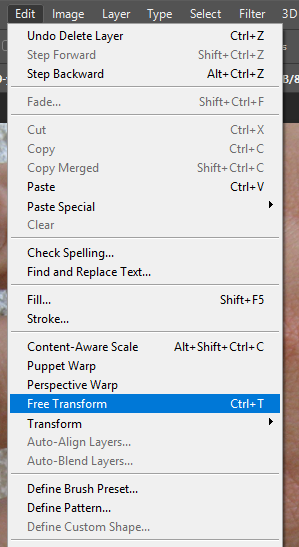 In the Layers Panel, double-click on the name “Layer 2” to rename that layer “hand01.” Notice “Layer 1” beneath the “hand01” layer. Layer 1 is completely transparent. It was the first layer that Photoshop® generated when the new document was created. By moving the hand into the new document, we created a new layer. Click once on Layer 1 and then click on the trash can icon in the bottom right corner of the Layers Panel. At the “Delete the layer Layer 1” warning dialog box click “Yes.” Now the layer hand01 is active (indicated by a blue highlight). To scale the hand so that it fits into the document, click Edit > Free Transform.
- When the image to be transformed does not run off the edges of the file document (as this one does), it is easy to transform it by using the arrows at one of the four corners of the transformation box to click and drag towards the center of the image. This type of transformation is similar to transforming objects in Illustrator®. Current versions of Photoshop® will automatically maintain the proportions of the image being scaled (if you’re using an older version you’ll need to hold down the SHIFT key while scaling in order to maintain the proportions). In a situation like this where we can’t see the edges of the image’s transformation box, it is easier to use the transform tools in the Options Panel at the top of the document. First click on the link icon between the width and height percentage boxes to maintain the image’s aspect ratio (or proportions). Now enter 65% into either the width or height box and notice that the other box also takes on the 65% value. Press “Return” or “Enter” on your keypad to finalize the transformation.
 Tool Tip: You can also confirm a transformation or a Type Tool setting in Photoshop® by clicking on the check-mark icon in the top right area of the Options Panel when you are using these tools. To get out of a transformation box, a crop box, or the Type Tool hit the Escape (ESC) key on the keypad, or use the delete icon in the top right area of Options.
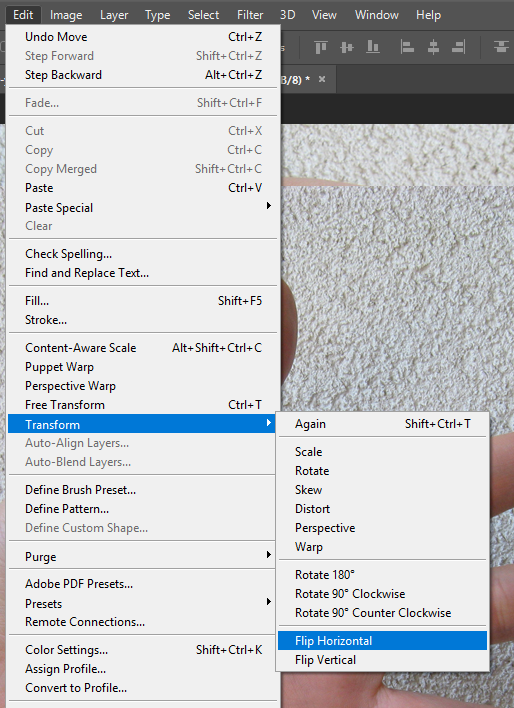
 - Open hand02.jpg and use the Move Tool or another method to bring the image of the second hand into the double-exposure document. Notice that it has already been scaled for you. While the second hand (Layer 1 in the double-exposure document) is still active in the Layers Panel, click Edit > Transform > Flip Horizontal. The Transform submenu will modify any layer or a selection on any layer. It does not modify the entire document. Notice that this transformation only occurred on the second hand and not on the hand01 layer. Flip the image back to its original orientation by again clicking Edit > Transform > Flip Horizontal. In the Layers Panel, double-click on the name of Layer 1 to rename it, “hand02.”
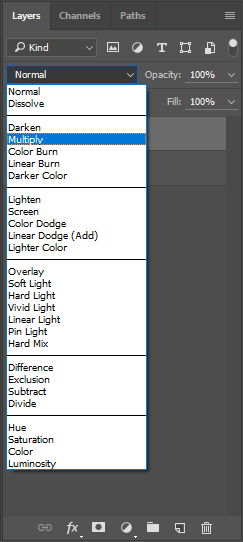
- Next we’ll use the Move Tool and Layer Blending Modes to move the separate layers into position. Clicking once on a layer in the Layers Panel sets it as the active layer. Whichever layer is active can be moved in the canvas area using the Move Tool. Make sure that the “hand02” layer is set as the active layer. Next, locate the pull-down menu that’s set to “Normal” and is located above the Lock buttons in the Layers Panel. This is the Layer Blending Modes pull-down menu and is used to change the blending mode of the active layer. Click the Layer Blending Modes pull-down and choose “Multiply” to set the “hand02” to the Multiply Blending Mode. Leave the “hand01” layer in Normal mode. Blending modes define how layers interact. We will continue to explore these in the third exercise in this chapter.
Use the Move Tool on each of the layers so that they are positioned similar to what is shown in the image below. The double-exposure happens in the area where the two images overlap. Multiply blending mode allows us to see the two images together, as if they were photographed on the same piece of film. In the next exercise we will crop the image so that only the double-exposure remains. Save your work so far as a Photoshop® (PSD) file if you haven’t done so already.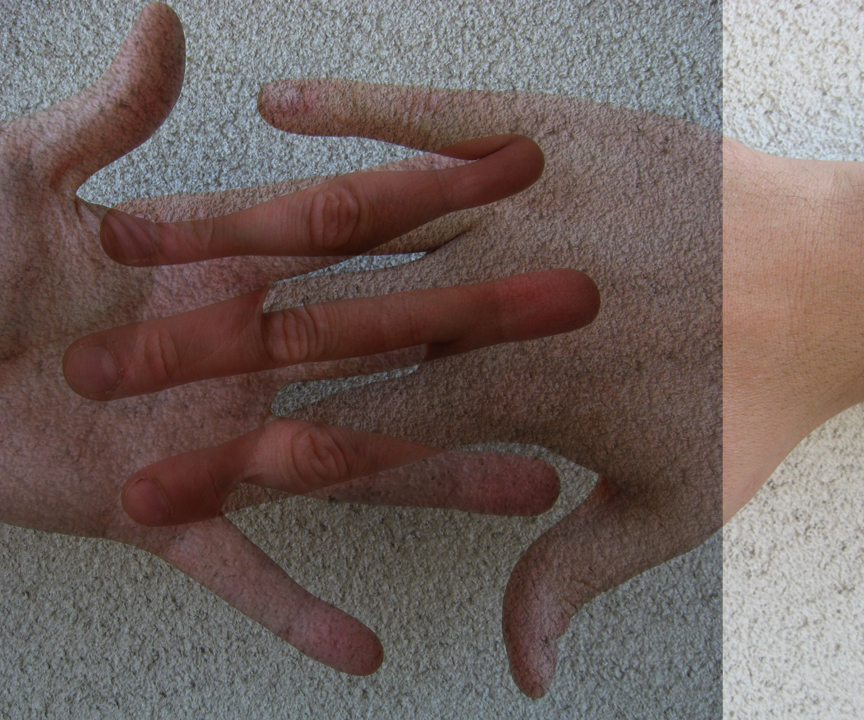
Your double-exposure should look something like this.
