
Chapter 1: The Metaphor of Using Graphics Applications
1.4 Exercise 4: Creating a dynamic composition
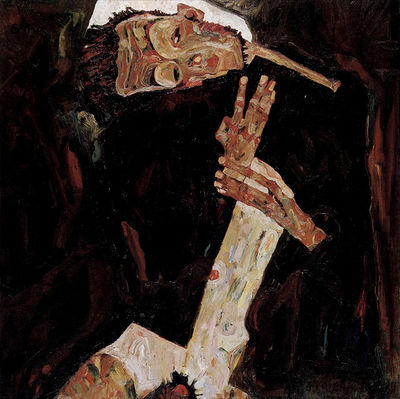
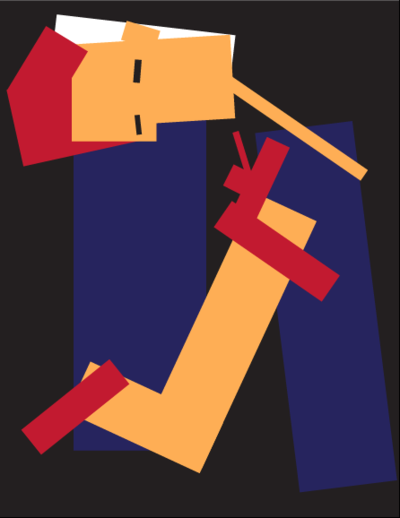
Compositions can be static or dynamic. In this exercise, we will recreate the dynamic movement found within a painting. Dynamic compositions are full of energy or movement. Angles are used to create motion. While a flat horizon line is at rest, a triangle is in motion. The repetition of even spacing is easy on the eye, as our minds predict the simple rhythm of an evenly spaced grid. Angles and uneven spacing between objects causes our eyes to move back and forth. This physical movement translates into the perception of movement within a composition. Use the Schiele painting as the guideline for your dynamic composition with rectangles. Your final composition will be similar to this:
Begin creating your composition
- If you closed your ch1-yourlastname-dynamiccomp.ai file at the end of the last exercise use File > Open Recent FIles to reopen it.
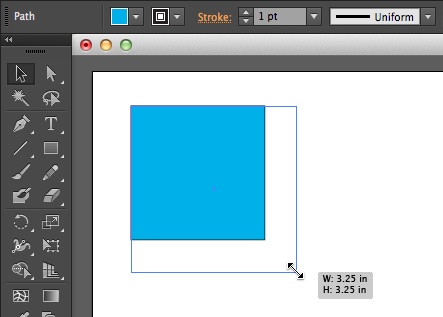
- With your file open in Illustrator®, click on the Rectangle tool from the Tools panel. Then click and drag in the artboard to draw a rectangle on the page. Once the rectangle is the size you want, release the mouse button.
Notice that a tool tip shows up when the mouse hovers over a tool. The tool tip displays the name of the tool, its keyboard shortcut and an animation showing how the tool is used. Most graphics applications will at least have a small tooltip with the name of the tool and its keyboard shortcut. The animations are a recent addition to Adobe software.
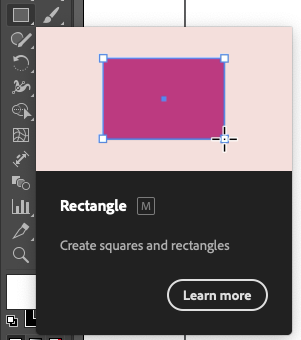
This tooltip for the Rectangle tool shows that its keyboard shortcut is the M key. - Now click on the Selection tool in the Tools panel. Objects can only be modified when they are selected. The Selection tool is used to select an object in order to move, scale, or copy it. Use the Selection tool to click on the rectangle you created. Notice that the selected rectangle has square anchor points on each corner and at the midpoint of each line. These anchor points are essential components of the vector art. They determine the contours of the shape by their position in relationship to each other. A rectangle is described by a path that turns at right angles through four anchor points to create four sides and meet itself to close the shape. To deselect the object, click on any area of the Artboard that is outside of the rectangle.
Important Note: A Contextual Task Bar was recently added to Adobe Illustrator’s interface and will appear when using the Selection Tool. This bar can be distracting and get in the way when first learning Illustrator. Hide the Contextual Task Bar by clicking on Window > Contextual Task Bar in the menu bar.
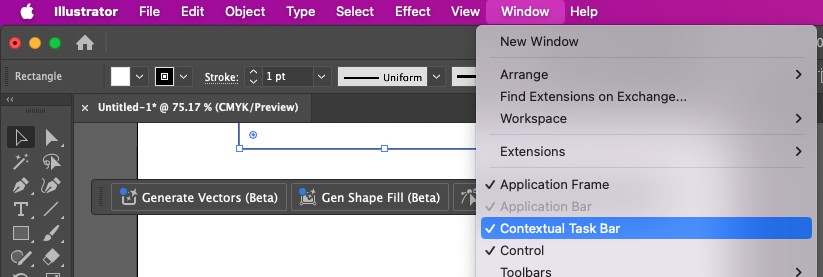
The Contextual Tool Bar can be turned off using the Window menu. Turning it off is recommended when beginning to learn Illustrator. - With the rectangle selected, notice how the shape is made. The rectangle is an area filled with color and there may or may not be a line surrounding the edges. The interior color is called the fill. The outline is called the stroke. White and black are the default color settings for fill and stroke.
- Look at the bottom of the Tools panel and notice what color is loaded in the Fill icon and what color is loaded into the Stroke icon. The Fill and Stroke icons stack with the active target on the top. To change the fill, it needs to be the top icon.
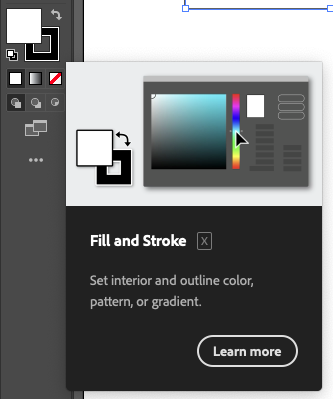
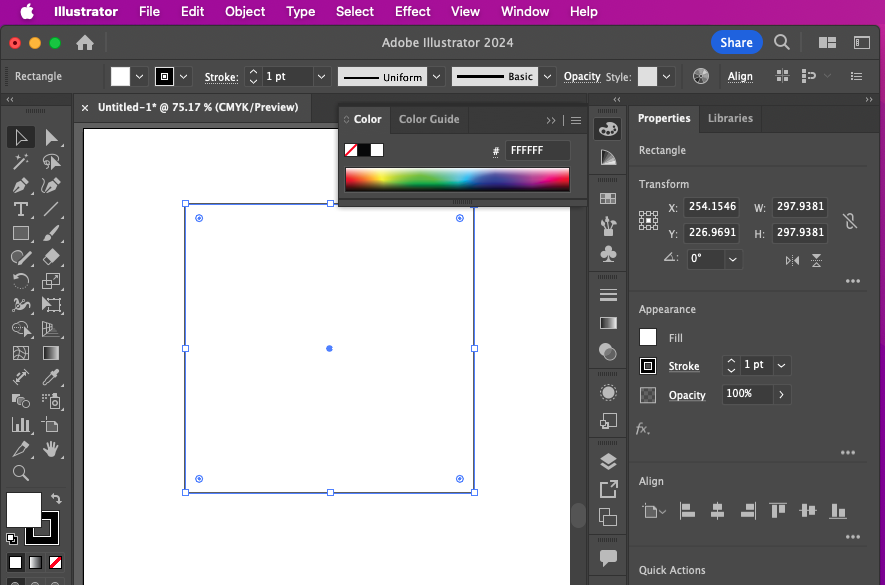
The fill and stroke tool are located at the bottom of the Tools panel. Pressing the X key on the keyboard will swap the active icon for Fill and Stroke. - While the rectangle is still selected, click once on the Fill icon. If the Stroke icon was active, clicking the Fill icon will reposition it on top of the stroke and make it active. This will also open the Color panel in the right-side of Illustrator’s interface. The Color panel has a small color spectrum area that can be used to specify a fill or stroke color.
Clicking the Fill icon in the toolbar will open the Color panel. - In addition to the Color panel, colors can also be set using the Swatches panel. The icon for the Swatches panel is two icons down from the Color panel’s icon in the Essentials Classic workspace, looks like a small 2×3 grid of squares. Click the Swatches icon to open the panel, then click on any color swatch to apply that color. That color is then assigned to the fill area of the rectangle and it also appears as the color in the fill icon. The rectangle’s fill color will change because it was the selected object when the color was applied.
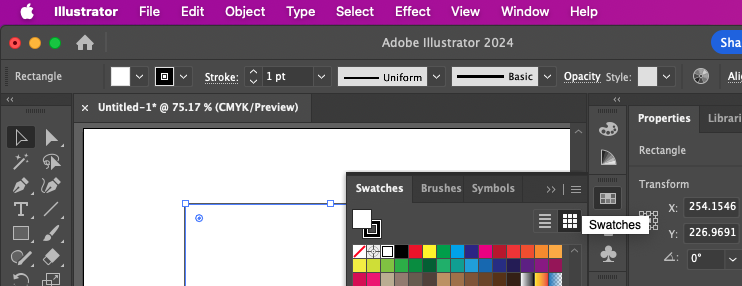
Click the Swatches icon to open its panel. The Swatches panel contains a variety of preset color swatches. You can also add your own color swatches to make re-using colors in your artwork easier. 
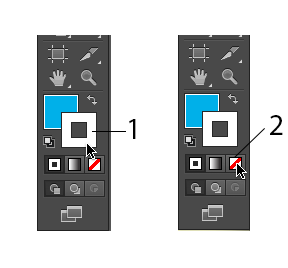
Click a color from the Swatches panel to apply it to the selected rectangle you drew. - Click on the Stroke icon in the Tools panel to make it active. This will position it on top of the Fill icon. Next, click the “None” icon (a white square with a red diagonal line through it), located below the Fill/Stroke icons. Clicking this will remove the stroke from the rectangle.
Click on the Stroke icon then click on the “None” icon to remove the stroke. - With the Selection tool, you can also scale or rotate the rectangle. Scale the rectangle by clicking on an anchor point and dragging toward or away from its center.
Using the Selection tool to scale a shape by clicking and dragging on an anchor point. To rotate the rectangle, position the Selection tool just outside one of the four anchor points at the corners. Don’t click yet. Notice that the cursor changes from the usual Selection tool icon (straight, black arrow) to a curved arrow. The curved arrow indicates that you can rotate the selection. When you see the curved arrow, click and drag outside of the rectangle to the right or left in order to rotate the rectangle.
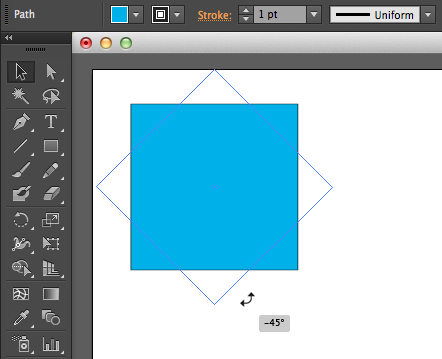
Rotating a rectangle using the Selection tool. Shapes can also be rotated via the Object > Transform > Rotate menu or with the Rotate Tool in the Tools panel. - When the first rectangle is complete (with the color, scale, and rotation of your choosing), deselect the rectangle by clicking on an empty spot in the Artboard. Notice that the anchor points are no longer highlighted.
- Use the Rectangle tool to begin the process again. Once a rectangle is made and modified, use the Selection tool to reposition it to the right, left, or on top of the other rectangle. Recreate the composition with up to 15 shapes. You should feel comfortable creating a shape and changing its fill and stroke colors.
- Arrange the rectangles so that they can be seen as one dynamic composition. Notice that as you create and position each rectangle, they appear stacked on top of each other. While you are creating this composition you may want a rectangle to be “sent behind” another rectangle. Select the top rectangle with the Selection tool, then click Object > Arrange > Send Backward.
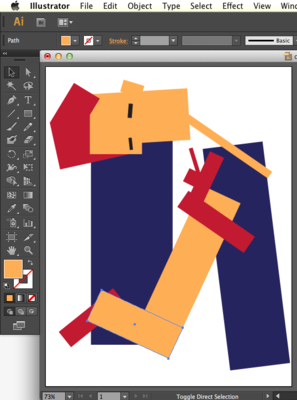
Positioning the rectangles to create one image 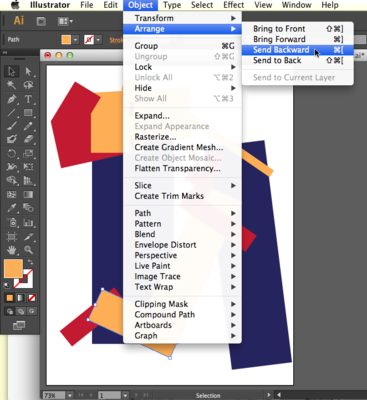
Sending the selection backward (behind) other rectangles 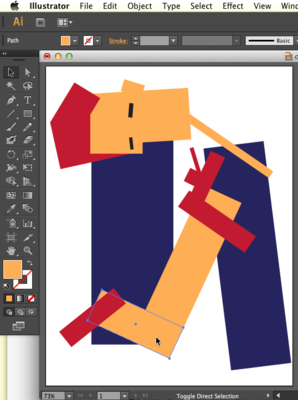
The image after Send Backward performed - Shapes such as your rectangles can be repeatedly sent backward or brought forward. Find these commands in the Object > Arrange menu. Any art object can be positioned using these menu items. Finally, while art objects are sent backward or brought forward one at a time (through as many levels of stacking order as there are objects), they can also be sent all the way to the back of the composition or brought all the way to the front of the composition using Object > Arrange.In this image, a large black rectangle was sent all the way to the back of the composition after most of the dynamic composition was already made.
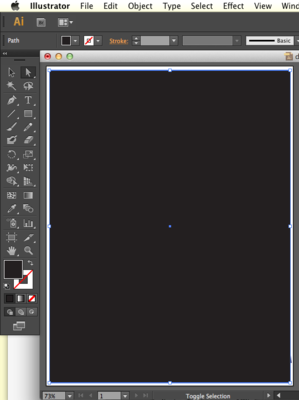
Creating a black background 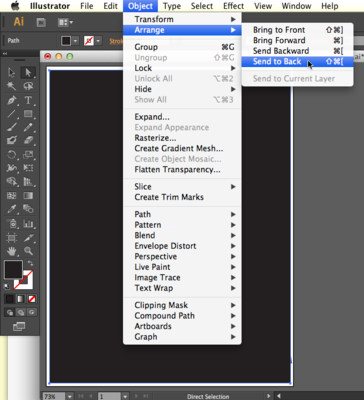
Sending the black background to the back 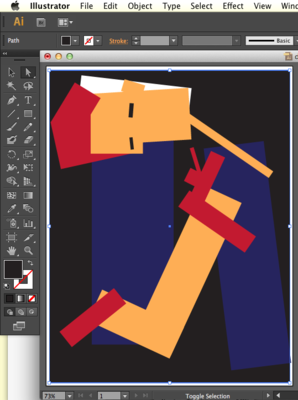
The black background is now all the way to the back, behind all other rectangles. Be sure to save your files!
