Chapter 6: Line Art and Flat Graphics
6.1 Exercise 1: Gesture drawings on a template layer
- Start with a new Print document in Adobe® Illustrator® set to standard Letter size dimensions, portrait orientation. You may change the unit of measure to Inches. Name and save your file as lastname-ch6-pen-curves.ai.
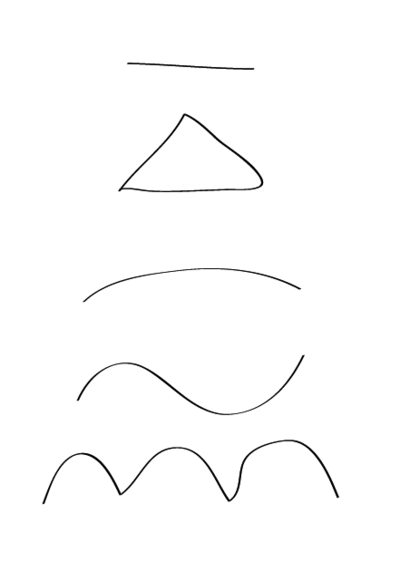
- To begin, we will set up a template layer with quick, gesture strokes using the Paintbrush tool. Select the Paintbrush tool from the Tools panel. Hit the letter D on the keyboard to set the default colors into the fill (white) and stroke (black). Set your stroke size to 6 pts (See Control Panel > Stroke). Draw a straight line by clicking and dragging with the Paintbrush tool. Deselect the straight line by clicking off of it with the Selection tool.
Key Commands: Another way to deselect in Illustrator® is to use the CMD key to temporarily access the Select tool and then click off of the Artboard to deselect. You can also use the CMD+SHIFT+A key combination to deselect.
- Draw a triangle with the Paintbrush Tool. The results of the paintbrush drawings are vector shapes, which always result in anchor points outlining the path. The Direct Selection Tool can be used to modify an anchor point. It is the tool to use when you want to modify part of a shape, but not the whole shape.
- Deselect the triangle and draw the remaining curves pictured below.

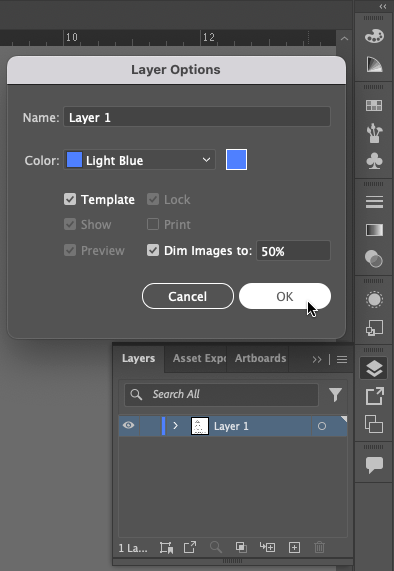
Drawing curves in Illustrator® - Open the Layers panel by clicking in the panel shown in the illustration below or use Window > Layers. Double-click the icon for Layer 1 in the Layers panel. Click on the “Template” button and then click “OK”. The template feature will lock the layer, so that you will not accidentally modify the paintbrush work. Template layers also dim artwork on those layers (this will be especially noticeable in exercise 4).

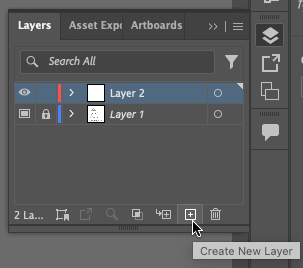
Use the Layer Options dialog box to set Layer 1 as a Template Layer. - Create a new layer in the Layer panel. We will use the Pen Tool on Layer 2.

Create a new layer in the Layer Panel for use in the next exercise. Remember to save your work, then continue to the next exercise.

