
Chapter 14: Two-Page Spreads
14.1 Exercise 1: Image Preparation
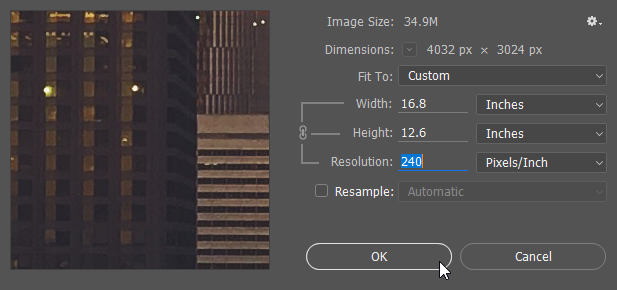
- Use Photoshop® to open the skyline.jpg image and use Image > Size to check the its size and resolution. Make sure Resample is unchecked and set the image to have an a resolution of 240ppi (this should give the image a height of 12.6 inches.
Use these settings to adjust the image size of skyline.jpg - Change the image’s Mode to CMYK Color. Then, Using a Hue/Saturation adjustment layer, adjust the image so that it is similar in appearance to the example here.
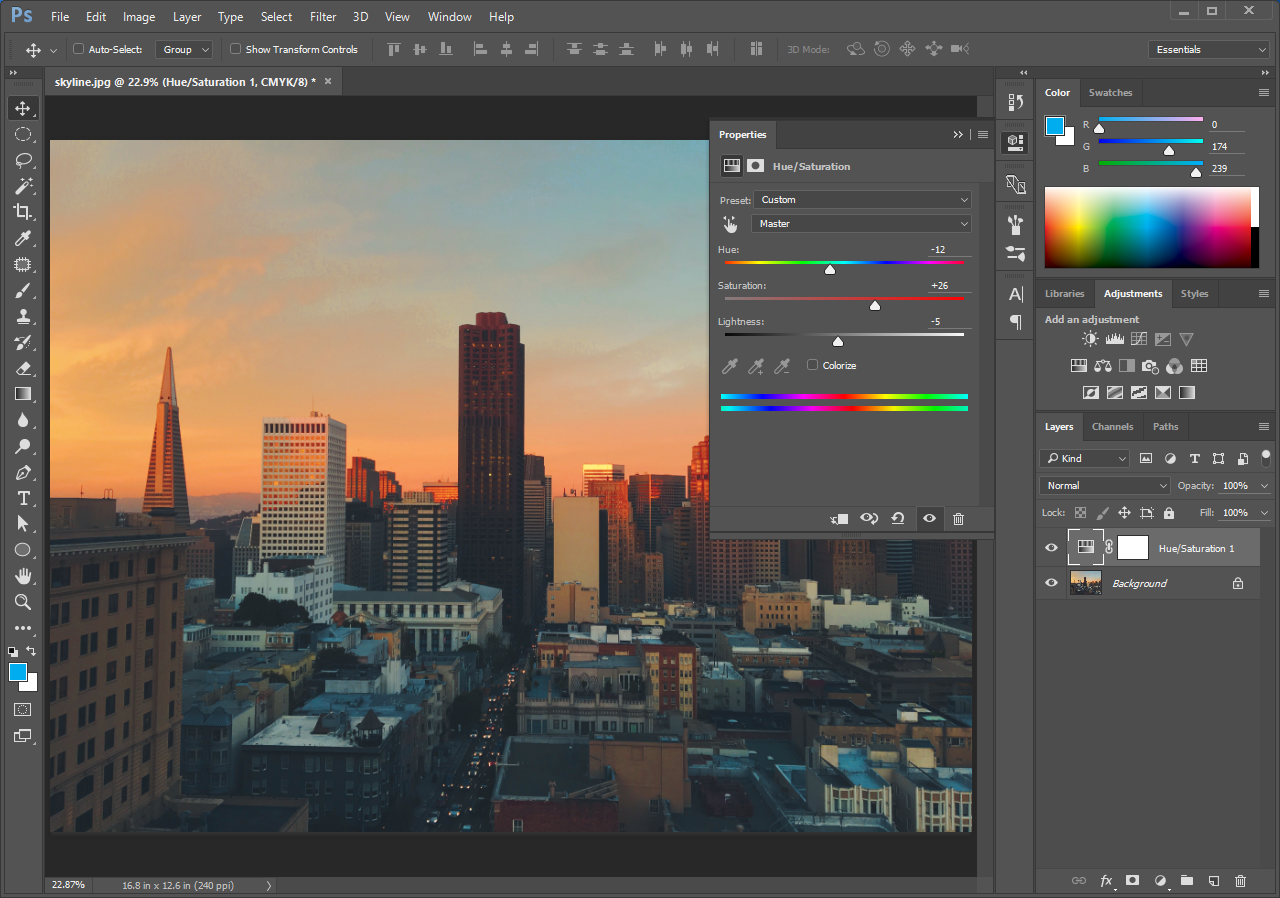
Set your Hue/Saturation adjustment layer similar to what’s shown here. After adjusting the Hue/Saturation, add a Levels adjustment layer and adjust the dark values to something like the example below.
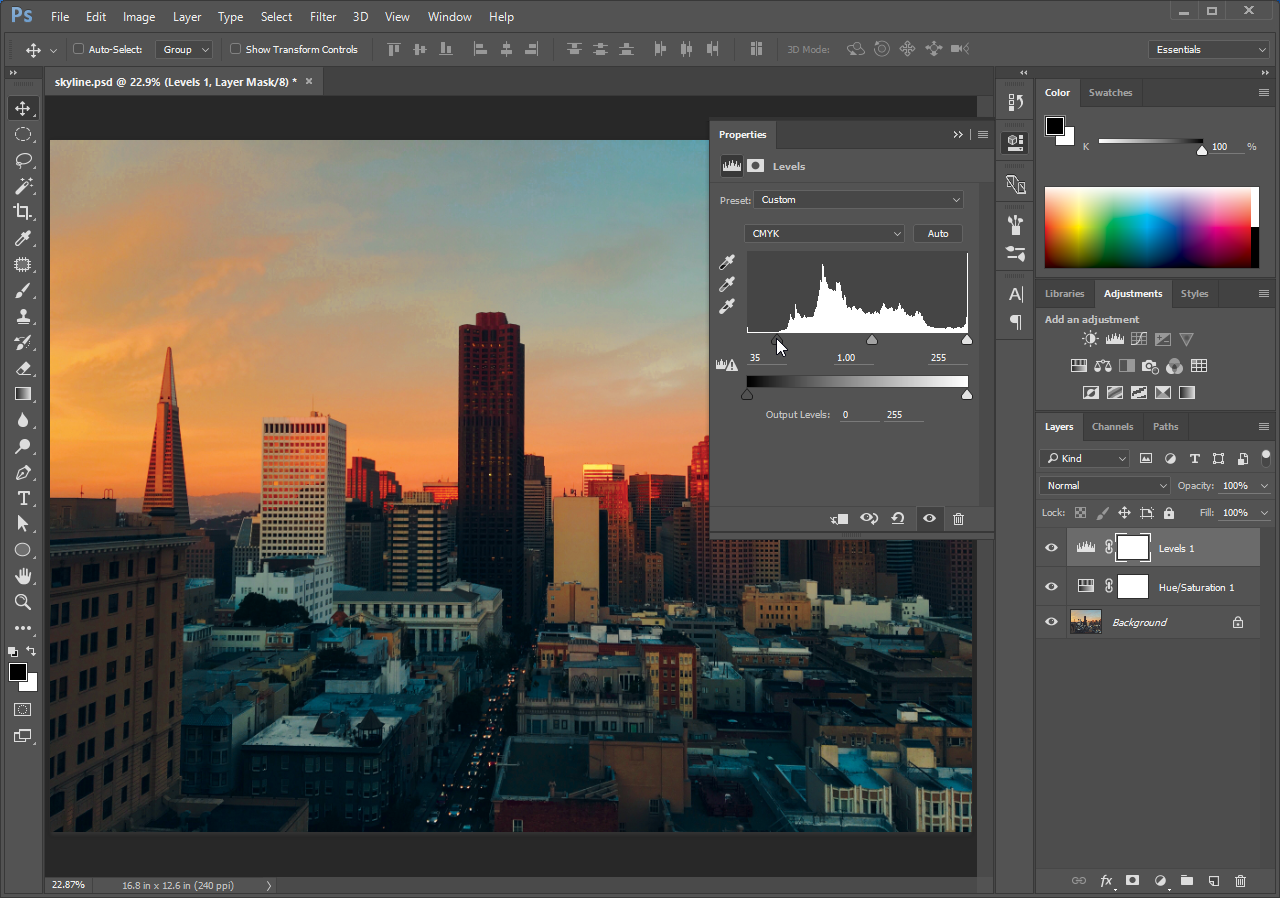
Your Levels adjustment layer should be set similar to what’s depicted here. - Save the revised image as a native Photoshop® document named skyline.psd and close Photoshop®.
